How to Make a Sourdough Starter
This post may contain affiliate links for products and ingredients I use and recommend. For more information, see my affiliate disclosures.
There’s so much mysticism on how to make a sourdough starter, but the reality is that it only takes two ingredients and a little patience. You can learn how to make a sourdough starter in as little as a week by following this detailed day-by-day guide.
This sourdough starter recipe guide offers simple and effective instructions for making a healthy and active sourdough starter by walking you through each step of the way.
I’ve taught thousands of people how to make, maintain, and store their sourdough starters in my in-person sourdough starter workshops.
The process might initially sound intimidating at first, but I promise the journey is worth it.
👉 Once you create a sourdough starter, you can make many delicious sourdough recipes, including sourdough bread and sourdough discard recipes.
And be sure to check out my Top 10 Sourdough Starter Tips for Success once you create a sourdough starter.
What is Sourdough Starter?
A sourdough starter is a symbiotic culture of bacteria and wild yeasts.
With only flour, water, and time, the natural yeasts in the air will populate the culture. This culture is powerful enough to leaven bread with no baker’s yeast or instant yeast.
Before baker’s yeast was developed and commercialized in the late 19th and 20th centuries (i.e., instant, active dry, rapid-rise yeast), sourdough was how bakers made bread.
A sourdough starter is highly resilient, and many people have passed down their starters for generations.
Some swear that starters produced in some regions, like San Francisco, have a unique and distinct flavor. There are indeed specific wild yeasts that populate different parts of the world that uniquely appear in starters.
Despite the lore, it’s a little more complicated, and many factors affect a sourdough starter culture beyond location (even the bacteria on an individual baker’s hands!).
You can make a delicious sourdough starter wherever you are in the world.

🛠 Tools Needed
These are the essential tools I recommend to make a sourdough starter.
See my favorite Sourdough Tools and Equipment for a list of all the tools I recommend to bake great sourdough bread.
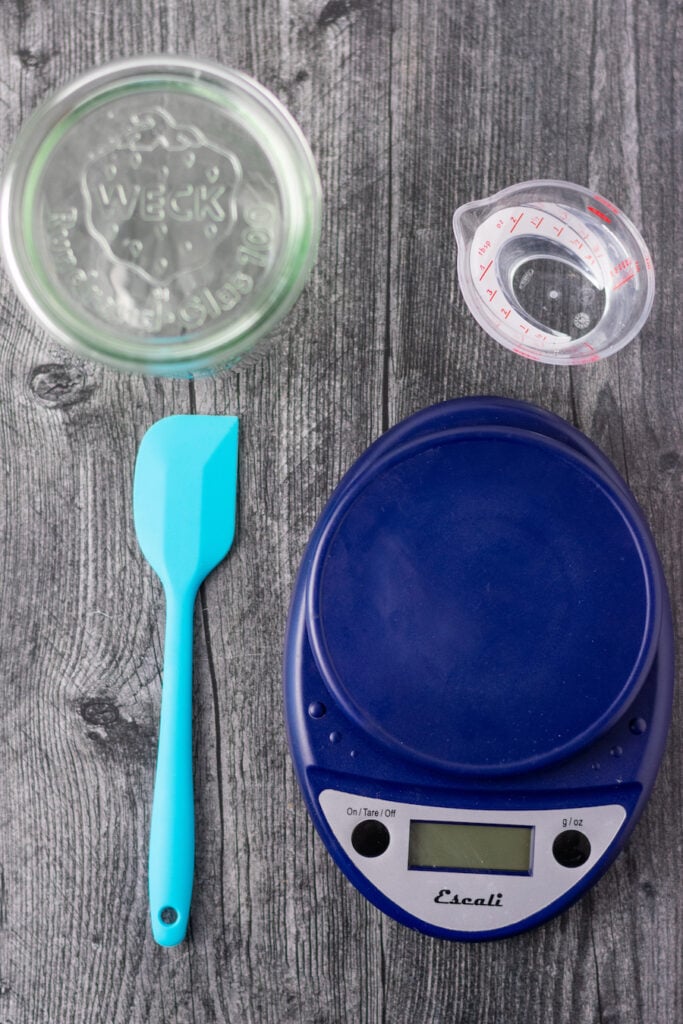
- Baking Scale
- A baking scale is essential in sourdough baking.
- Without a scale, ingredients are measured differently from person to person. The most consistent way to measure your baking ingredients is by weight.
- This Escali scale is lightweight, accurate, and has long battery life. I use it for all of my baking and would highly recommend it.
- The Best Sourdough Starter Jars
- Transparent glass jars are the best for creating and maintaining your sourdough starter, as they’re non-porous and easy to clean.
- My favorite sourdough starter jars are these Sourhouse Starter jars. I think they are the best jars to keep and maintain a sourdough starter. They’re easy to clean, dishwasher safe, have a silicone lid to let gases escape, come in two sizes, and have flat sides/bottoms for easy stirring.
- Mason jars or any other reusable glass jars work well too. For creating your starter, you will want to err on the side of a larger jar, so it doesn’t overflow. Once established, you can move it to a smaller pint-sized jar to maintain a smaller starter.
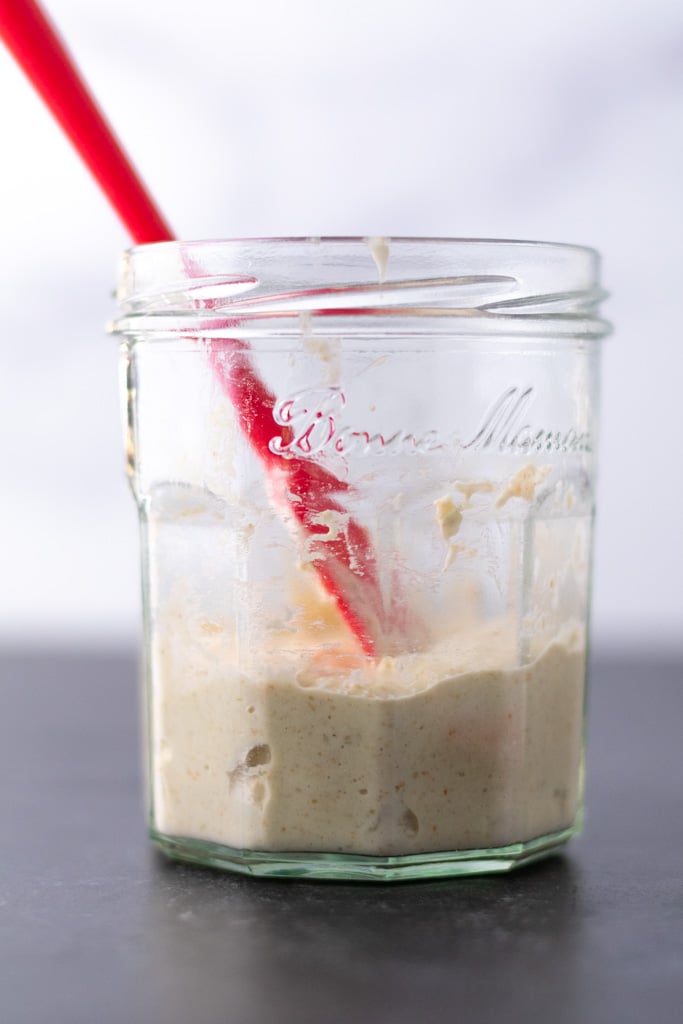
- Spatula
- Mini silicone spatulas work best to stir your starter and hydrate the flour completely. They also allow you to scrape the sides and bottom of your jar better than a spoon.
- Brød and Taylor Folding Bread Proofer, optional but helpful
- The Brød & Taylor Folding Proofer makes things much simpler by keeping your dough at a constant temperature. This proofer is an investment, but if you bake a lot, it’s well worth it (can also be used as a slow cooker).
- I keep my proofer at 78°F and keep my starter and any doughs I’m making in it while they proof.
- Sourdough yeasts thrive at a slightly warmer than room temperature range, so anything between 70°F-85°F is going to be suitable for your culture.
🛒 Ingredients Needed
Click on the toggles below for more information on each ingredient and my recommendations for flour.
- Bread Flour
- I bake consistently with King Arthur Bread Flour. In the Northeast, King Arthur Flour is accessible, unbleached, and usually the highest quality flour at major supermarkets and grocery stores.
- I try to use organic flour for my sourdough starter feedings because I’ve noticed my starter seems happiest with it. However, their non-organic bread flour works great too.
- Many other high-quality brands of unbleached bread flours like Bob’s Red Mill or Central Milling might be more accessible depending on where you are.
- If a local flour mill near you produces excellent flour, support them!
- Rye Flour (optional but helpful)
- Rye flour is packed with nutrients that sourdough yeasts love. This sourdough starter guide begins with 50% rye flour to give it an extra boost and accelerate the process.
- With rye flour, my starter rises better and faster. Whole wheat flour is a good substitute if you don’t have rye.
- You can use whole wheat flour, spelt flour, einkorn flour, rye flour, or any other wheat flour for your starter.
- Water
- Don’t complicate it; use whatever clean water works best for you depending on how you drink your water. If you think your starter is sluggish because of your water and would prefer to filter it, go for it!
Can I use Gluten-Free Flour to Make a Starter?
Yes, you can follow the same process of making a sourdough starter from scratch using a gluten-free flour such as buckwheat, sorghum, rice, or cup-for-cup/measure-for-measure. Do not use nut flours for sourdough starters.
You can also purchase gluten-free sourdough starter culture online.

👨🍳 How to Make a Sourdough Starter
It can take anywhere from a week to a couple of weeks to make a sourdough starter from scratch.
Throughout the process, I note various sensory indicators of that journey, including sight, scent, and texture.
Please note that everyone’s environment is different, so your starter might take longer than a week to be active. That’s okay! Just keep at it.
Starters are very resilient, but should you see mold in your starter at any point, you should discard it and restart the process.
Day 1:
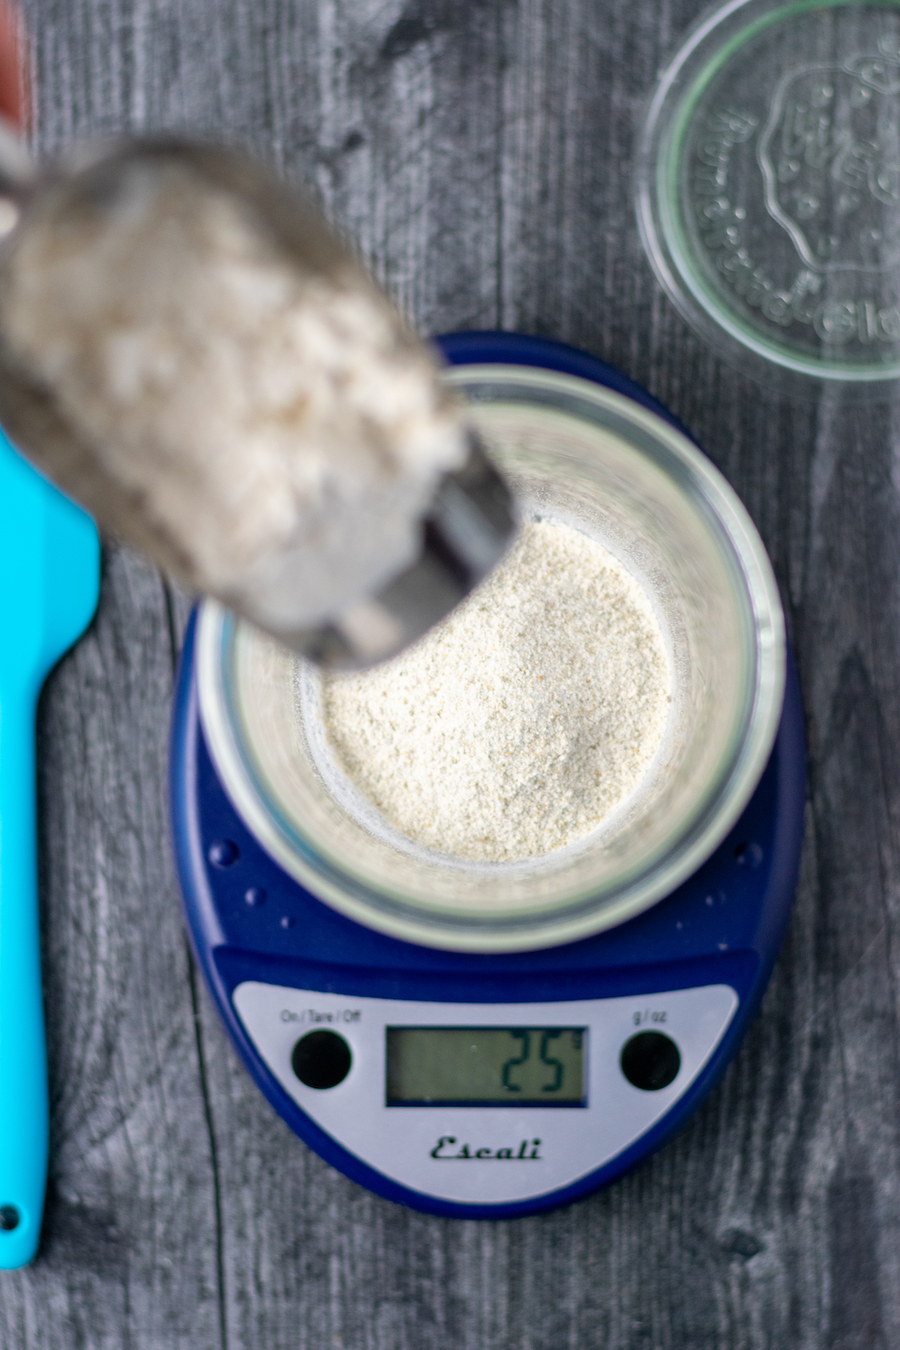

Measure 25g of rye flour, 25g of bread flour, and 50g of water. Place the empty jar on a scale and tare it (set it to 0) and add each ingredient to the jar.
If you do not have a scale, you can combine ¼ cup of rye flour, ¼ cup of bread flour, and ½ cup of water and follow those measurements throughout the process.
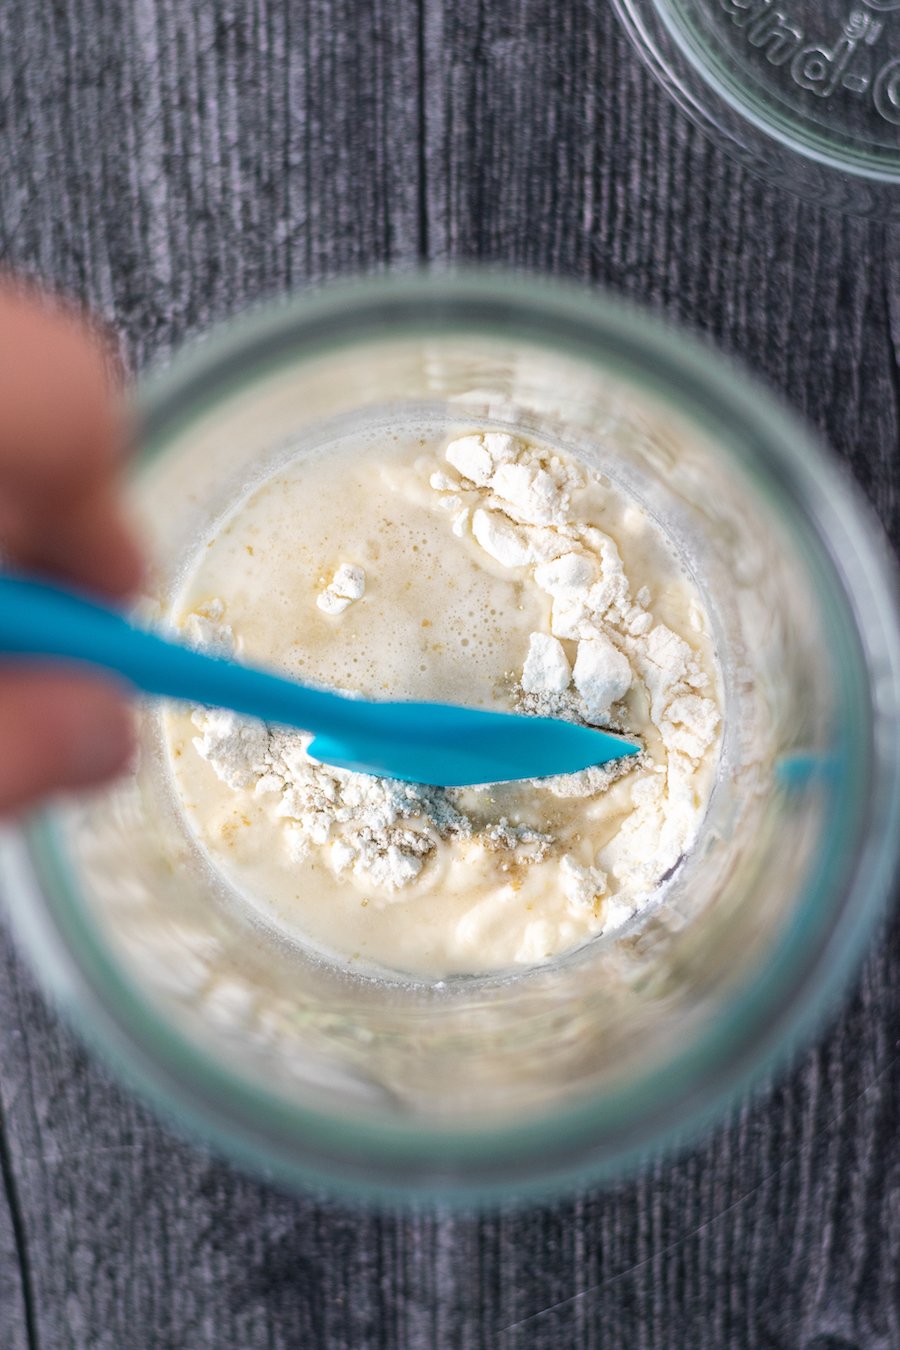
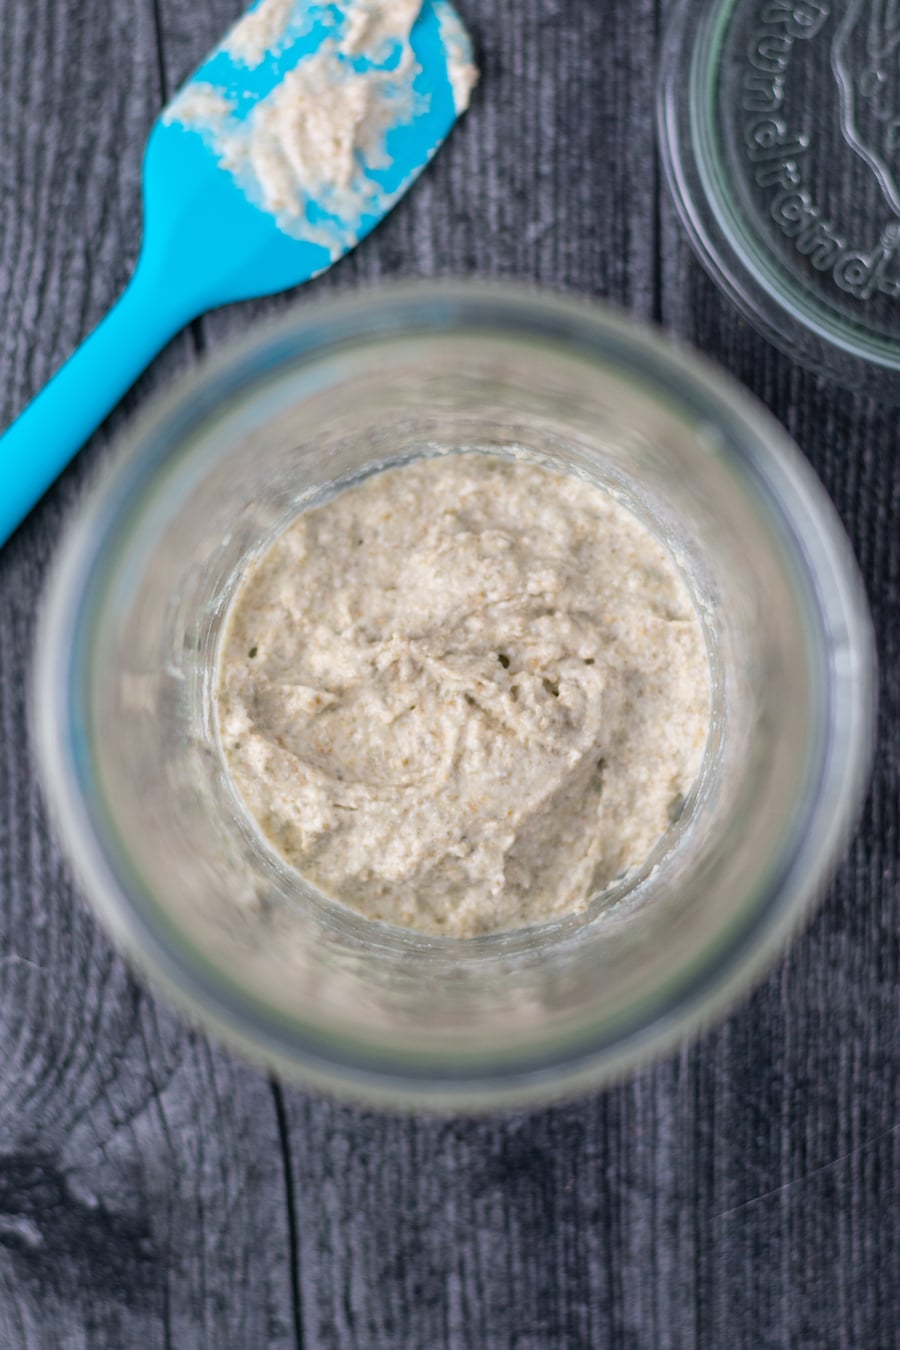

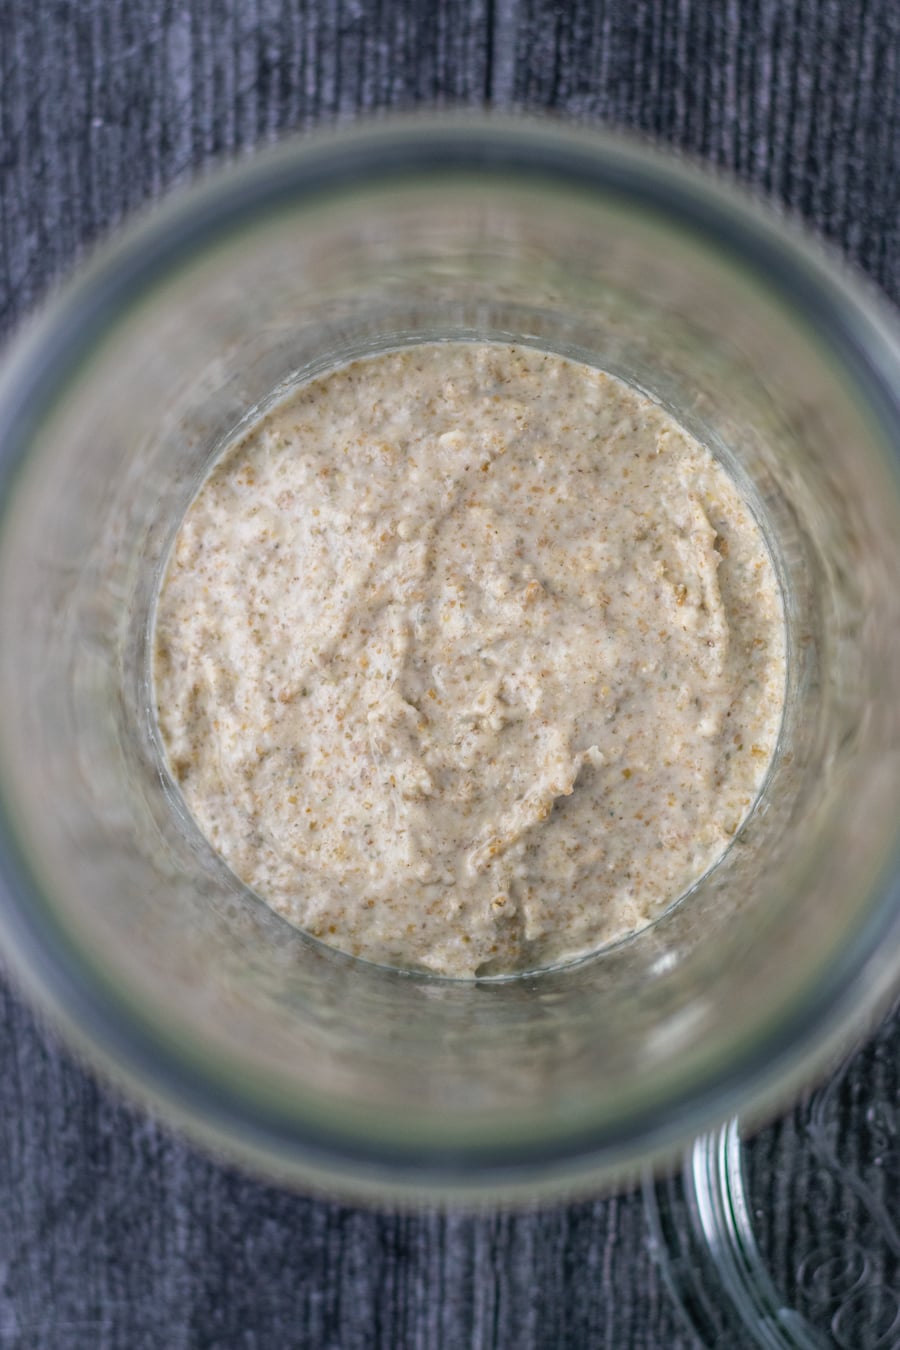
Stir together the flour and water until all of the flour is hydrated. Be sure to scrape the sides and bottom of your jar, so no dry spots remain. The mixture will be thick and pasty.
Then, cover the jar with a loose-fitting lid or cheesecloth.
Keeping a loose top on your starter is crucial. You want your starter to have some air to breathe to let wild yeast in but also want to keep it covered, so it doesn’t accidentally get spilled or get other ingredients in it.
Place your starter in a warm location to set for a full day/24 hours.
I keep my starter in a proofer set to 78ºF, but anywhere slightly warmer than room temperature, out of direct sunlight, and where it won’t be disturbed is okay.
Keeping your starter in the 70-85ºF zone is ideal for the wild yeasts to populate. If it’s colder, it might take a few more days!
A few warmer locations in your home, if it is cold, include:
- On top of a refrigerator
- In a turned-off oven with the light turned on (remember if you are going to preheat it!)
- Possibly upstairs if you have a second-floor since heat rises.
- Near a south-facing window
Day 2:
After 24 hours feed your sourdough starter for the first time. Repeat the same process each day until the indicators in day six are met.


On day 2, my sourdough starter had a few bubbles but no other signs of activity. It smelled somewhat like green tea. The starter was warm and had some condensation on the side of the jar.
Discard about ⅔ of your starter.
Why discard some of your sourdough starter?
You need to discard some of your starter at each feeding because your starter will get too large and outgrow its container.
It might seem wasteful, but once your starter is active, you can keep the sourdough discard or “surplus” in a separate container for a few days in your refrigerator to use for sourdough discard recipes like sourdough pumpkin waffles, sourdough biscuits, sourdough granola, sourdough pancakes, Sourdough Blueberry Yogurt Muffins, etc.
While making your starter, you do not want to use the discard in any recipes. Right now, the bacteria and yeasts are fighting for who will survive (it will be the good ones eventually!). This is why my sourdough starter guide uses less than many other recipes to minimize waste.

Mix 25g rye flour, 25g bread flour, and 50g water into your jar.
Stir again and let it rest for another 24 hours/full day.
You will repeat this feeding process each day while making your starter.
Day 3:


Things start to get interesting on day three.
The starter rose and fell a little; there appears to be some fermentation activity. The bubbles and gases indicate that the starter is already full of life. This initial surge of activity is typical and it will likely subside over the next few days. The bacteria and yeasts in the starter are simply competing with each other at this point.
In terms of smell, well, it doesn’t smell good. It smells like sweaty socks. The scent is a significant indicator that the starter is not ready. A healthy sourdough starter will smell yeasty and pleasant. It shouldn’t smell foul.
Just like day two, discard about ⅔ of the starter.
Mix and stir in 25g rye flour, 25g, bread flour, and 50g water.
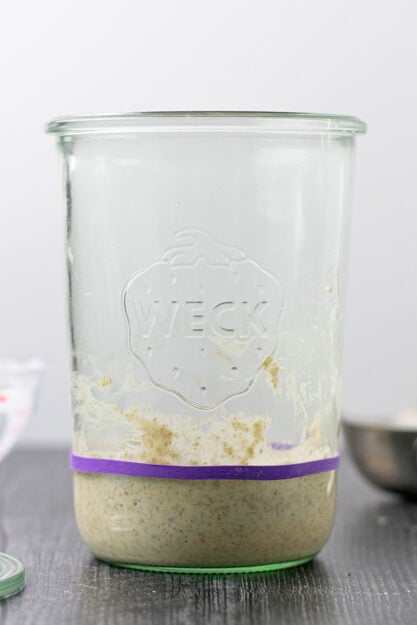
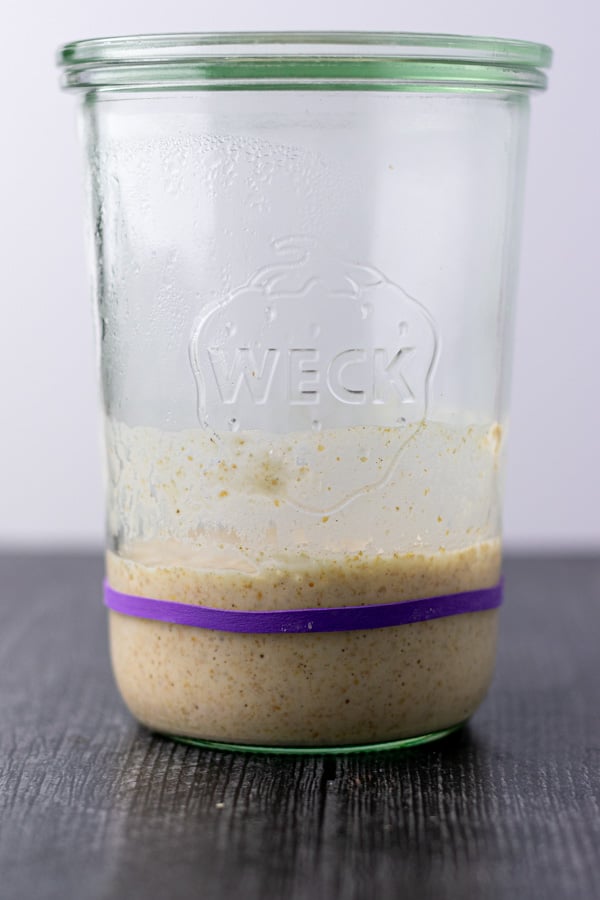
At this point, I chose to put a rubber band on my starter to measure how much it rises and falls after each feeding. The rubber band is optional, but I like to see the daily changes.
Let rest another 24 hours/full day.
Day 4:


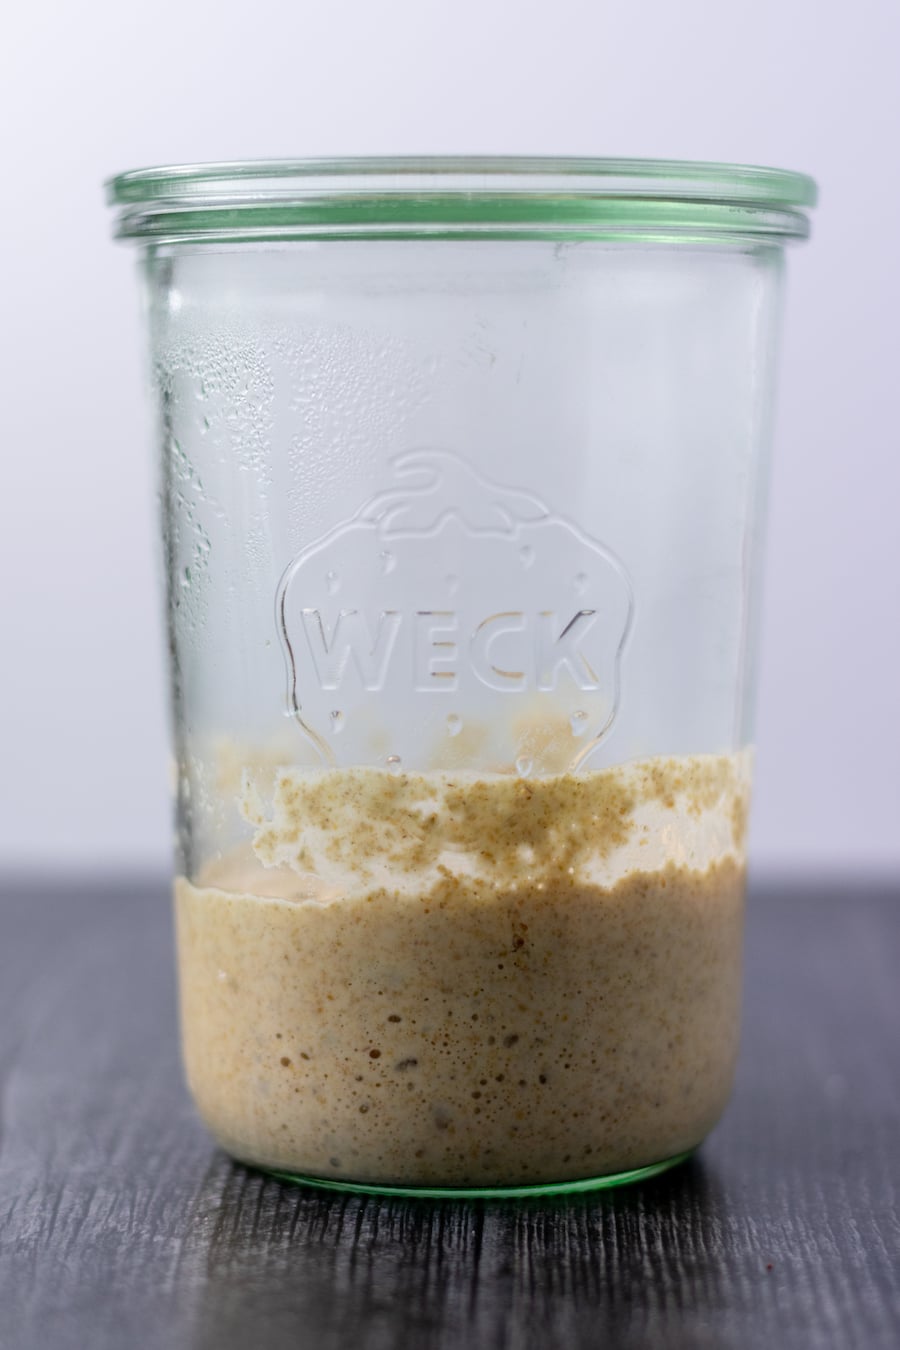
It’s easy to get discouraged when there is minimal activity. My starter on day four shows barely any movement. The starter has minimum bubbles in it, stinks even more (like rotten cheese!), is thick again, and didn’t rise hardly at all in the jar. This is okay!
It is normal and expected that a starter will slow down after the first few days and might not show much activity for a few days.
Discard ⅔ of the starter. On day four, my jar started to get a little messy (sticking and drying some on the sides), so I put about 50g of the discard into another clean jar. You could do this every day or not at all, but I like to put it in a new jar every few days.
Mix and stir in 25g rye flour, 25g bread flour, and 50g water.
Let rest another 24 hours/full day.
Day 5:


Day five is similar to day four. My starter smelled slightly better than the day before- a positive sign. It smells a little more yeasty and even has a somewhat fruity scent. The scene is a clue that the good bacteria are working themselves out and becoming more stable in their environment.
Otherwise, no visual rise or activity was seemingly present on day five.
Discard about ⅔ of the starter.
Mix and stir in 25g of rye flour, 25g of bread flour, and 50g of water.
Let rest another 24 hours/full day.
Day 6:

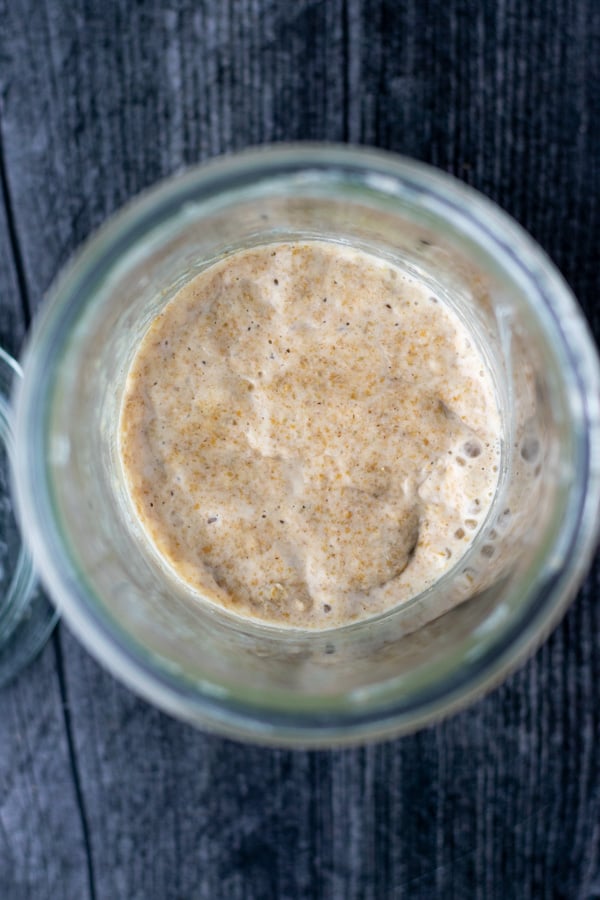

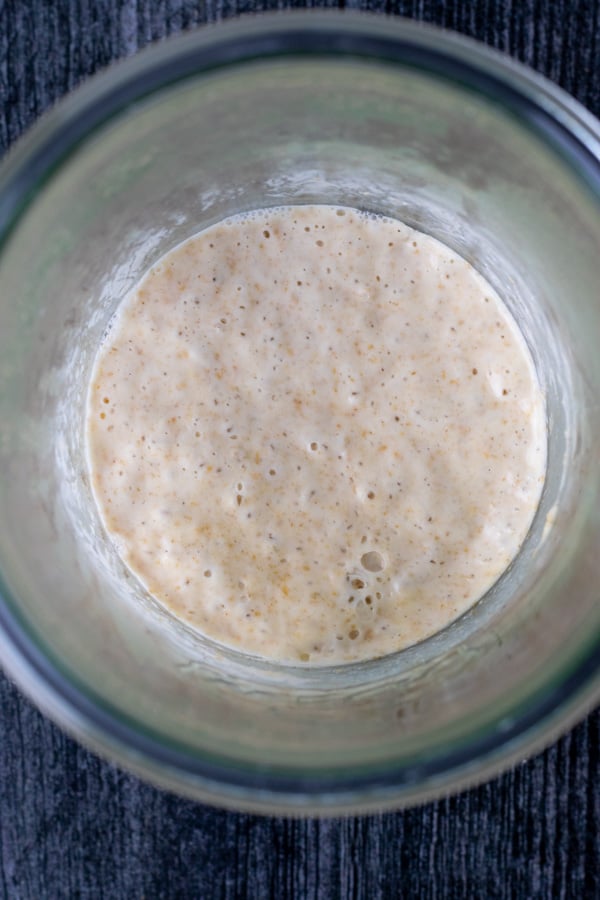
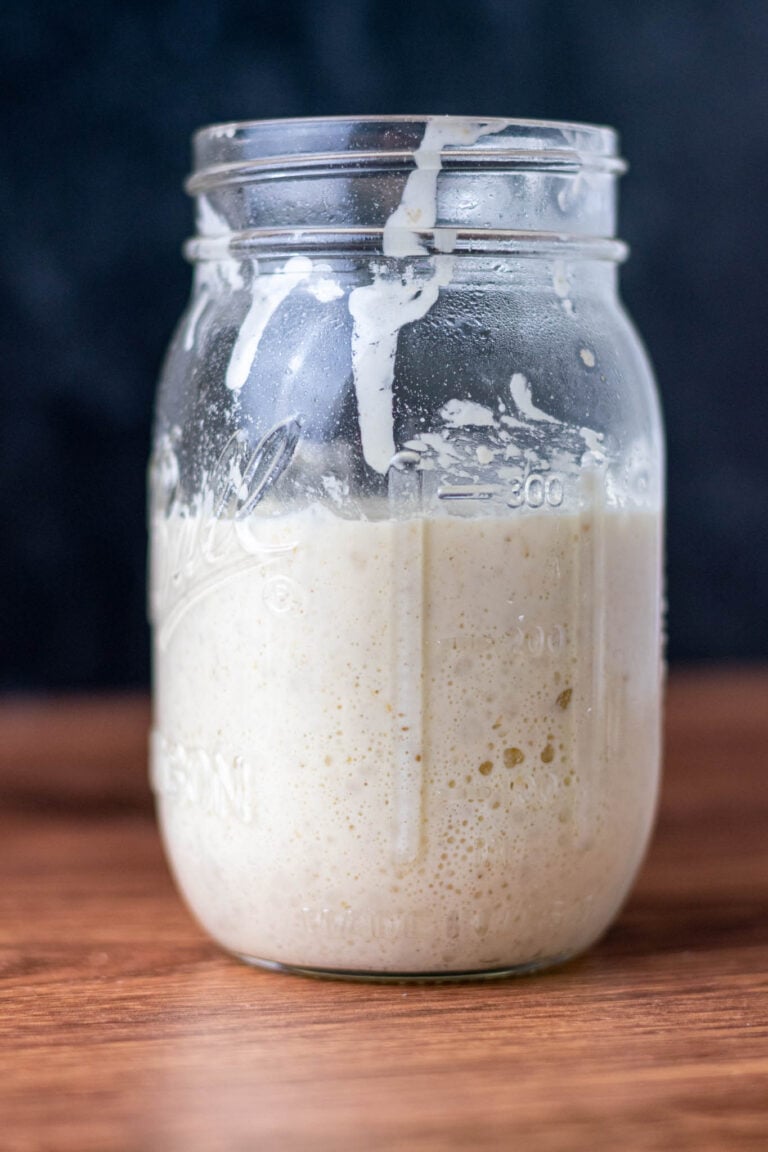
The sourdough starter almost doubled on day six!
The culture had plenty of activity with gases and bubbles; it still smelled funky and not completely yeasty. Unfortunately, the starter also didn’t double fully. It’s getting close, though!
The feeding on this day is different!
Because I could tell that my starter was close to being ready, I phased out the rye flour and the rest bread flour. This feeding is how I typically maintain my starter.
If your starter still has little or no activity on day six, feed it like days 2-5 with 50/50 rye and bread flour.
Discard about ⅔ of the starter.
Mix and stir in 50g of bread flour, and 50g water.
Day 7:
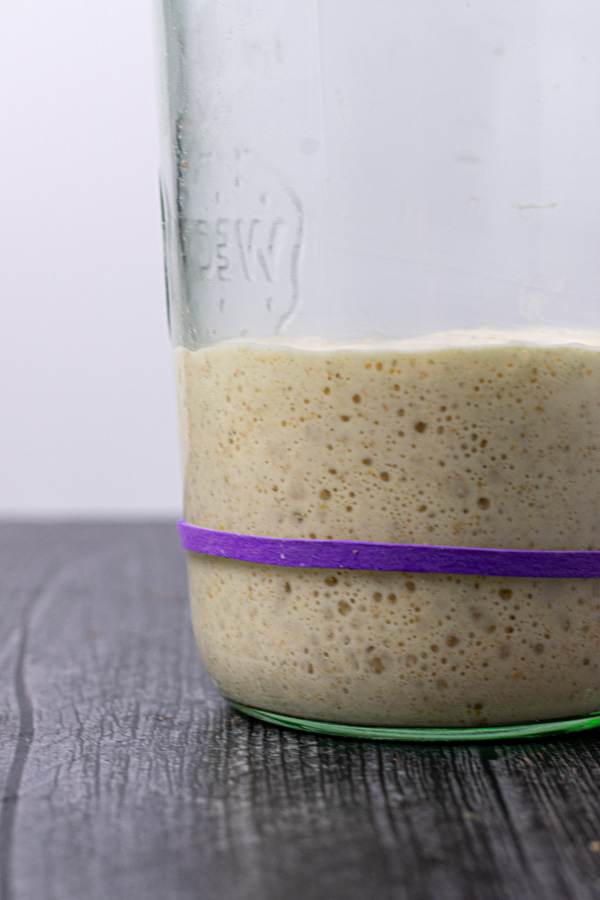
On day seven, the starter doubled and fell over 24 hours. I actually noticed it doubled and peaked after only 12 hours.
Unlike day six, where the starter rose but didn’t fall after a full day, this starter was hungry after 24 hours.
A hungry starter means it has passed its peak rise, and the yeasts have consumed the starches/sugars from the flour and are ready for another feeding.
At this point, you could probably feed the starter twice a day, meaning that the starter is healthy and active.
The starter smelled yeasty like bread; bubbly gases were present throughout the starter when stirred. The bubbly gases are carbon dioxide (which help the dough to rise) and other “wastes” like lactic and acetic acids that contribute to your individual sourdough starter’s flavor.
Feeding on Day 7 and After
On day seven, or when your starter has doubled and fallen, discard about ⅔ of your starter and feed it 50g of bread flour, and 50g of water.
This feeding can become your once or twice-daily routine to maintain your starter.
Go ahead and name your starter, too as it’s good luck! 😉
What is the Sourdough Starter Float Test?
The sourdough starter float test is a popular method to test if your starter is ready.
The premise of the float test is if there are enough gases built up in your starter, you can place a teaspoon in a glass of water, and it will float. The idea is that the starter is so full of carbon dioxide that it should be lighter than water.
If it immediately sinks, your starter might not be ready to be baked.
The sourdough starter float test can be helpful but is not always accurate.
The best indicator that your sourdough starter is ready is your senses. If your starter doubles in volume consistently, is full of gases, and smells like yeast, it is likely strong enough to leaven bread.

How to Maintain A Sourdough Starter:
You can adjust your starter’s feeding schedule as you get to know it.
Many storage options exist if you don’t like to feed once or twice a day. The various feeding and storage options to maintain your sourdough starter are listed below.
Feeding your sourdough starter every day
If your sourdough starter is healthy and active (usually at least doubling consistently at room temperature), you should ideally feed your starter once or twice a day.
The best time to feed your starter is just after it peaks. This might be every 12 hours or sooner. Peak might be before or after 12 hours, depending on your starter, ingredients, temperature, etc.
Get to know your starter’s schedule and how it reacts based on various factors.
Below is a short video time-lapse of my new starter created for this guide rising, doubling, and going just past peak in its proofer (this would be day 8 of this guide!).

As your starter rises, it will likely have a slight dome. The dome means that your starter still has room to grow.
As your starter peaks, the dome will subside, and if left long enough, your starter will begin to fall.
Feeding your starter just after peak, which can last 1-2 hours, is ideal because your starter isn’t too acidic yet and hasn’t consumed all of the nutrients/sugars in the flour.
Feeding your starter late
You can feed your sourdough starter past peak or even once it has completely fallen, but that will make your starter more acidic and hungry. It will likely smell like vinegar or alcohol if you let it go long enough.
A hungry starter can affect its flavor and rising potential over time. Keeping it on a regular schedule will make it more predictable and healthier.
A helpful tip is to set a daily reminder on your phone to feed it or when you do another daily task.
If left long enough without feeding, your starter might develop a layer of brown liquid on top called a “hooch.” The hooch is a waste product of its fermentation- alcohol. It is harmless. Pour it off or stir it in and feed your starter because it’s hungry.
In short, feeding at room temperature once or twice a day should keep your starter healthy and active!
Keeping a small sourdough starter
When I asked my Instagram followers what advice they wish they knew after creating a starter, keeping a smaller sourdough starter was the number one piece of advice.
Maintaining a smaller starter has less discard and is just as healthy as a large starter.
I maintain a small starter that I build up before baking. I keep it in a small pint-sized Mason jar or glass jam jar. Reusable glass jars make great starter/levain jars!
My daily sourdough starter maintenance schedule with a small starter looks like the following:
- Discard almost all the starter in the container until there are just scraps of starter remaining (about 5g or less).
- Feed with 30 grams of bread flour and 30 grams of water (this is a 1:6:6 ratio of starter to water to flour).
- Repeat once or twice a day as needed after your starter peaks.
How to Refrigerate a Sourdough Starter
If you aren’t able to feed your starter each day and you bake once a week or less, you can refrigerate your starter. I do this if I go on vacation or am away from home for more than a couple of days.
- Feed your starter as standard, let it sit at room temperature for a couple of hours or until you notice some activity, then place it in a cold spot of your refrigerator. Feed your starter once a week if kept in the fridge.
- A day or two before baking, give your starter at least one or two feeds to activate it again at room temperature.
Your starter will get moldy and die if left too long without feeding it in the refrigerator. If you don’t have a backup starter, you’ll have to restart the process. Don’t risk it. It only takes a few minutes to feed your starter!
How to Freeze a Sourdough Starter
If you rarely bake with your starter or want to preserve some as a backup, freezing your sourdough starter can be a good option.
- To freeze your starter, place your active starter in a freezer-safe jar, plastic bag, or covered ice cube trays to protect from freezer burn.
- I’ve seen various time ranges for frozen starters, with some saying it can last from a few weeks to a few months.
- Allow it to thaw and refresh with a few feedings to get active again.
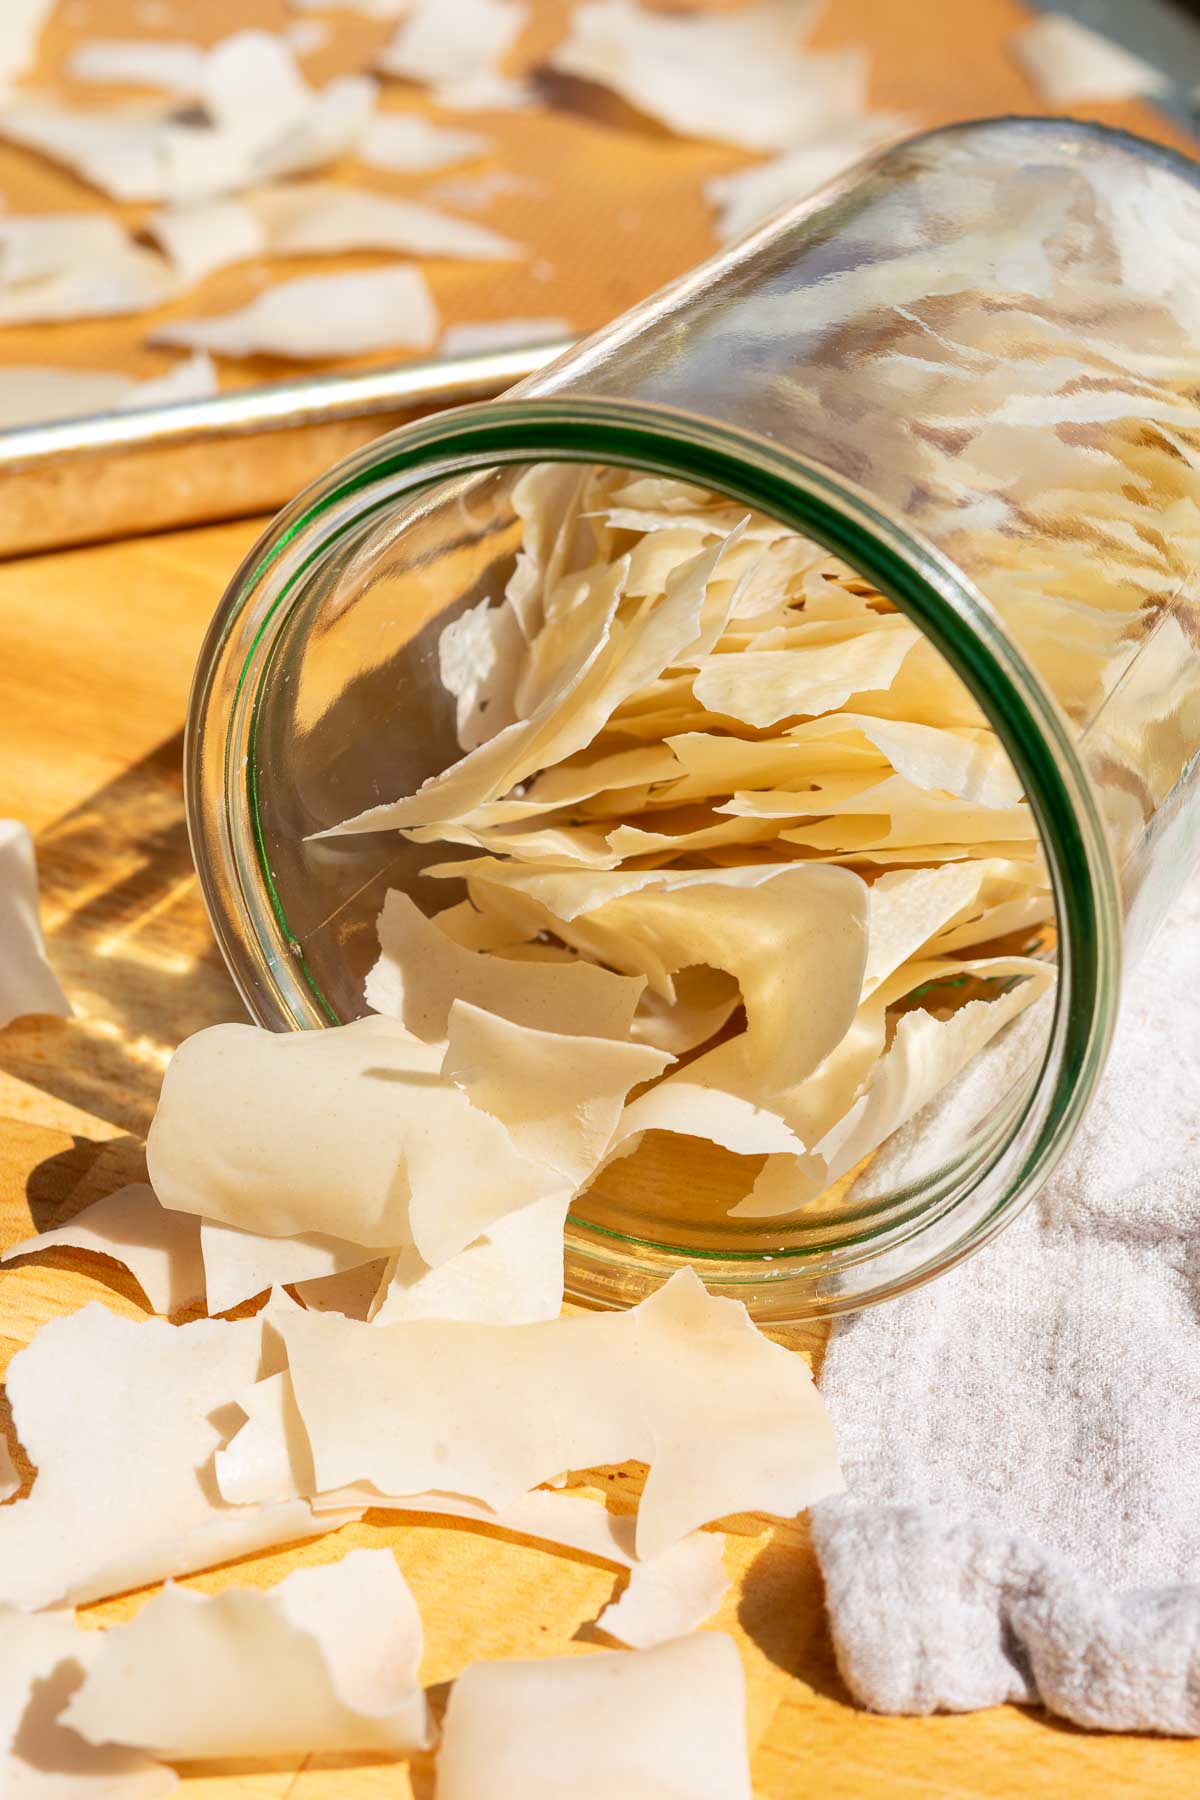
How to Dry a Sourdough Starter
The final method of maintaining your starter is drying your starter. Drying your starter is a good option for gifting, and traveling, and is the best long-term storage option.
- Spread a thin layer of active starter on a baking sheet with parchment paper or a reusable silicone baking mat.
- Keep the baking sheet in a dry location to completely dry out until it is brittle. The drying out might take as little as 12 hours to a couple of days, depending on how humid and thin you spread.
- Once it is entirely brittle, indefinitely place the dried starter flakes in airtight jars or bags.
- To revive, place the dried starter in a jar and barely cover it with water until it is hydrated in an hour or less. Mix and stir in equal amounts of flour to water. Continue feeding as usual until it is active fully again.
Learn more about how to dry your starter and reactivate it.
❓Sourdough Starter FAQs
Can I use any flour for my starter?
I recommend using bread flour and rye flour to make a new starter from scratch for the best results. However, you can use whole wheat flour, all-purpose flour, or other wheat flours to make a starter as well.
Use unbleached flour for the most success.
How can I use sourdough discard?
Once your starter is active, you can use your discard/surplus in discard recipes like waffles, muffins, cakes, banana bread, or sourdough granola.
What’s the difference between starter and levain?
A starter and a levain are essentially the same thing and are sometimes used interchangeably. When I refer to a levain, I mean an offshoot of my starter/”the mother” that is developed solely for a recipe.
There is no discard from a levain because it is 100% used in a recipe like in My Everyday Sourdough Bread recipe. My starter technically never gets directly put into a recipe because I use a levain instead.
You could make your starter bigger and use it for a recipe, but creating a levain gives you more control. A levain is especially helpful so you can feed it with different flour depending on the recipe and develop it on a different schedule based on your feeding ratio. That way, it’s built separately from your starter. I will usually make a levain that develops faster for a recipe as well (often peaks in 4-6 hours as opposed to 12 hours for my starter).
What is a sourdough feeding ratio?
The feeding ratio is the ratio of starter to added flour and water. STARTER:WATER:FLOUR. A 1:1:1 ratio is equal amounts of starter, water, and flour (i.e. 25g starter, 25g water, and 25g flour). A 1:2:2 ratio is one part starter to two parts water and two parts flour (i.e. 25g starter, 50g water and 50g flour) and so forth.
A 1:1:1 ratio will peak faster than a 1:2:2 ratio. This is because there is a larger proportion of starter to water and flour. At a 1:2:2, your starter will take longer to rise and peak because the amount of starter “seed” is smaller in proportion to your flour and water. I usually use a 1:5:5 feeding ratio for my small starter and it peaks in about 12 hours at 78ºF.
Using different feeding ratios allow you to control how long it will take for your starter to peak. This is especially important if you live in a place that experiences wide temperature differences. In the summer when it is warm, your starter will peak faster, so you might want to feed it at a different ratio than when it is winter.
Conclusion
There are endless ways to make a sourdough starter. Simply, a sourdough starter is flour and water mixed and left to ferment. By following this guide, I hope it pulls back the curtain some on the seemingly mystical ways of making a sourdough starter from scratch.
The sourdough starter recipe follows, but I would highly recommend using the more detailed guide above as it walks you through day-by-day making the starter.
Once your starter is healthy and active, you too can make delicious, naturally leavened bread and other yeasted sourdough recipes at home. And be sure to check out my Top 10 Sourdough Starter Tips for Success once you create a sourdough starter.
And if you enjoyed making your own sourdough starter, you may enjoy making homemade water kefir in a similar process!
⭐️⭐️⭐️⭐️⭐️
Please leave a rating, comment or question below! Tag me on Instagram or Facebook @SourdoughBrandon or PIN this recipe on Pinterest to come back to it later!

Sourdough Starter Recipe
Equipment
- 1 Brød and Taylor Folding Proofer, optional but helpful
Ingredients
- 200 grams Bread Flour
- 125 grams Rye Flour, optional, or whole wheat flour
- 350 grams Water
Instructions
- Day 1: Weigh and add 25g rye flour, 25g bread flour, and 50g warm water to a clean jar. Mix and stir the flours and water together with a small spatula until no dry bits remain. Place a loose fitting lid on the jar.Let rest in a warm location (70-85ºF is ideal) for 24 hours.Note: If you do not have a scale, you can combine 1/4 cup of rye flour, 1/4 cup bread flour, and 1/2 cup water and use those measurements throughout the process.If you do not have rye flour, substitute with whole wheat flour or use all bread flour.200 grams Bread Flour, 125 grams Rye Flour, 350 grams Water
- Day 2-6: Discard about ⅔ of the starter. Add another 25g rye flour, 25g bread flour, and 50g warm water to the jar. Mix and stir together. Rest again for 24 hours. Continue this process until Day 6 or until the starter begins consistenly rising and falling and has visible bubbles in it. Please refer to the guide above for a day-by-day walkthrough with images.
- Day 6: If you notice that your starter rose, fell in the jar, or has a lot of bubbles/gases in it, the feeding on this day is different as the starter is almost ready.Discard about ⅔ of the starter. Add 50g bread flour and 50g warm water to the jar. Mix and stir together. Rest for 24 hours.Note: If do not notice activity in the starter, continue the same feeding process as the previous days until you notice activity. Then continue with this step and the following steps.
- Day 7 and Beyond: At this point if your starter is active, it should have doubled in size, smell yeasty, and be full of activity (bubbles/gases). It might even pass the "float test", which I describe in the detailed guide above. Continue the feeding process from Day 6 and feed once or twice daily. Discard ⅔ or more of the starter, add 50g bread flour and 50g warm water to the jar. Mix and stir together. Rest and feed ideally just after it peaks.It should be ready for leavening bread or other yeasted baked items now! Ideally, use just after the starter peaks and before it starts falling again in its jar.Note: If your starter is not active at this point, continue the feeding process from Day 5 until you notice it rising/doubling/full of activity and gases. Once again, it can take two weeks or longer to establish an active starter longer depending on various conditions.
Video
Notes
- Creating a sourdough starter can take anywhere from a week to over two weeks. It depends on many factors including flour used, temperature, environment, etc. Following my detailed guide above and keeping your starter in a warm location should get it active in 7-10 days.
- If at any point your starter has mold growing on it, completely discard and restart the process.
- Feel free to transfer your starter to another clean jar throughout the process as many times as you’d like.
- There are many ways to maintain, store, and keep your starter depending on your preferences and baking schedule. Please refer to my detailed guide above for ways to maintain a smaller starter or how to store it in the refrigerator, freezer, or even dried.


Excellent instructions. I haven’t made any as yet. But it’s so well written that I think even I can follow the instructions.
I can’t wait to try this recipe.
Let me know if you have questions during the process!