Sourdough Bulk Fermentation 101
This post may contain affiliate links for products and ingredients I use and recommend. For more information, see my affiliate disclosures.
Bulk fermentation is one of, if not the most important and misunderstood stages in sourdough bread baking. Sourdough bread develops much of its flavor, crumb structure, and rise during bulk fermentation.
Without proper sourdough bulk fermentation, the sourdough will not bake correctly, resulting in dense or flat bread.
This comprehensive sourdough bulk fermentation guide addresses all your bulk fermentation questions, including why bulk fermentation is important, how to control bulk fermentation with temperature, and various indicators and images to help you determine when bulk fermentation is complete.
What is Bulk Fermentation?
Bulk fermentation is the first proofing stage, occurring between mixing and dividing or shaping the dough.
Other terms used to describe bulk fermentation include first rise, first proof, bulk rise, or bulk proof.
This stage is called bulk fermentation because many bread bakers and bakeries ferment large amounts of bread dough at a time. As a home baker, you might make only one or two loaves at a time, but the same idea applies.
When bulk fermentation is complete, the dough is divided, shaped, and proofed again before baking.

Why is Bulk Fermentation Important?
Bulk fermentation is important because it is the proofing stage during which the dough accumulates gases, which determine the structure and flavor of sourdough bread.
The gluten network you develop from mixing will trap the carbon dioxide produced during bulk fermentation. This will result in the light texture and fluffy interior associated with sourdough bread.
The large, even holes and soft, custardy interior texture of sourdough bread are often referred to as an “open crumb” and are an aspiration of many sourdough bakers. An open crumb can only be achieved with a proper bulk ferment.
Successful bulk fermentation can also help achieve the sought-after “sourdough ear“, which is one sign of a properly proofed bread.
Proper bulk fermentation is crucial in sourdough baking. But even with the best ingredients, tools, and experience, if you misjudge bulk fermentation, your dough can turn out under- or over-proofed.

What Do You Do During Bulk Fermentation?
Sourdough bulk fermentation is the longest room-temperature stage in sourdough baking, and it’s also the most challenging stage to gauge for most people.
Bulk fermentation is largely hands-off, as you simply allow the bread dough to ferment on its own schedule.
I typically proof my dough in a covered mixing bowl, but if you’re making large amounts of bread, it might be helpful to invest in a bulk fermentation container.
I recommend this 6-quart storage container as a suitable bulk fermentation container for proofing multiple doughs. There are various sizes as well, including a larger 8-quart container.

What Are Stretch & Folds or Coil Folds?
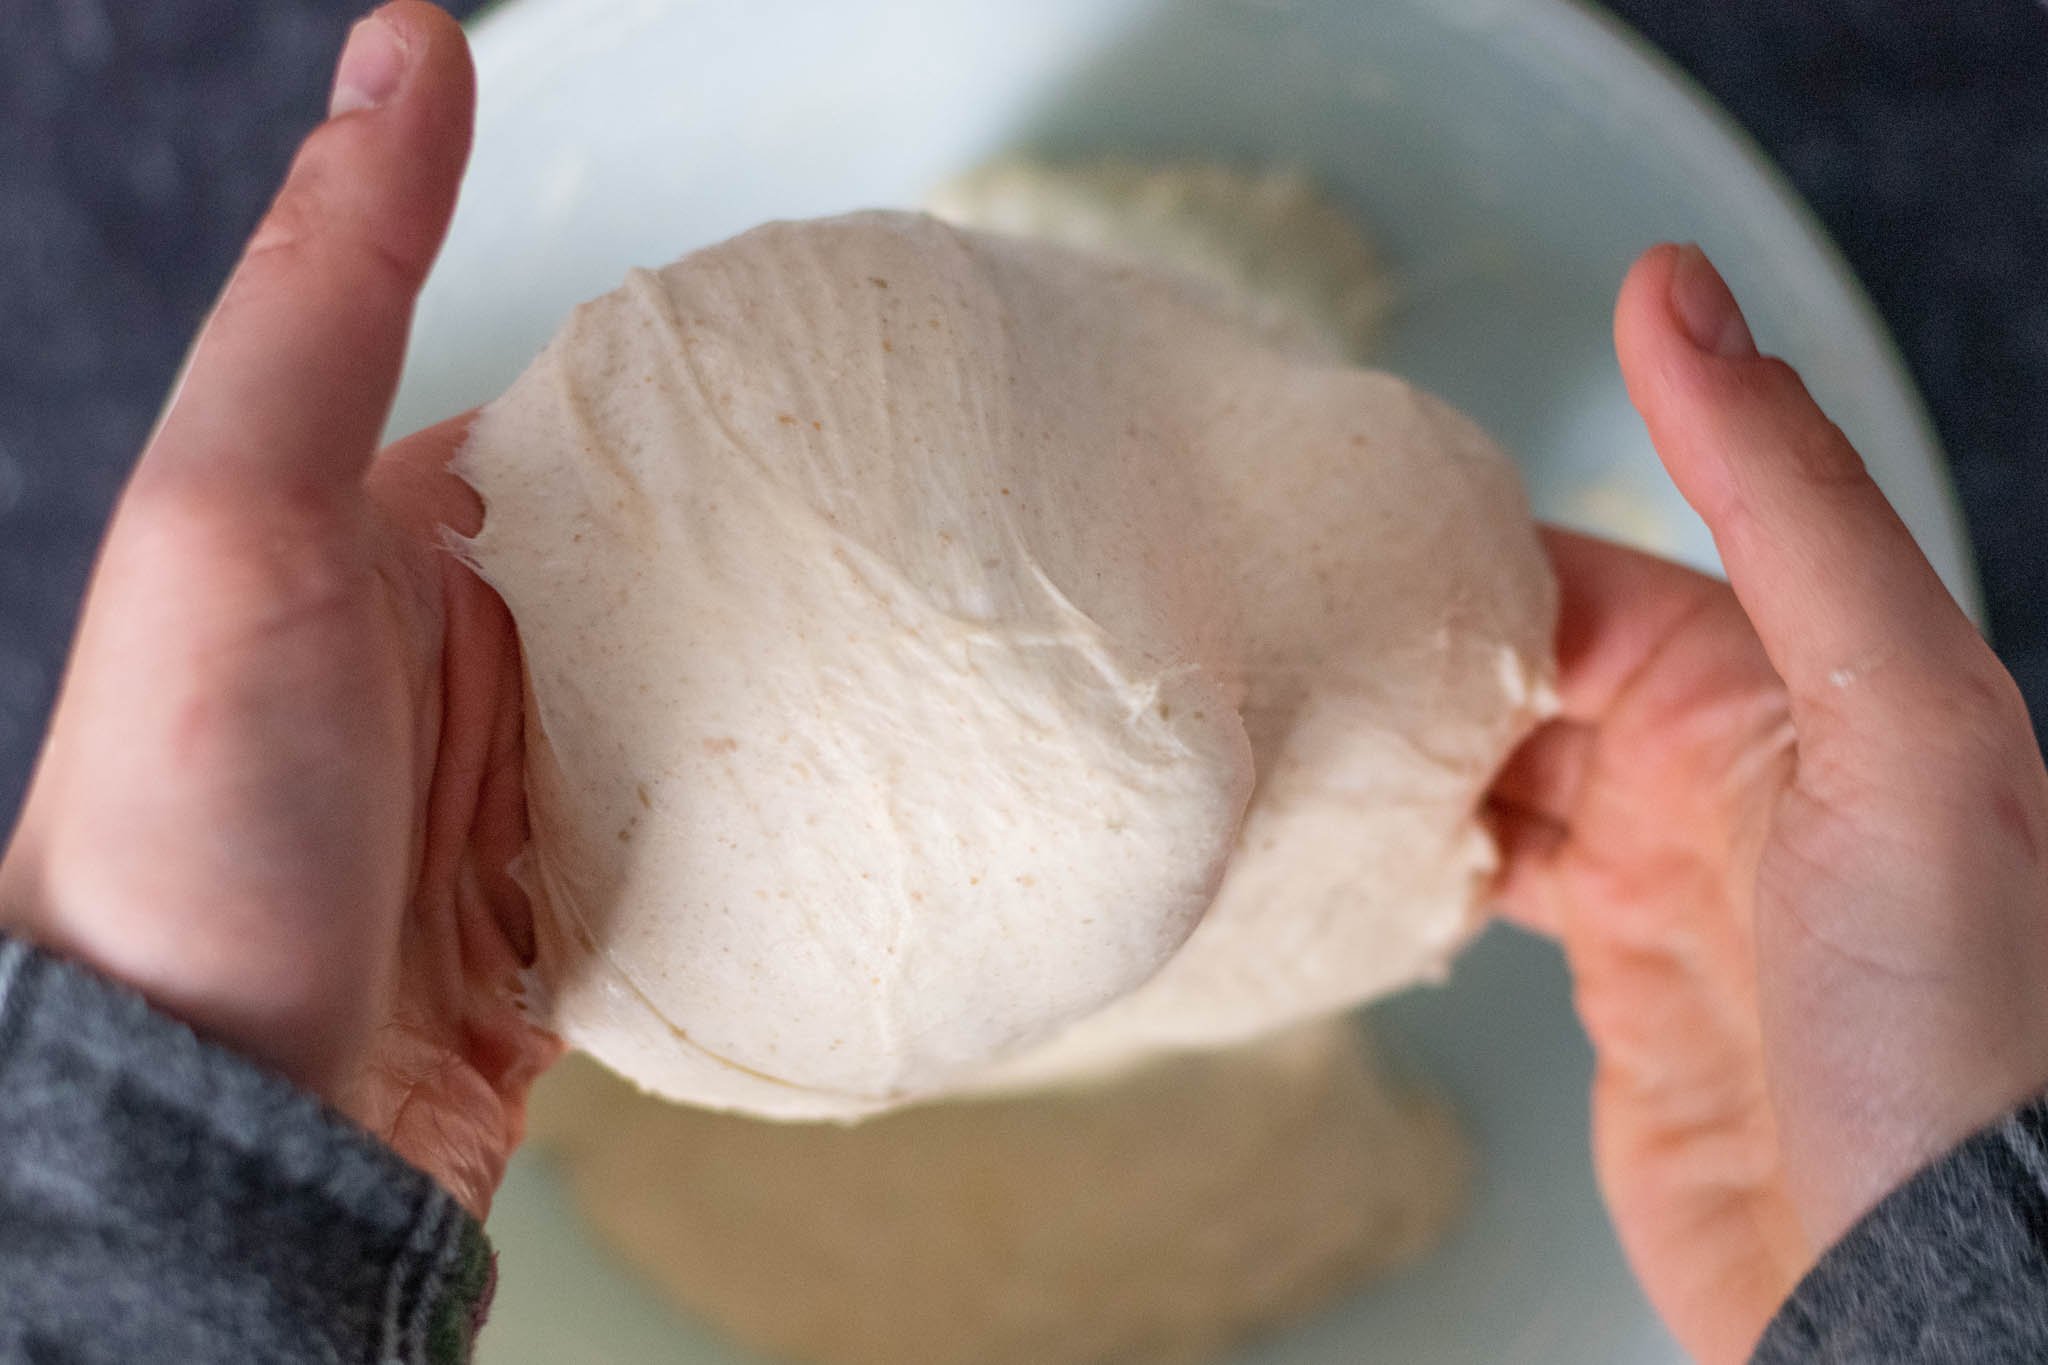
Many bakers employ stretch & folds or coil folds during bulk fermentation.
Performing a series of folds during bulk fermentation helps regulate dough temperature, promotes further gluten development, and allows you to sense how quickly your dough is fermenting.
I employ stretch and folds in most sourdough bread recipes, including my Buckwheat Sourdough, Spelt Sourdough Bread, and even in very high hydration breads like my 100% hydration Sourdough Pan de Cristal (Glass Bread) or Sourdough Focaccia.
Either type of fold will be beneficial for your dough. Some bakers have a strong preference for one or the other.
I tend to use gentle coil folds during bulk fermentation because I feel that it preserves the integrity of the gases more effectively, which helps achieve a more open crumb.
The more you bake, the more you’ll develop a sense of when bulk fermentation is complete and if your dough needs more or fewer folds.
Since stretch & folds are slightly stronger, a set of 4 to 6 stretch & folds is common in many sourdough recipes. For gentle coil folds, 6 to 8 sets is typical. Some recipes may use both or another method entirely (like a slap and fold technique).
Watch this video for how to perform coil folds during bulk fermentation.

How Do You Control Bulk Fermentation?
The best way to control bulk fermentation is to maintain a constant temperature for your dough throughout the bulk fermentation process.
Sourdough bulk fermentation is best in a slightly warmer environment than room temperature, at 75-80ºF or 24-27ºC.
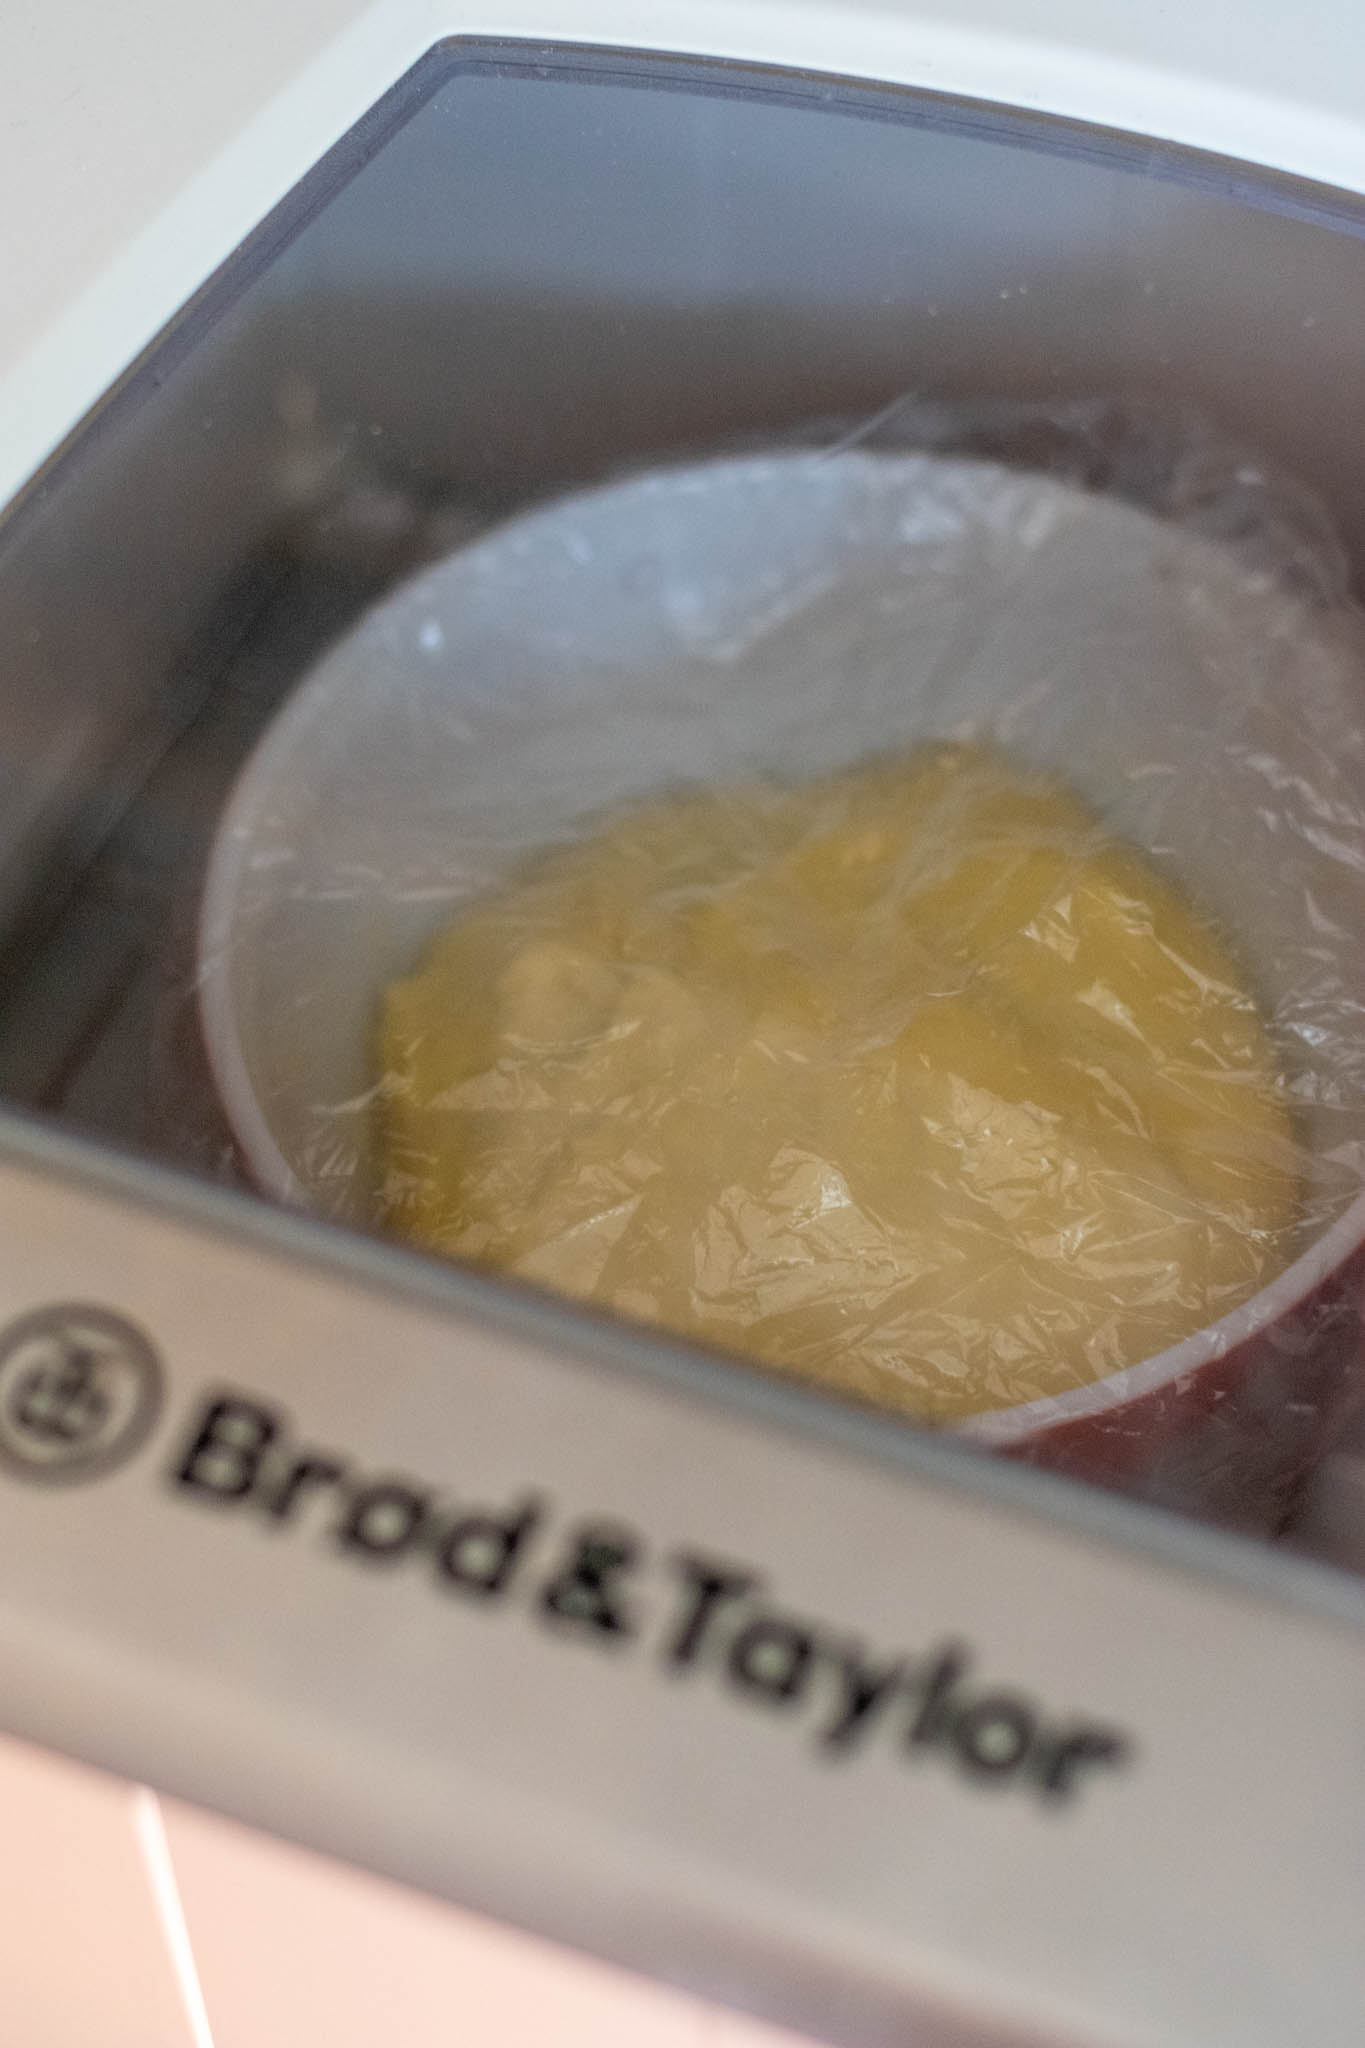
Some of my favorite tools for controlling bulk fermentation temperature are the Brød and Taylor Folding Proofer box and an Instant-Read Thermometer.
Both will help you dial in the temperature for bulk fermentation.

Another factor that affects fermentation is the hydration of the dough, as well as whether whole wheat flours are used.
A high-hydration dough will proof faster than a lower-hydration bread.
Likewise, whole wheat flours have nutrients that sourdough yeasts love.
You’ll notice that when using large amounts of whole wheat in a recipe like my Seeded Whole Wheat Sourdough Sandwich Bread or Soft Sourdough Rye Sandwich Bread, bulk fermentation accelerates.
How Long Does Bulk Fermentation Last?
Bulk fermentation can typically last anywhere from 3.5 to 7 hours, depending on the dough temperature, recipe, and amount of sourdough starter used.
At 78ºF, bulk fermentation usually lasts about 4-4.5 hours for a typical sourdough bread using about 20% sourdough starter in the recipe.
If using a cooler temperature or less sourdough starter in a recipe, bulk fermentation may take longer.
I don’t recommend performing bulk fermentation in the refrigerator, as the cold temperatures will not allow the dough to proof adequately.
Instead, proof the dough in the fridge overnight after it has already been shaped. This is called a retard or cold proof.
The range of time it takes for bulk fermentation to be complete is broad because there are so many factors that affect how quickly your dough ferments.
Factors that impact sourdough bulk fermentation time include, but are not limited to:
- The strength of your sourdough starter (see tips to strengthen your starter)
- Ambient temperature
- The types of flours or other ingredients used
- Humidity
- Elevation (higher elevation=less bulk fermentation time).
- If you autolyse your bread or not
For example, added sugar can accelerate bulk fermentation, like in my Calabrian Chili and Honey Sourdough Bread. The sourdough yeasts in this recipe consume the sugars at a faster rate than a typical loaf.
Enriched doughs with eggs, milk, and butter like Sourdough Brioche Bread or Sourdough Cinnamon Rolls may take longer.
Sensory indicators are the most reliable signals to determine when bulk fermentation is complete, rather than relying on time. Use time as a guide and not as the only indicator.
When is Bulk Fermentation Done?
Knowing when sourdough bulk fermentation is complete can be challenging at first.
With more sourdough baking experience, you will develop a better intuitive sense of when your dough is finished proofing, using sensory clues.
Signs That Your Dough is Finished Proofing
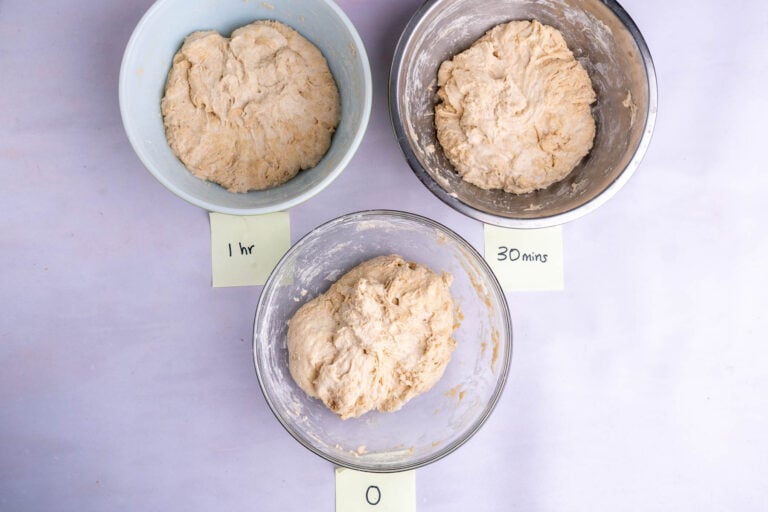
The bulk fermentation chart highlights indicators to know if your sourdough is proofed correctly or under/over-proofed at the end of bulk fermentation.
I also include photos of various bulk fermentation stages.
| Proofed Correctly | Under-proofed | Over-proofed |
|---|---|---|
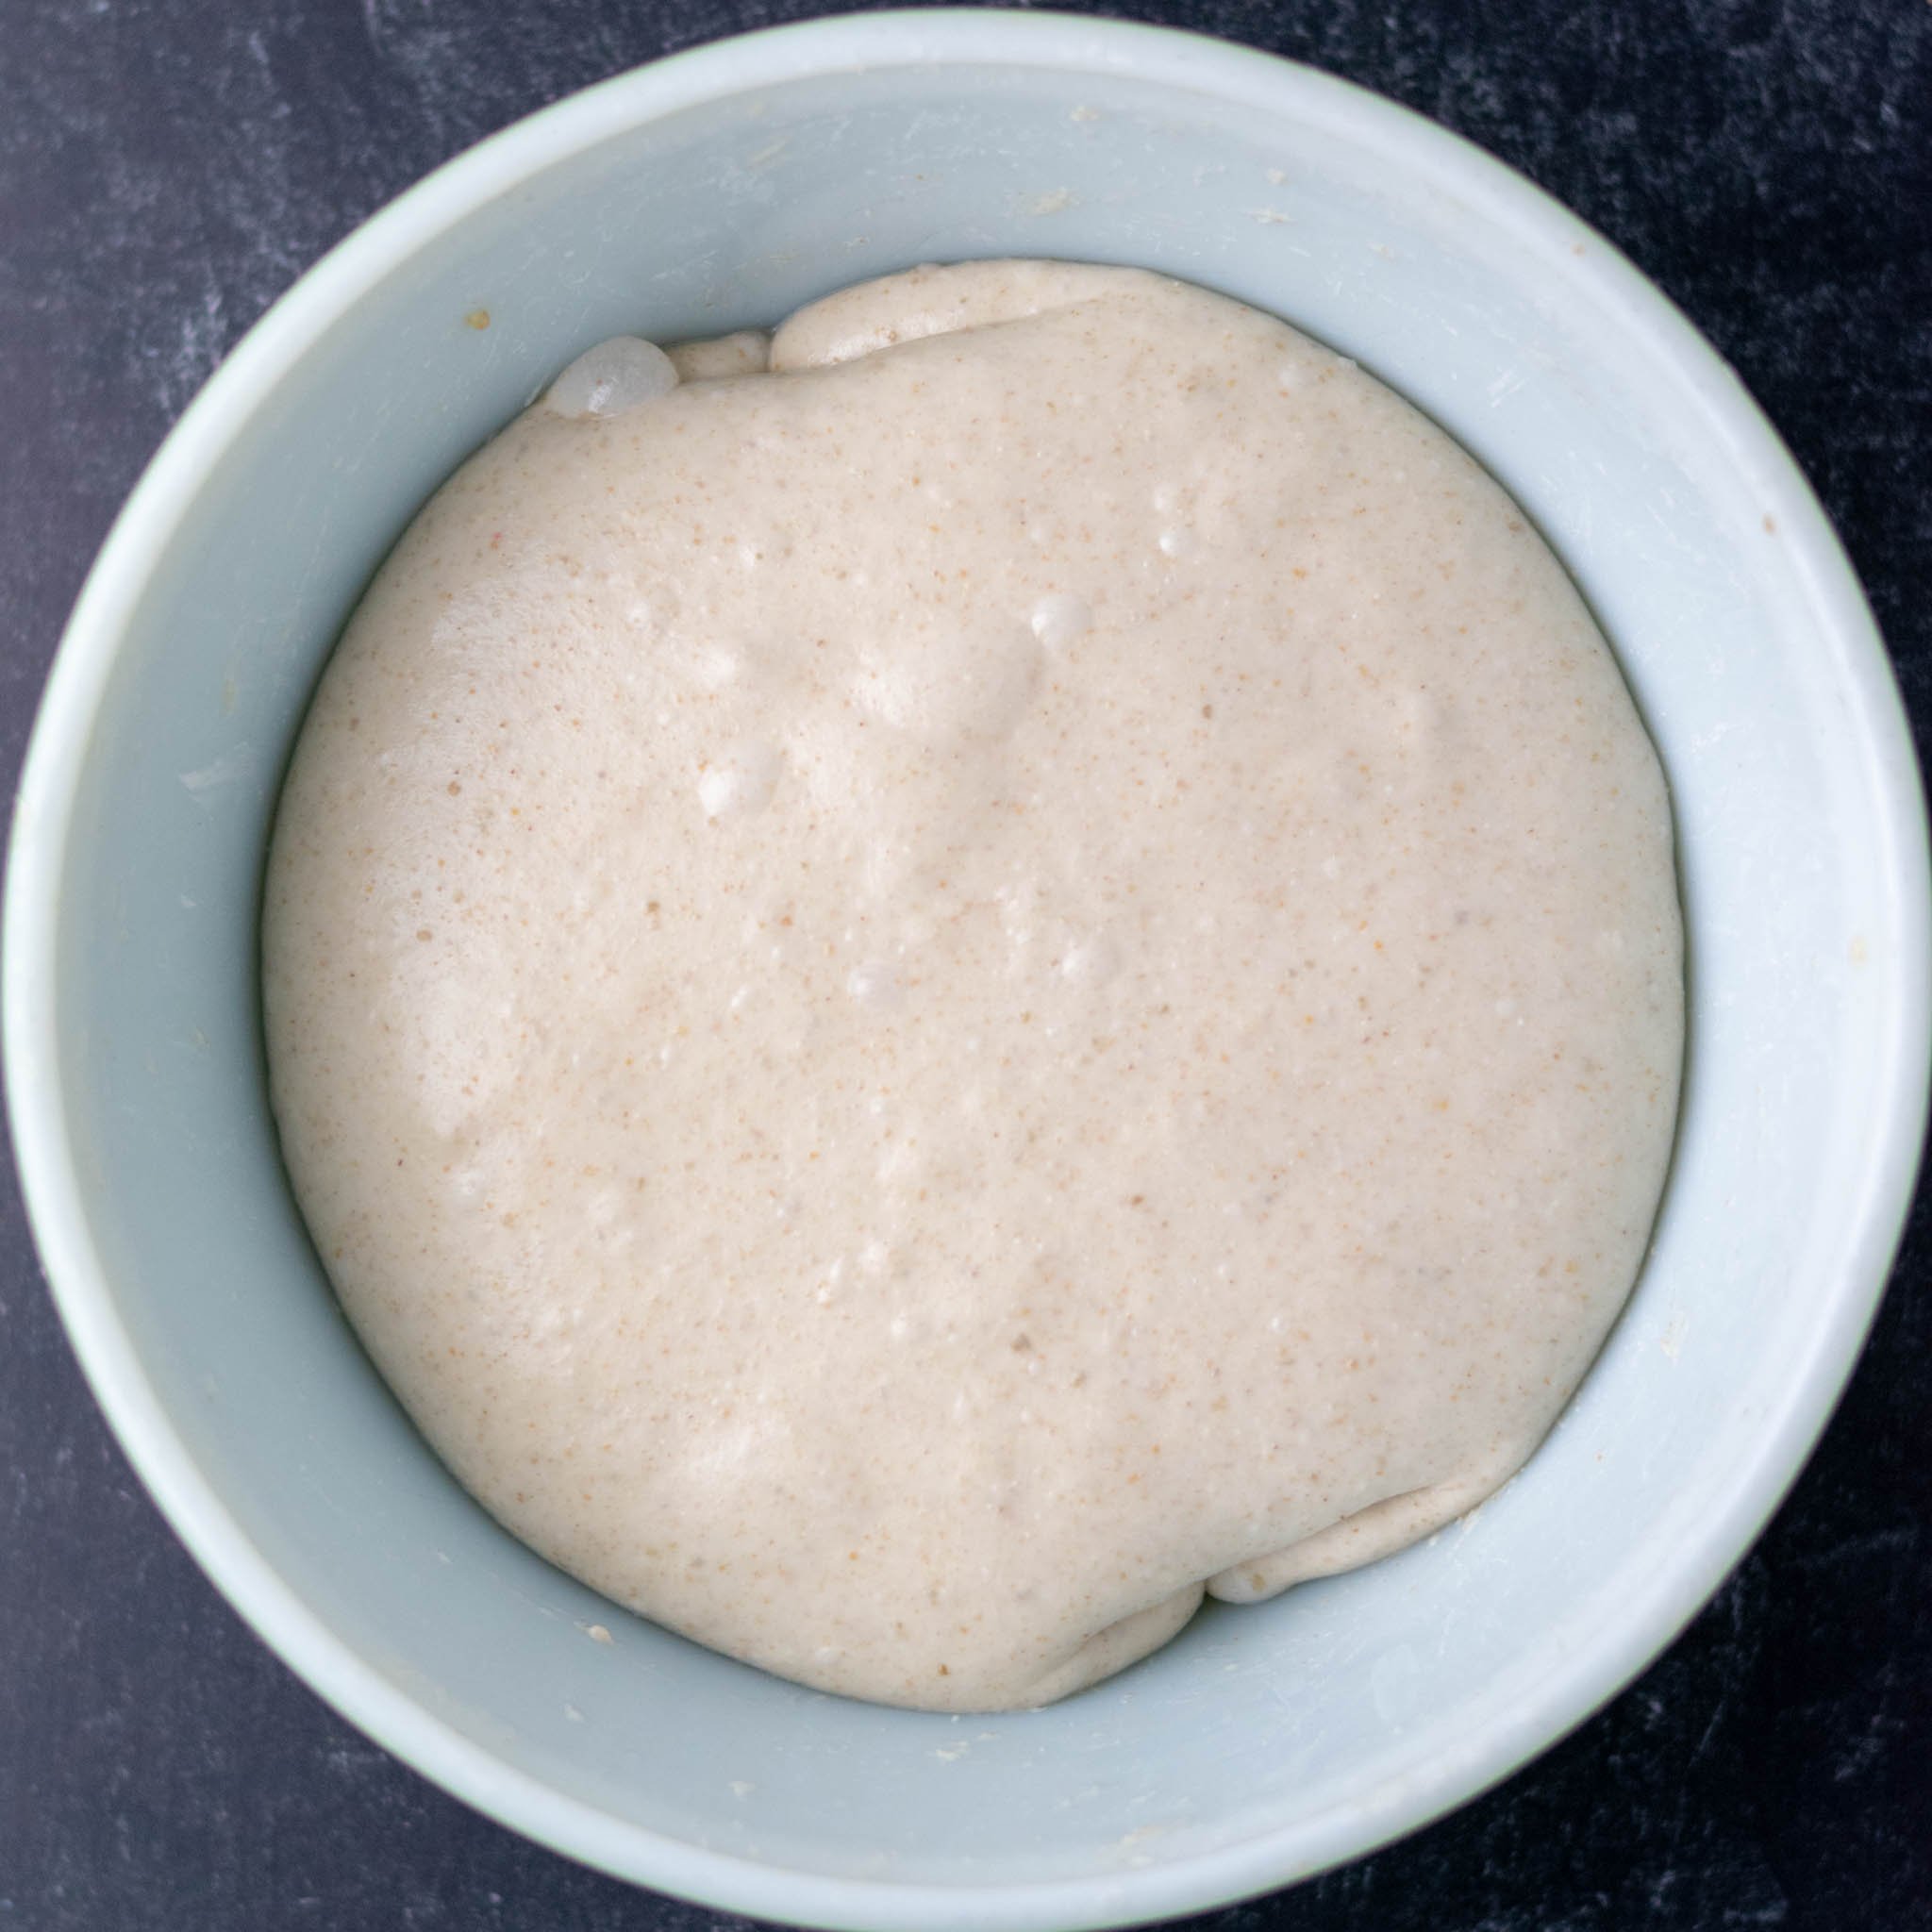
| The dough has grown about 50% in size (refer to recipe). | The dough has only grown slightly in size. | The dough might be doubled or more in size (refer to recipe). |
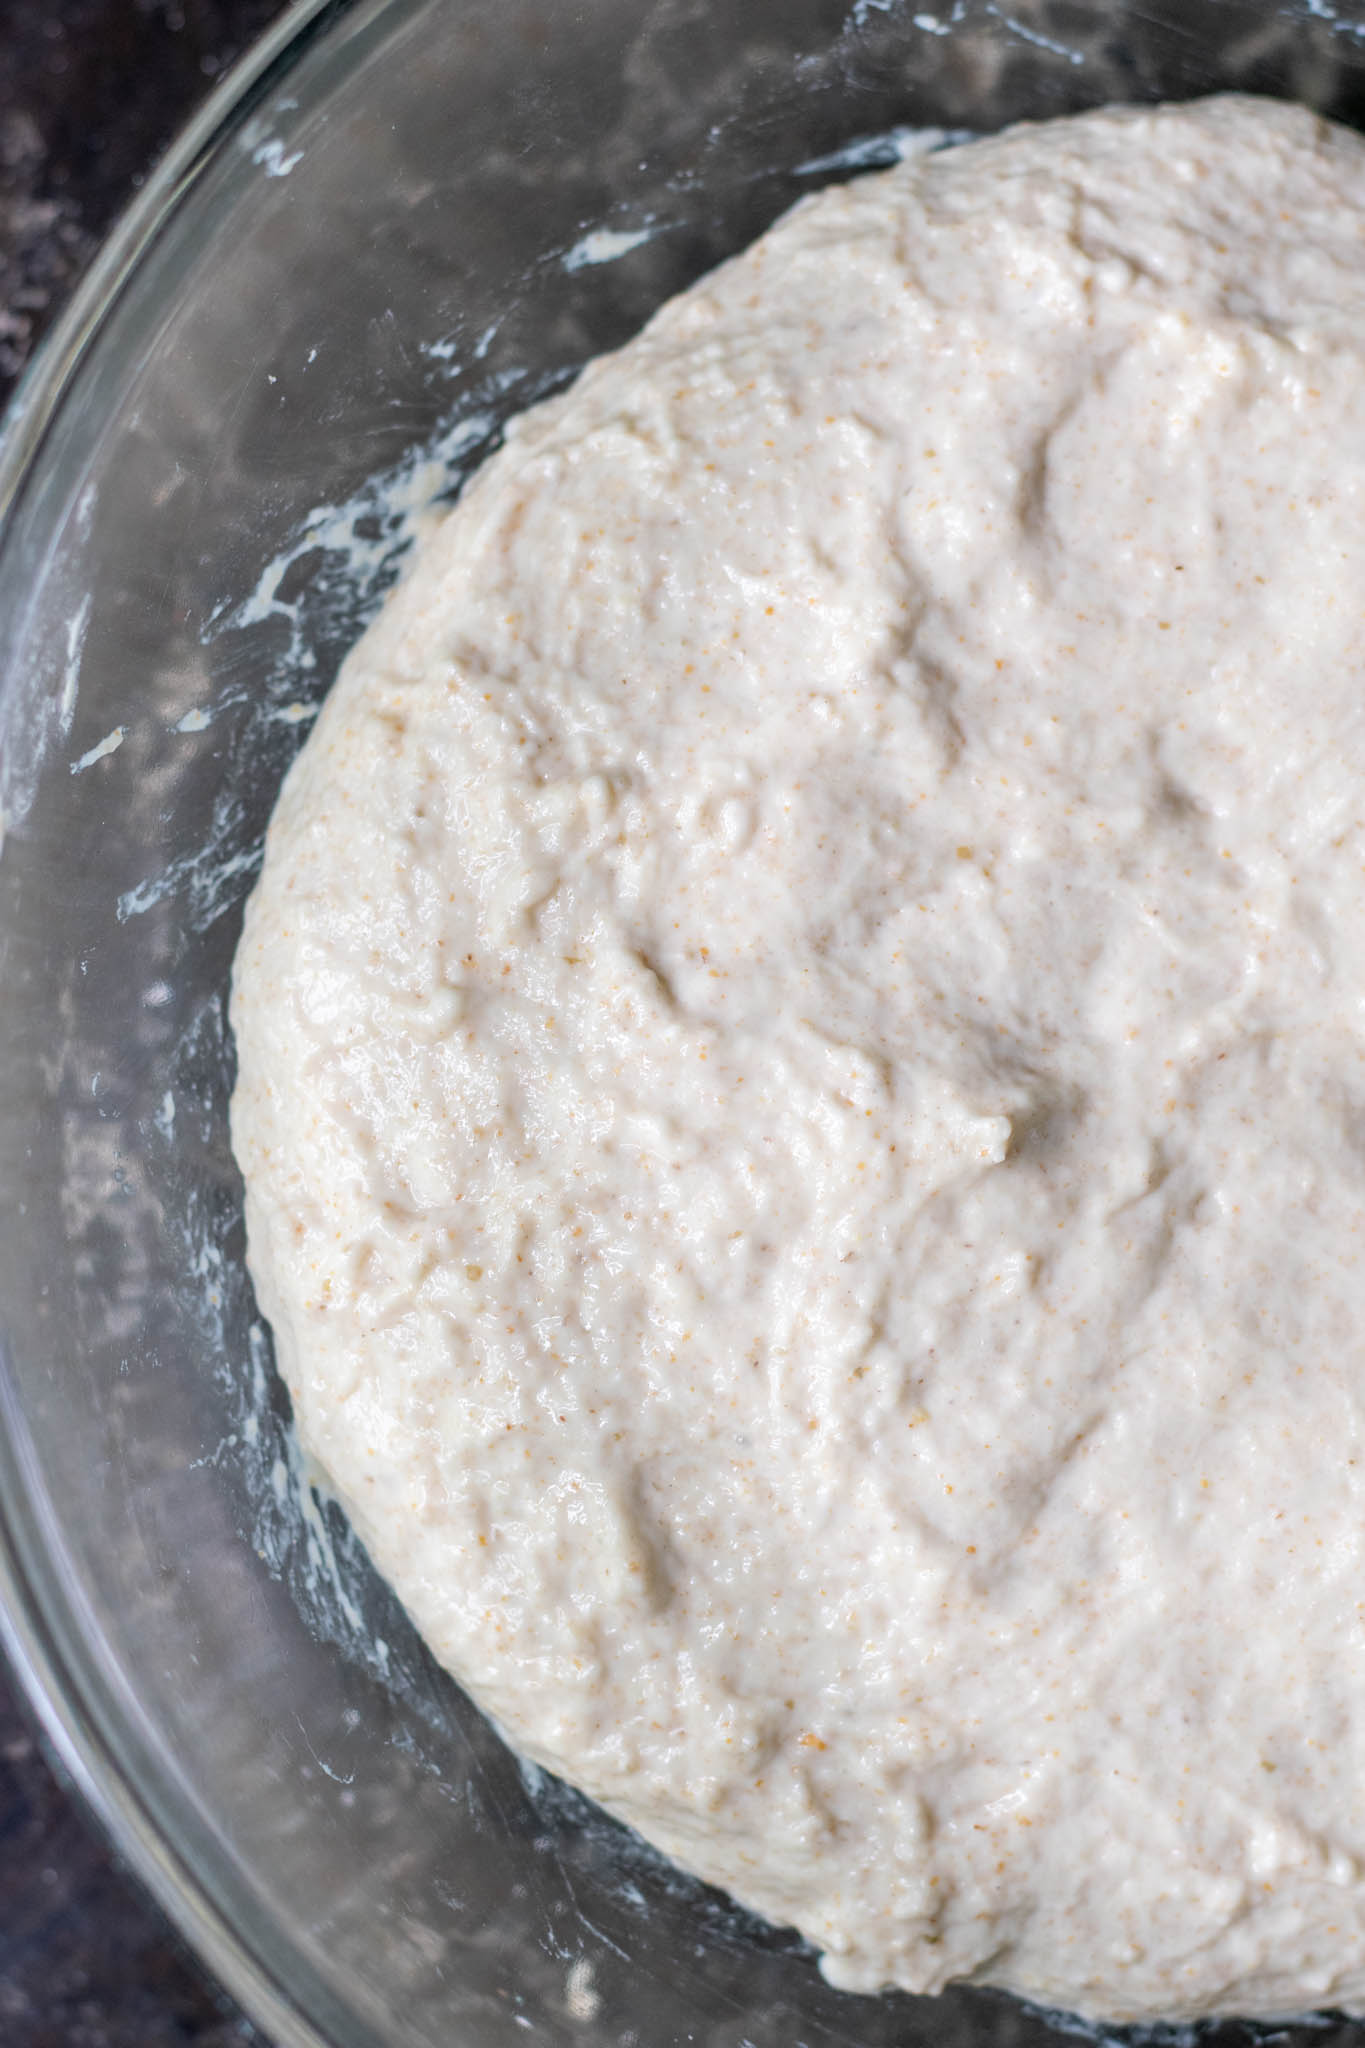
| The dough has visible gas bubbles on top of and throughout the dough. | There are no visible gas bubbles. | The dough has many gas bubbles. Some bubbles deflated. |
| The dough is jiggly when you shake it. | The dough is stiff and does not jiggle. | The dough will be very jiggly and slack. |
| The top of the dough is domed and smooth. | The top of the dough is flat and rugged. | The top of the dough is extremely poofy and might overflow the proofing container. To the extreme, it will be deflated. |
| The dough feels aerated and full of air. Generally easy to shape (high-hydration doughs are an exception, as they are difficult to shape). | The dough might be slack due to a lack of gluten development and gas buildup. | The dough feels very wet, slack, or even soupy. Extremely difficult to shape. |
| The dough smells yeasty. | The dough might smell like flour. | The dough smells acidic and sour. |


What to do if your dough is under or over-proofed?
Sometimes you decide to end bulk fermentation, and when you’re shaping the dough, you notice that something seems off. You might have under- or over-proofed your dough!
If you’ve moved on to pre-shaping or shaping your dough and notice that it is under or over-proofed, there are many different options you can take.
Under-proofed Dough
An under-proofed dough is much easier to save than an over-proofed dough. This is because an under-proofed dough simply needs to be proofed for a longer period.
If your sourdough is not rising during bulk fermentation at all, you might need to strengthen your sourdough starter.
If you notice the dough is underproofed during preshaping or shaping, simply give it a longer bench rest. By letting the dough rest longer during preshaping or shaping, the bulk fermentation stage is essentially extended.
The dough will continue to proof very slowly in the refrigerator, so you can also extend a cold, overnight proof. Depending on the recipe, you might be able to extend the cold proof for up to a few days.
If the dough still seems underproofed once taken out of the refrigerator, let it proof longer at room temperature before baking.
An underproofed sourdough bread will be very dense or may have a few large holes surrounded by tight ones instead of an evenly open crumb.
Over-proofed Dough
An over-proofed dough is more difficult to save than an under-proofed dough.
If the dough is only slightly overproofed at the end of bulk fermentation, divide and shape the dough into a banneton immediately, then place it directly in the refrigerator. The cold temperature will slow down fermentation, and your bread will likely end up okay.
A dough that is extremely over-proofed might not be salvageable for sourdough bread. If it’s so wet and slack that you cannot shape the bread, I would advise making focaccia out of it! Dump the dough out onto a sheet pan with a lot of olive oil, dimple it all over, add salt and any toppings and bake at 450ºF for 20-25 minutes.
An overproofed sourdough bread will be flat, extremely sticky, and lack structure.
Can You Bulk Ferment in the Refrigerator?
Generally, no. Bulk fermentation is intended to occur at a warm enough location, allowing the sourdough yeasts to produce carbon dioxide and multiply (ideally between 75-80°F).
In a cold location, such as a refrigerator, yeasts ferment at an extremely slow pace, which hinders bulk fermentation.
However, if you’ve proofed your dough for a few hours in a warm location, you can transfer it to the refrigerator for the last couple of hours to complete bulk fermentation.
Essentially, the yeast have activated enough at this point that it will continue to expand further in the refrigerator.
Conclusion
Bulk fermentation doesn’t have to be intimidating or as mysterious as it seems.
Most of the process is hands-off; allow the sourdough yeasts to do their job. Another part of it is a baker’s intuition that comes with experience and practice.
Learn the various signs and indicators when bulk fermentation is complete and you’ll be 90% there!
And experiment! Let your dough ferment much longer than normal and see what happens.
Those experiments with your dough taken to extremes can help you get to know your dough better and make you a better baker.


Very helpful post. I love the table comparing the three stages.
Glad the chart was helpful!