Sourdough Challah Recipe
This post may contain affiliate links for products and ingredients I use and recommend. For more information, see my affiliate disclosures.
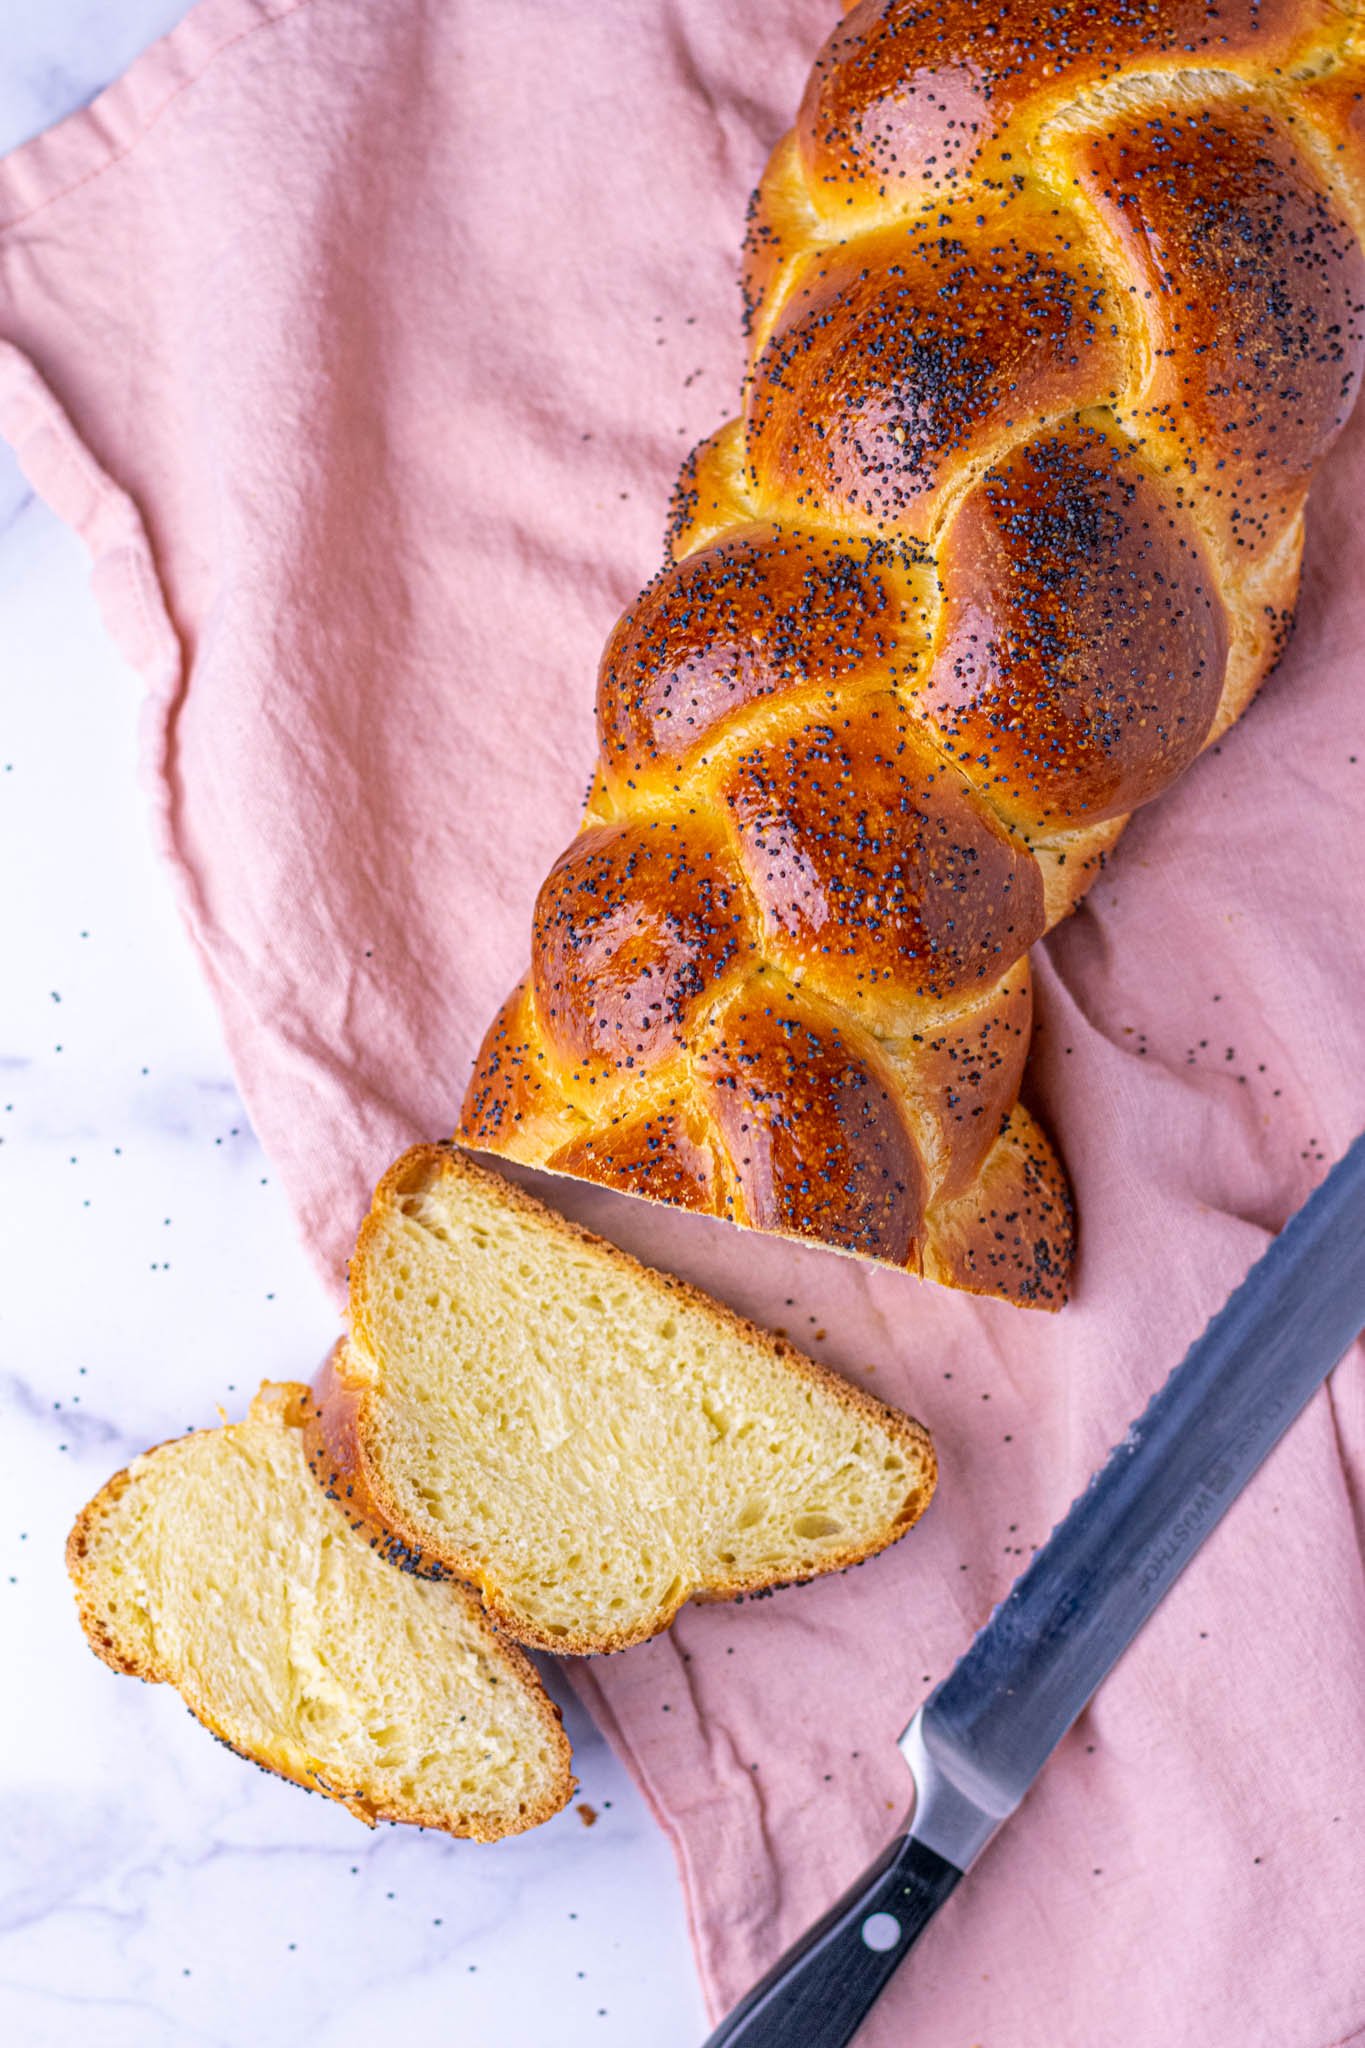
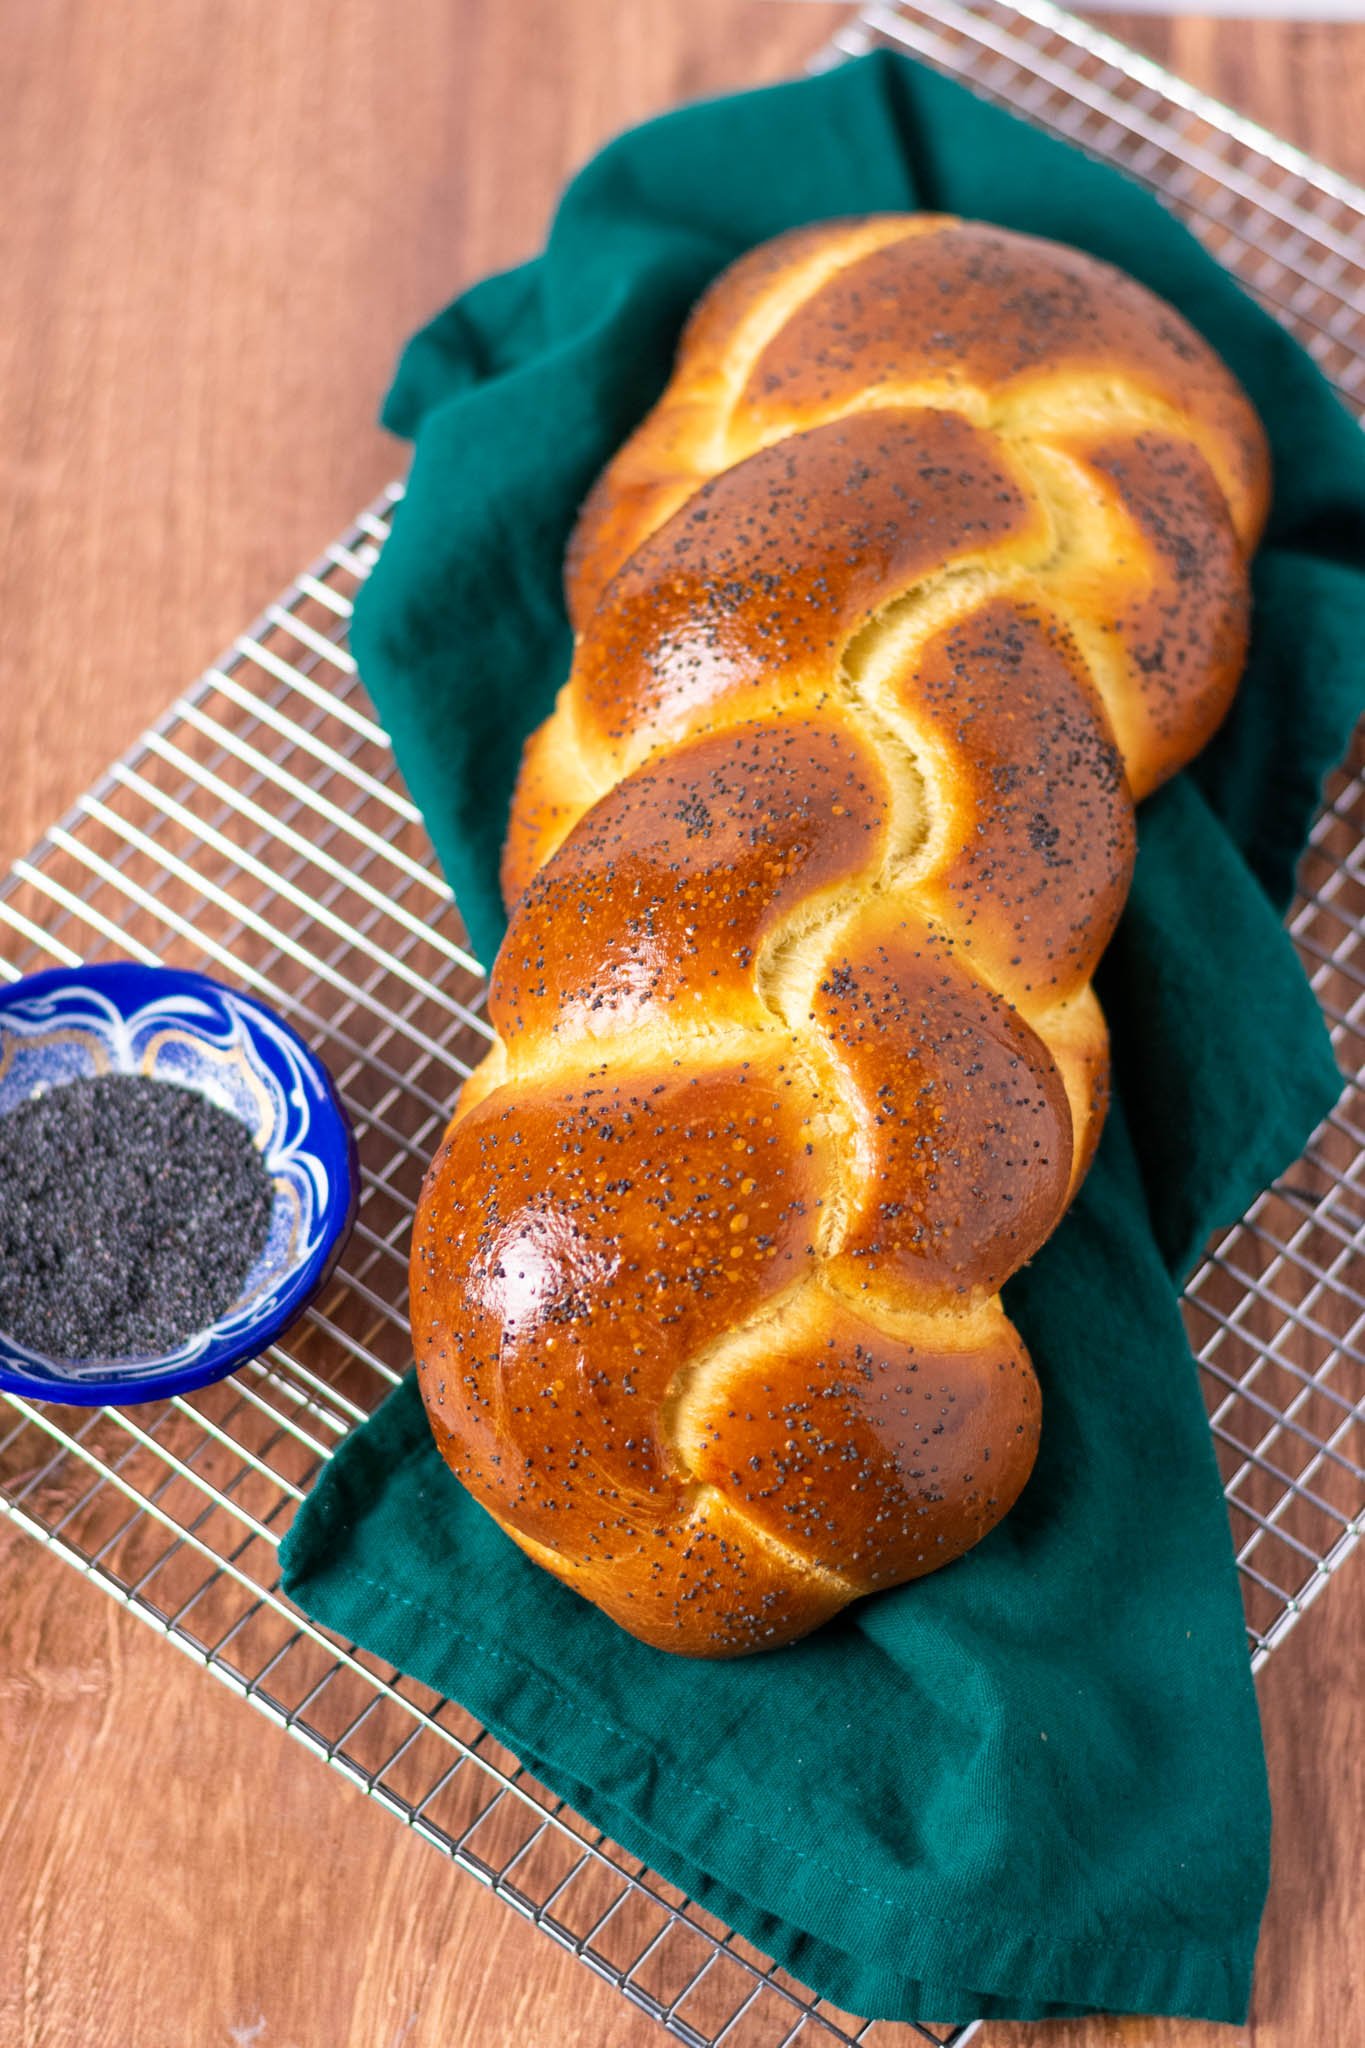
This sourdough challah is one of my favorite loaves of bread to bake and eat.
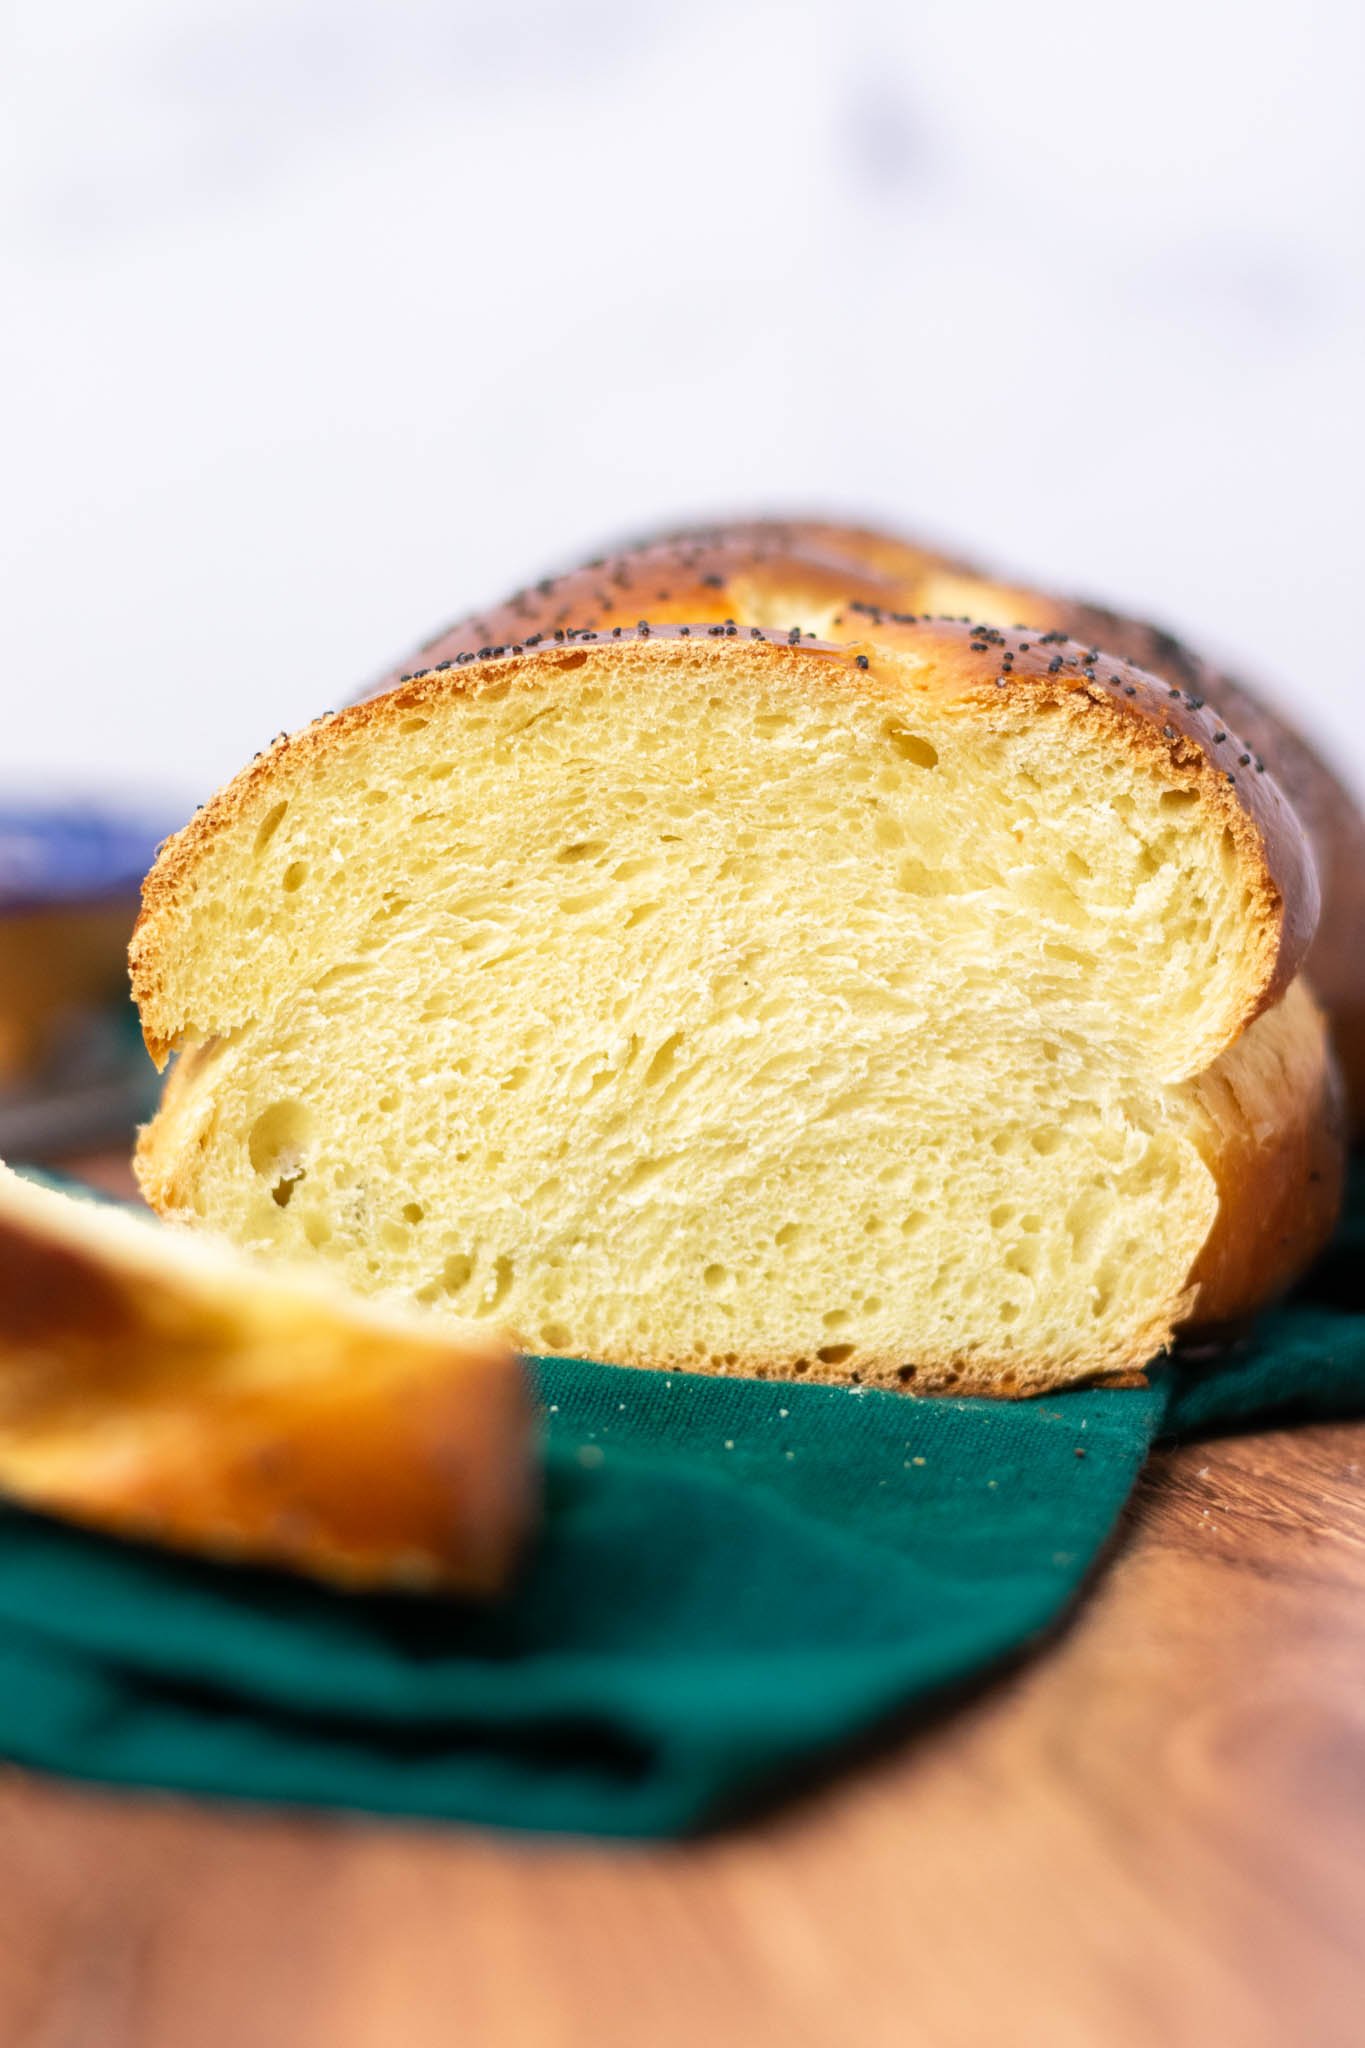
It has a soft and somewhat eggy interior, is slightly sweet, and has a beautifully braided and shiny crust topped with crunchy seeds. With an overnight fermentation using only a sourdough starter as the leavening, this easy sourdough challah has a ton of added flavor.
Challah is of Jewish origin and has a long history that has evolved for thousands of years along with the people who have made it. One often eats challah on Shabbat (Sabbath) and other ceremonial occasions and holidays.
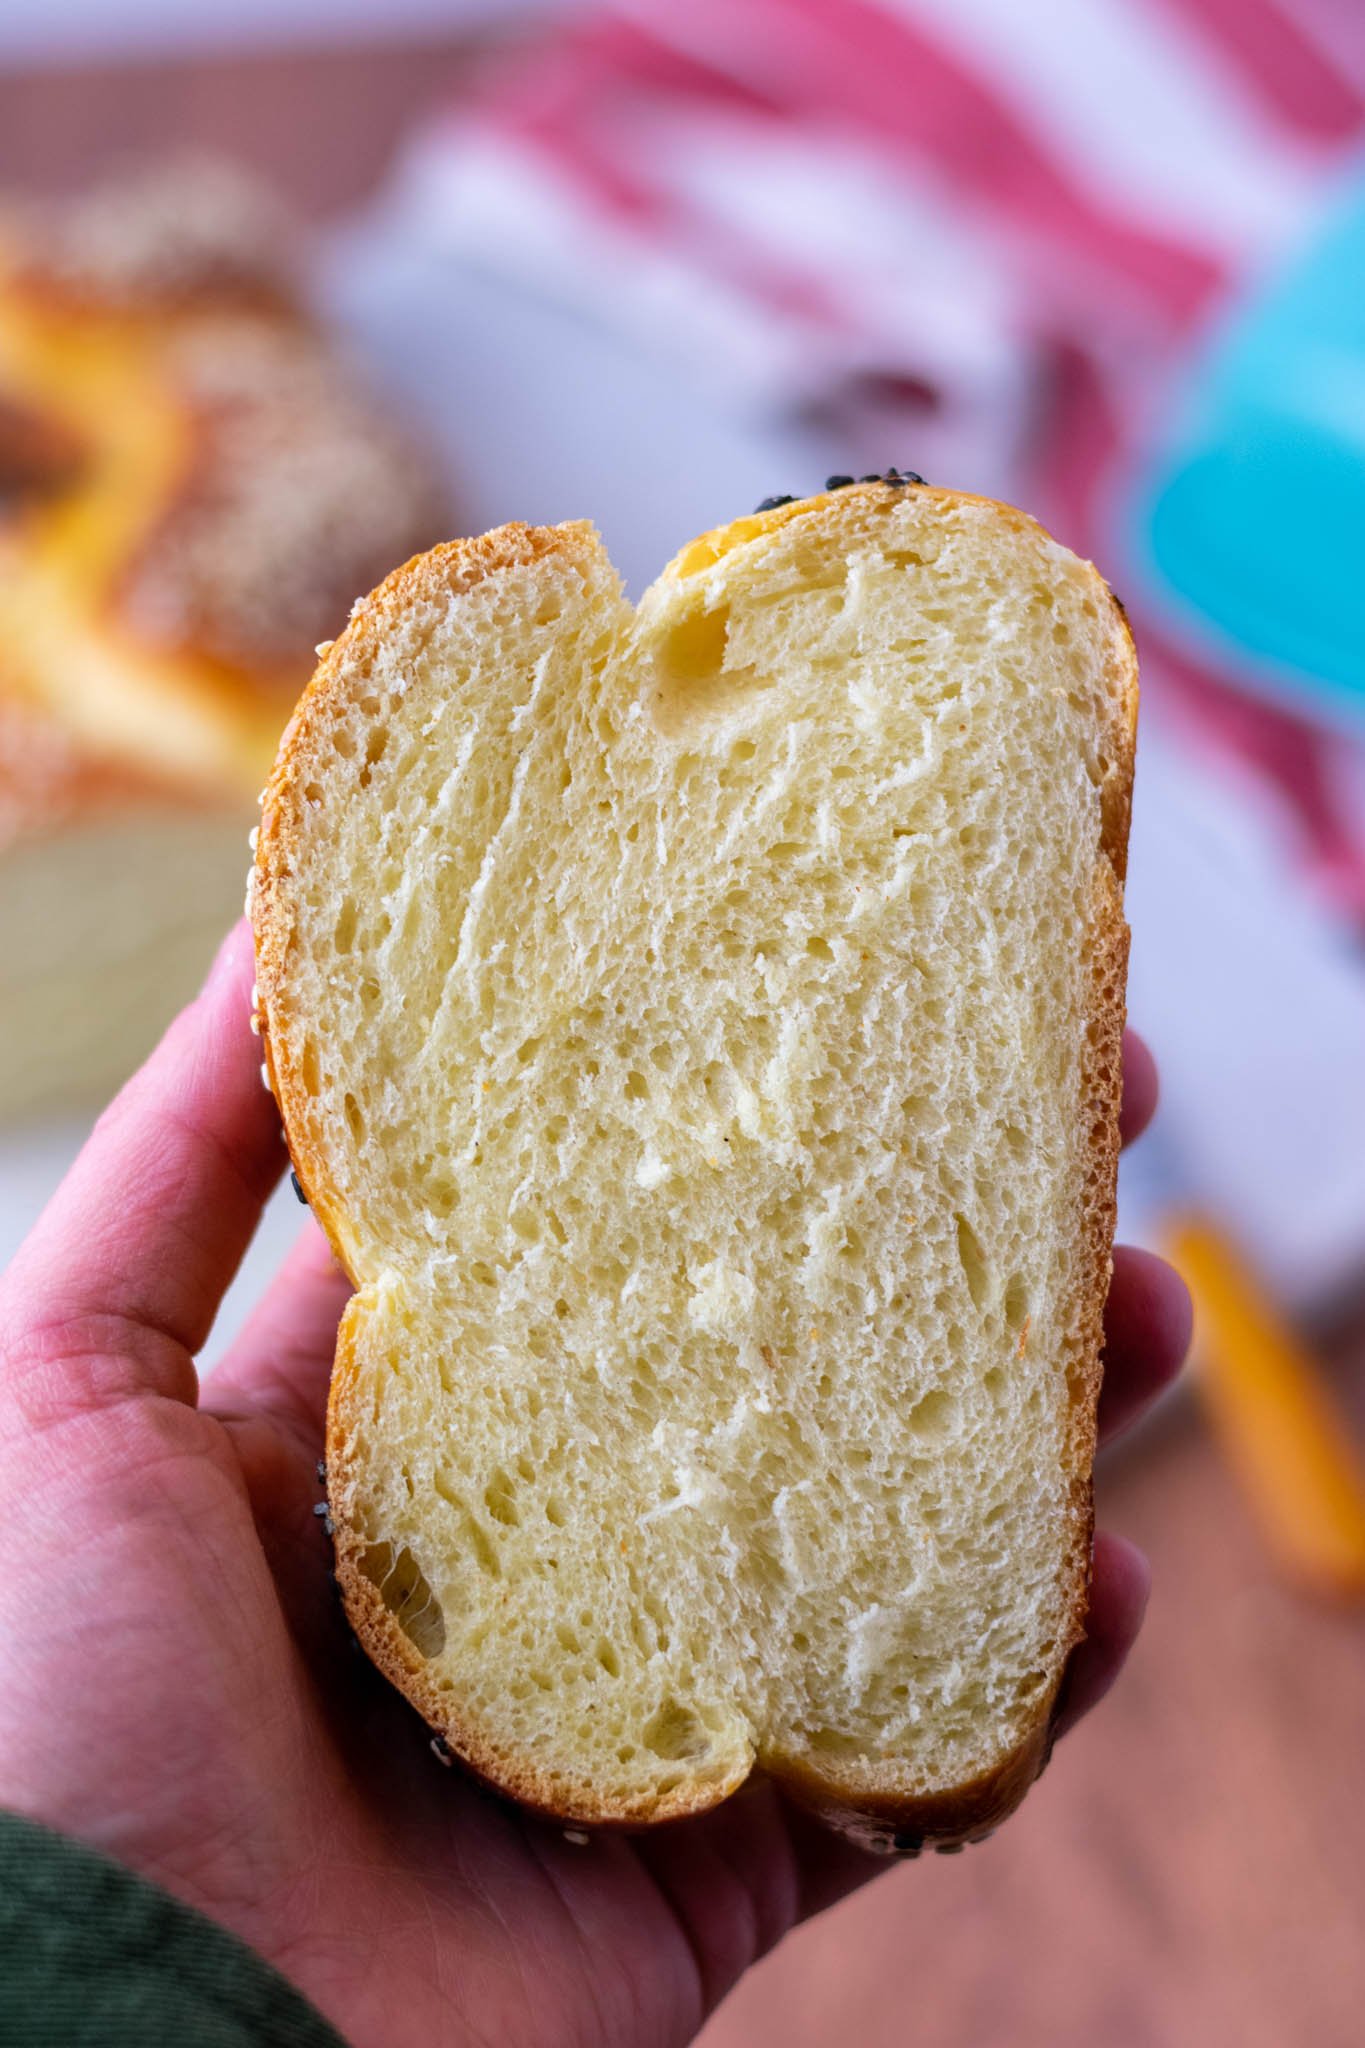
Challah is an enriched bread similar in texture to brioche but is dairy-free.
Additionally, I use staple ingredients like neutral oil and granulated sugar for this sourdough challah recipe to highlight the sourdough flavor and spongy texture of the eggs.
A double egg wash gives the sourdough challah a brilliant, reflective crust.
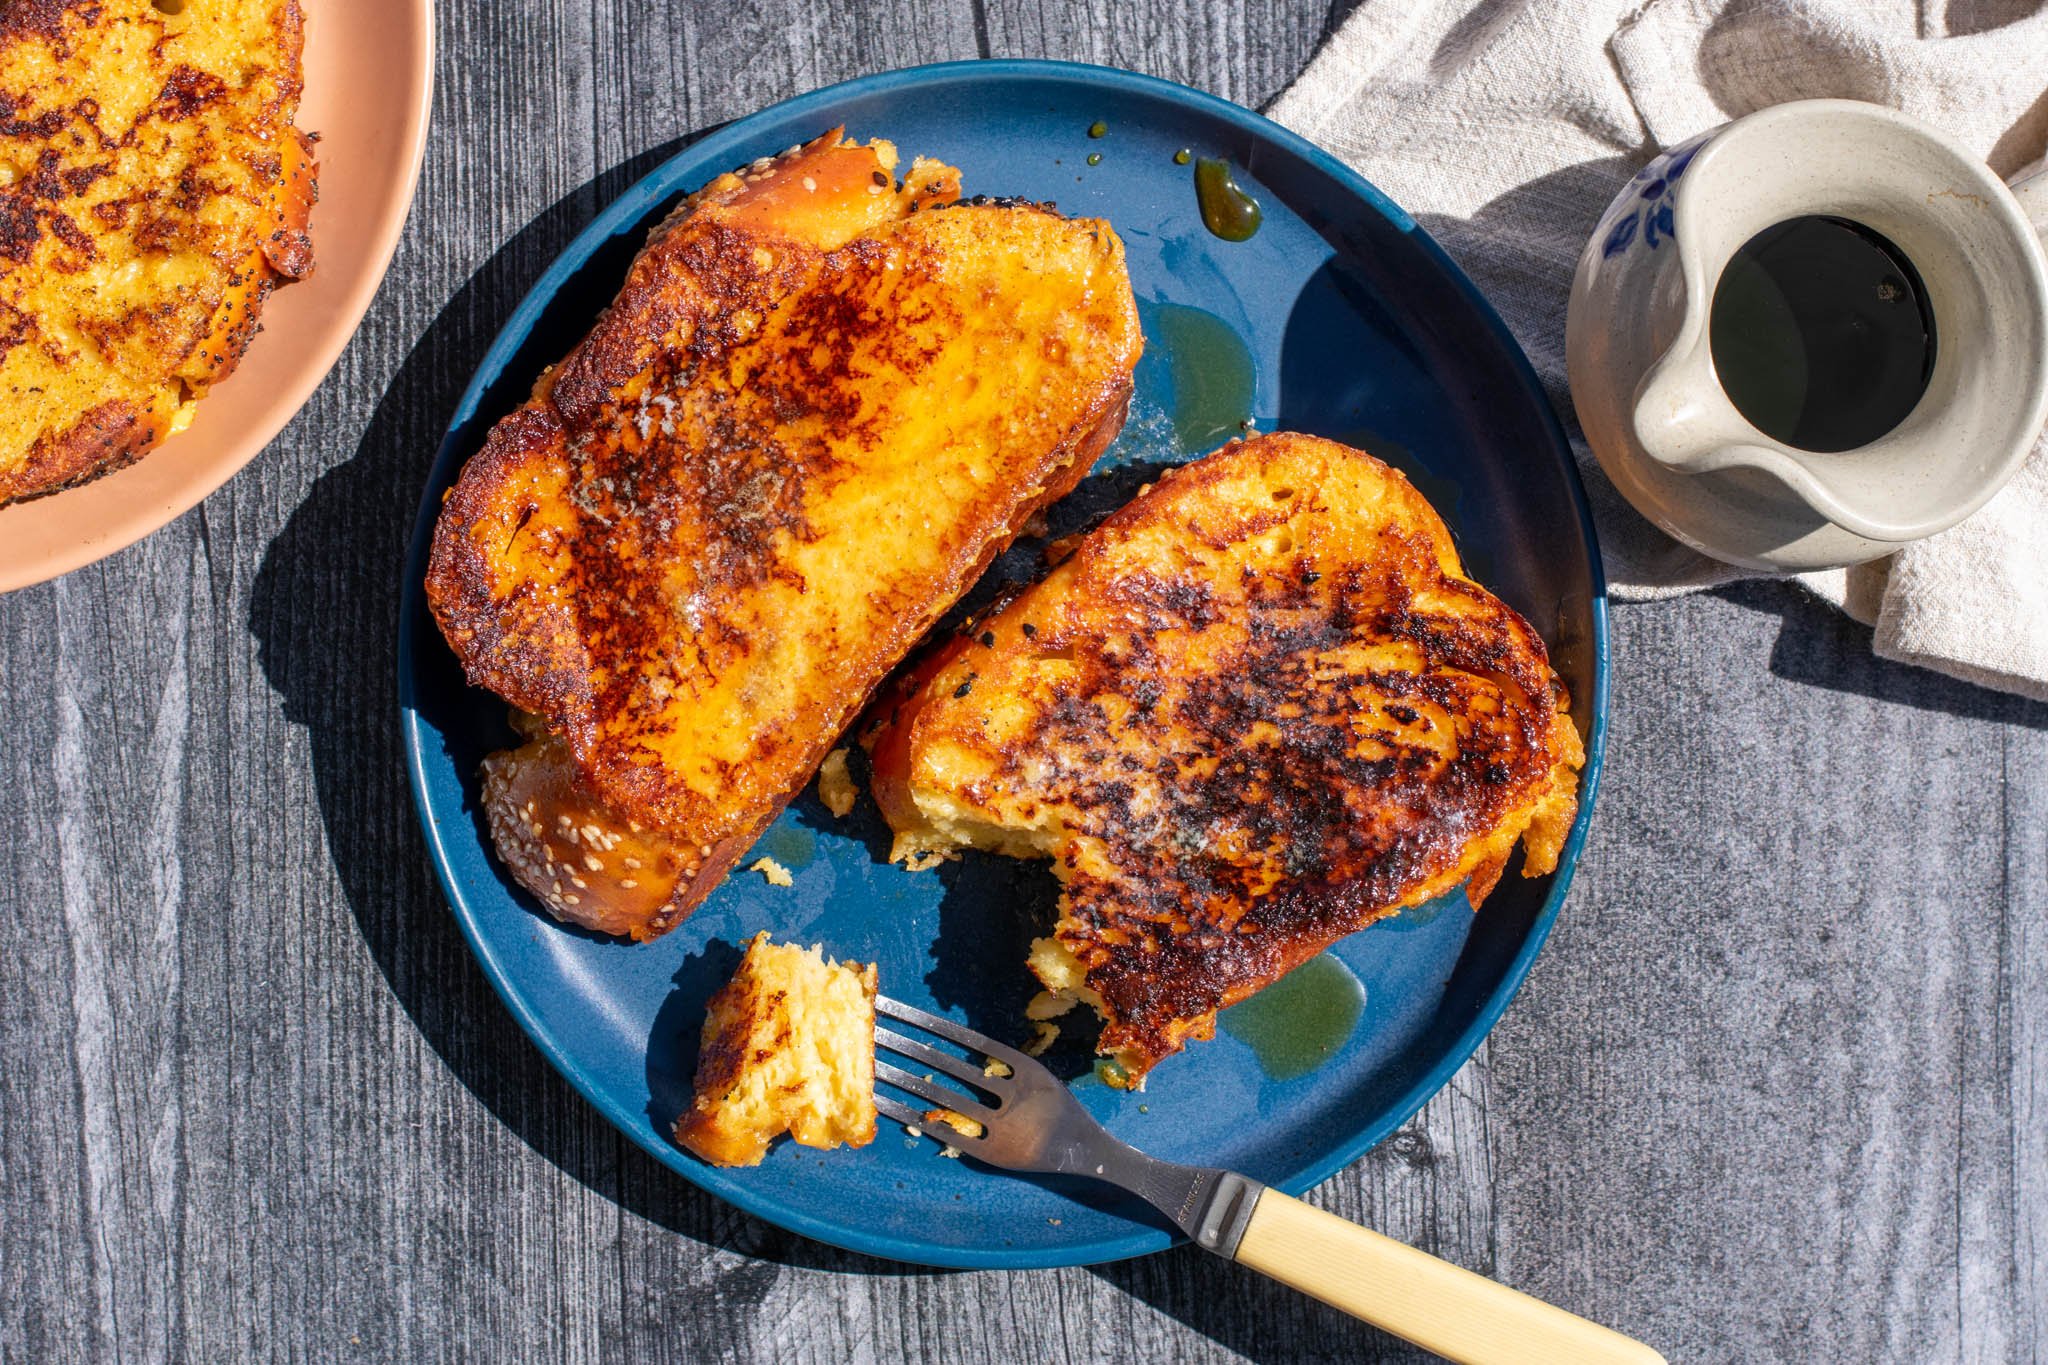
This sourdough challah also makes excellent French Toast. Sign up for my newsletter to get my Sourdough Challah French Toast recipe!
🛠 Tools Needed
- Baking Scale
- Measuring ingredients by weight is much more accurate and consistent than volume measurements.
- Sheet Pans, for baking
- Pastry Brush, for egg wash
- Brød and Taylor Folding Bread Proofer, optional but helpful
- This folding proofing box by Brod & Taylor is a game changer to keep your sourdough starter and doughs at the perfect temperature while proofing. It folds up easily, includes a humidity tray, and can even be used as a slow cooker.
🛒 Ingredients Needed
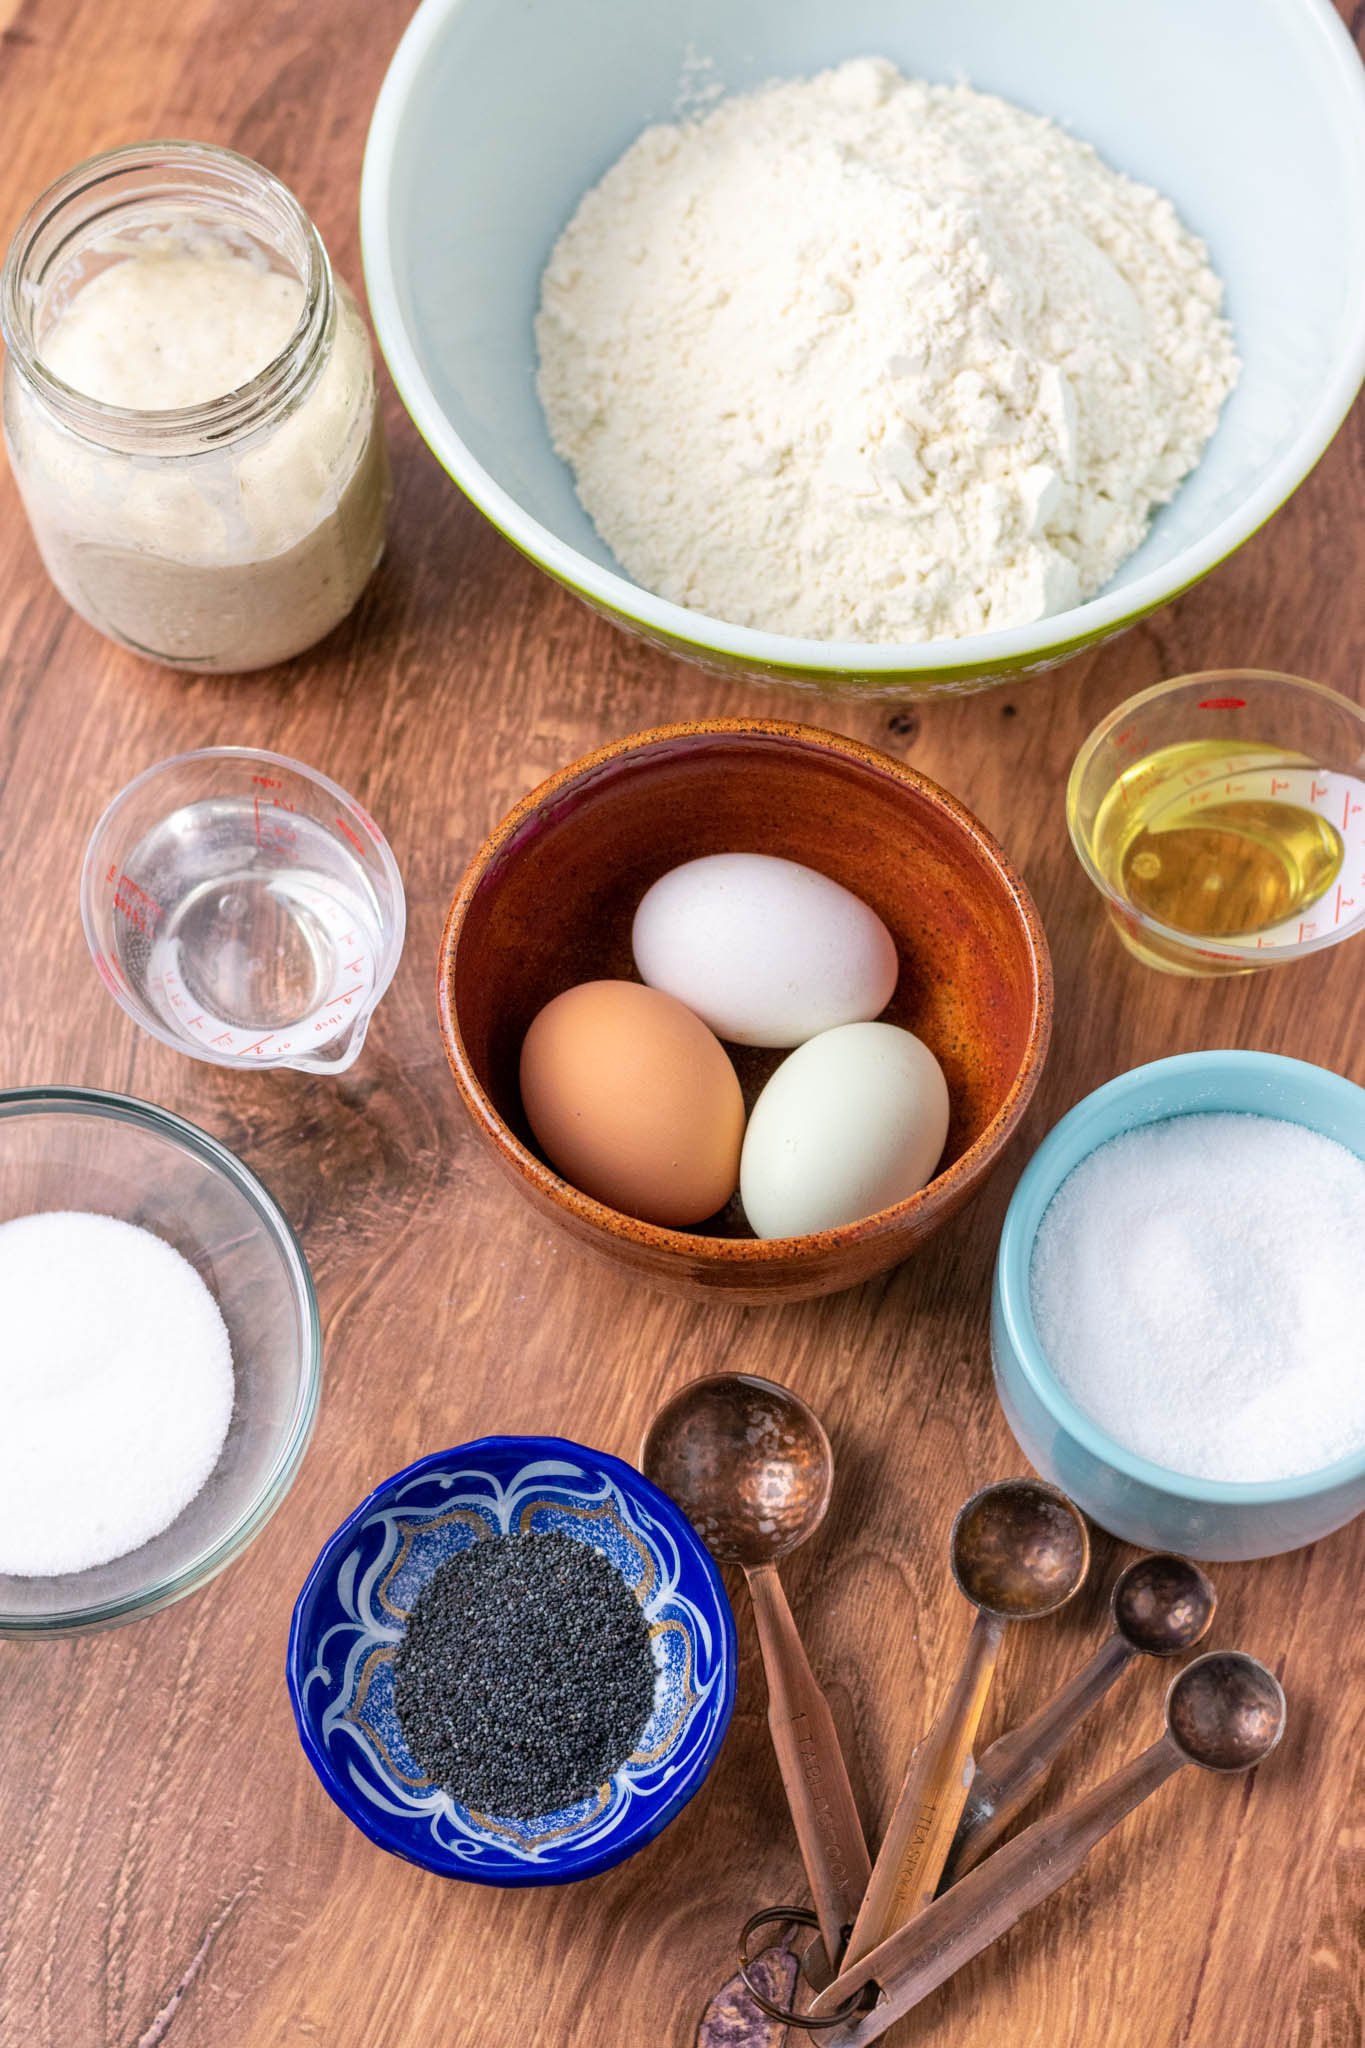
- Bread Flour
- I refer a high-protein bread flour, such as King Arthur, for enriched doughs like challah. It creates a chewy texture.
- However, you can substitute it with all-purpose flour or add in whole wheat flour for a heartier challah.
- Sourdough Starter
- If you do not have a sourdough starter, please refer to my How to Make a Sourdough Starter guide where I walk you through the entire process of making a sourdough starter from scratch.
- Water
- Eggs, for binding the ingredients, adding richness, and egg wash for a shiny loaf.
- Vegetable Oil
- Traditional challah does not use dairy products, so oil is the preferred fat to keep the braided bread moist and rich.
- Granulated Sugar
- For a little sweetness in this enriched dough.
- Salt
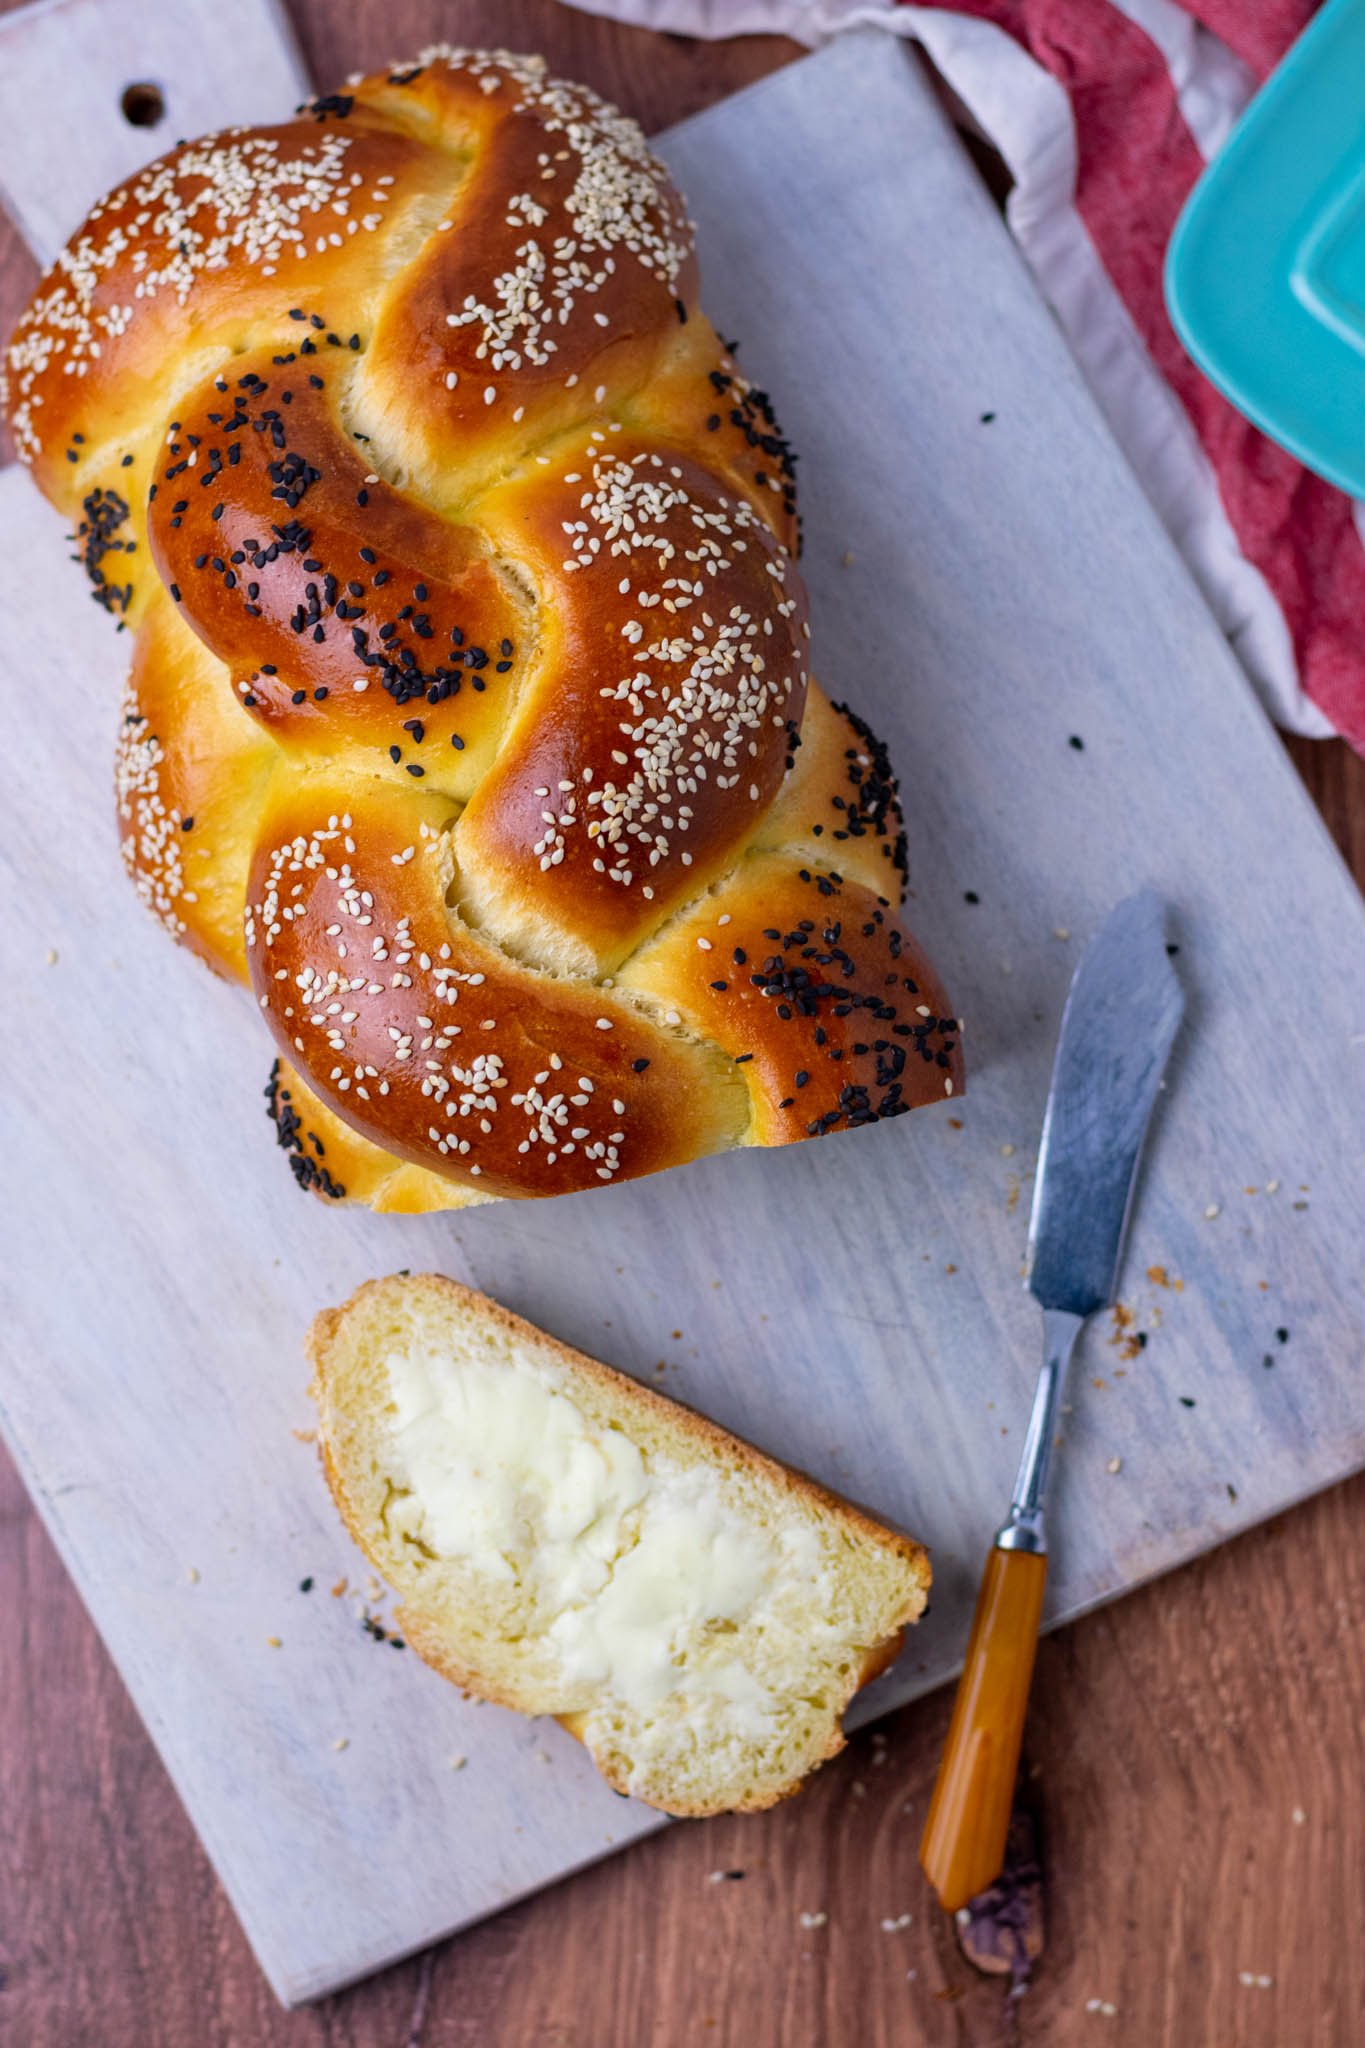
- Toppings: my favorite challah toppings include sesame seeds, poppy seeds, and flaky salt.
⏰ Sample Baking Schedule
The chart below is a sample baking schedule for an evening challah with dinner (or Shabbat) that works decently for my schedule. Many steps are flexible, depending on your own day-to-day schedule.
For example, you can make the levain the night before by using a smaller amount of starter and higher ratio of flour and water.
You can also proof the dough overnight in the refrigerator for up to two days to bake on your own time.
Schedule
- Make Levain: 9am
- Mix and Knead: 2pm
- First Proof (bulk fermentation): 2:30-7:30pm
- Overnight Cold Proof
- Shape, Braid, and Final Proof: next day, 12pm-4pm
- Bake: 4-4:35pm
👨🍳 How to Make Sourdough Challah
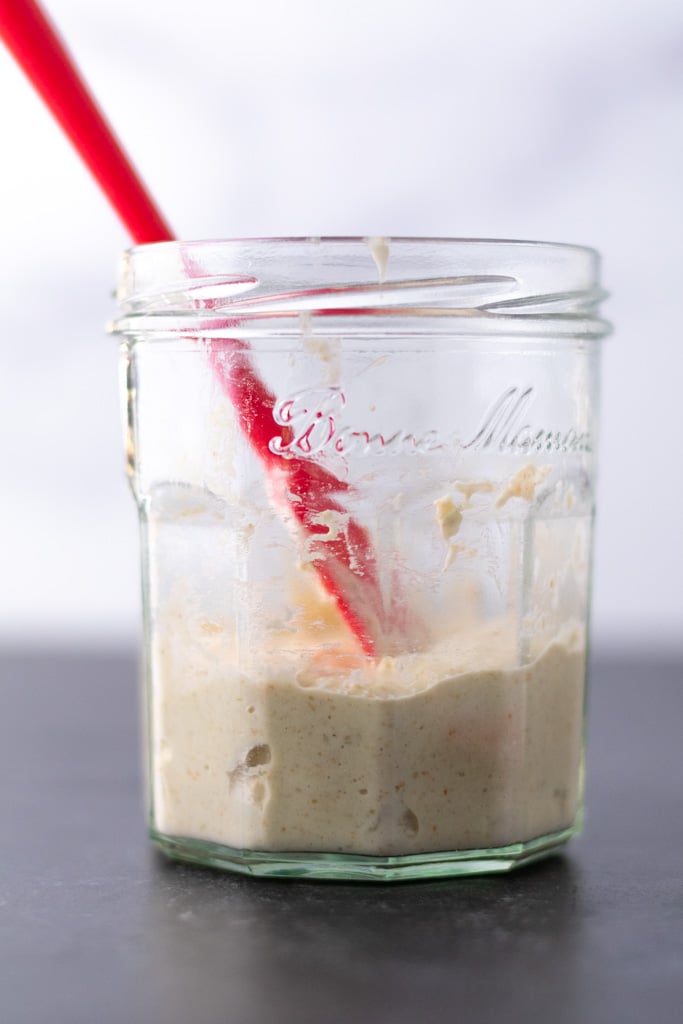
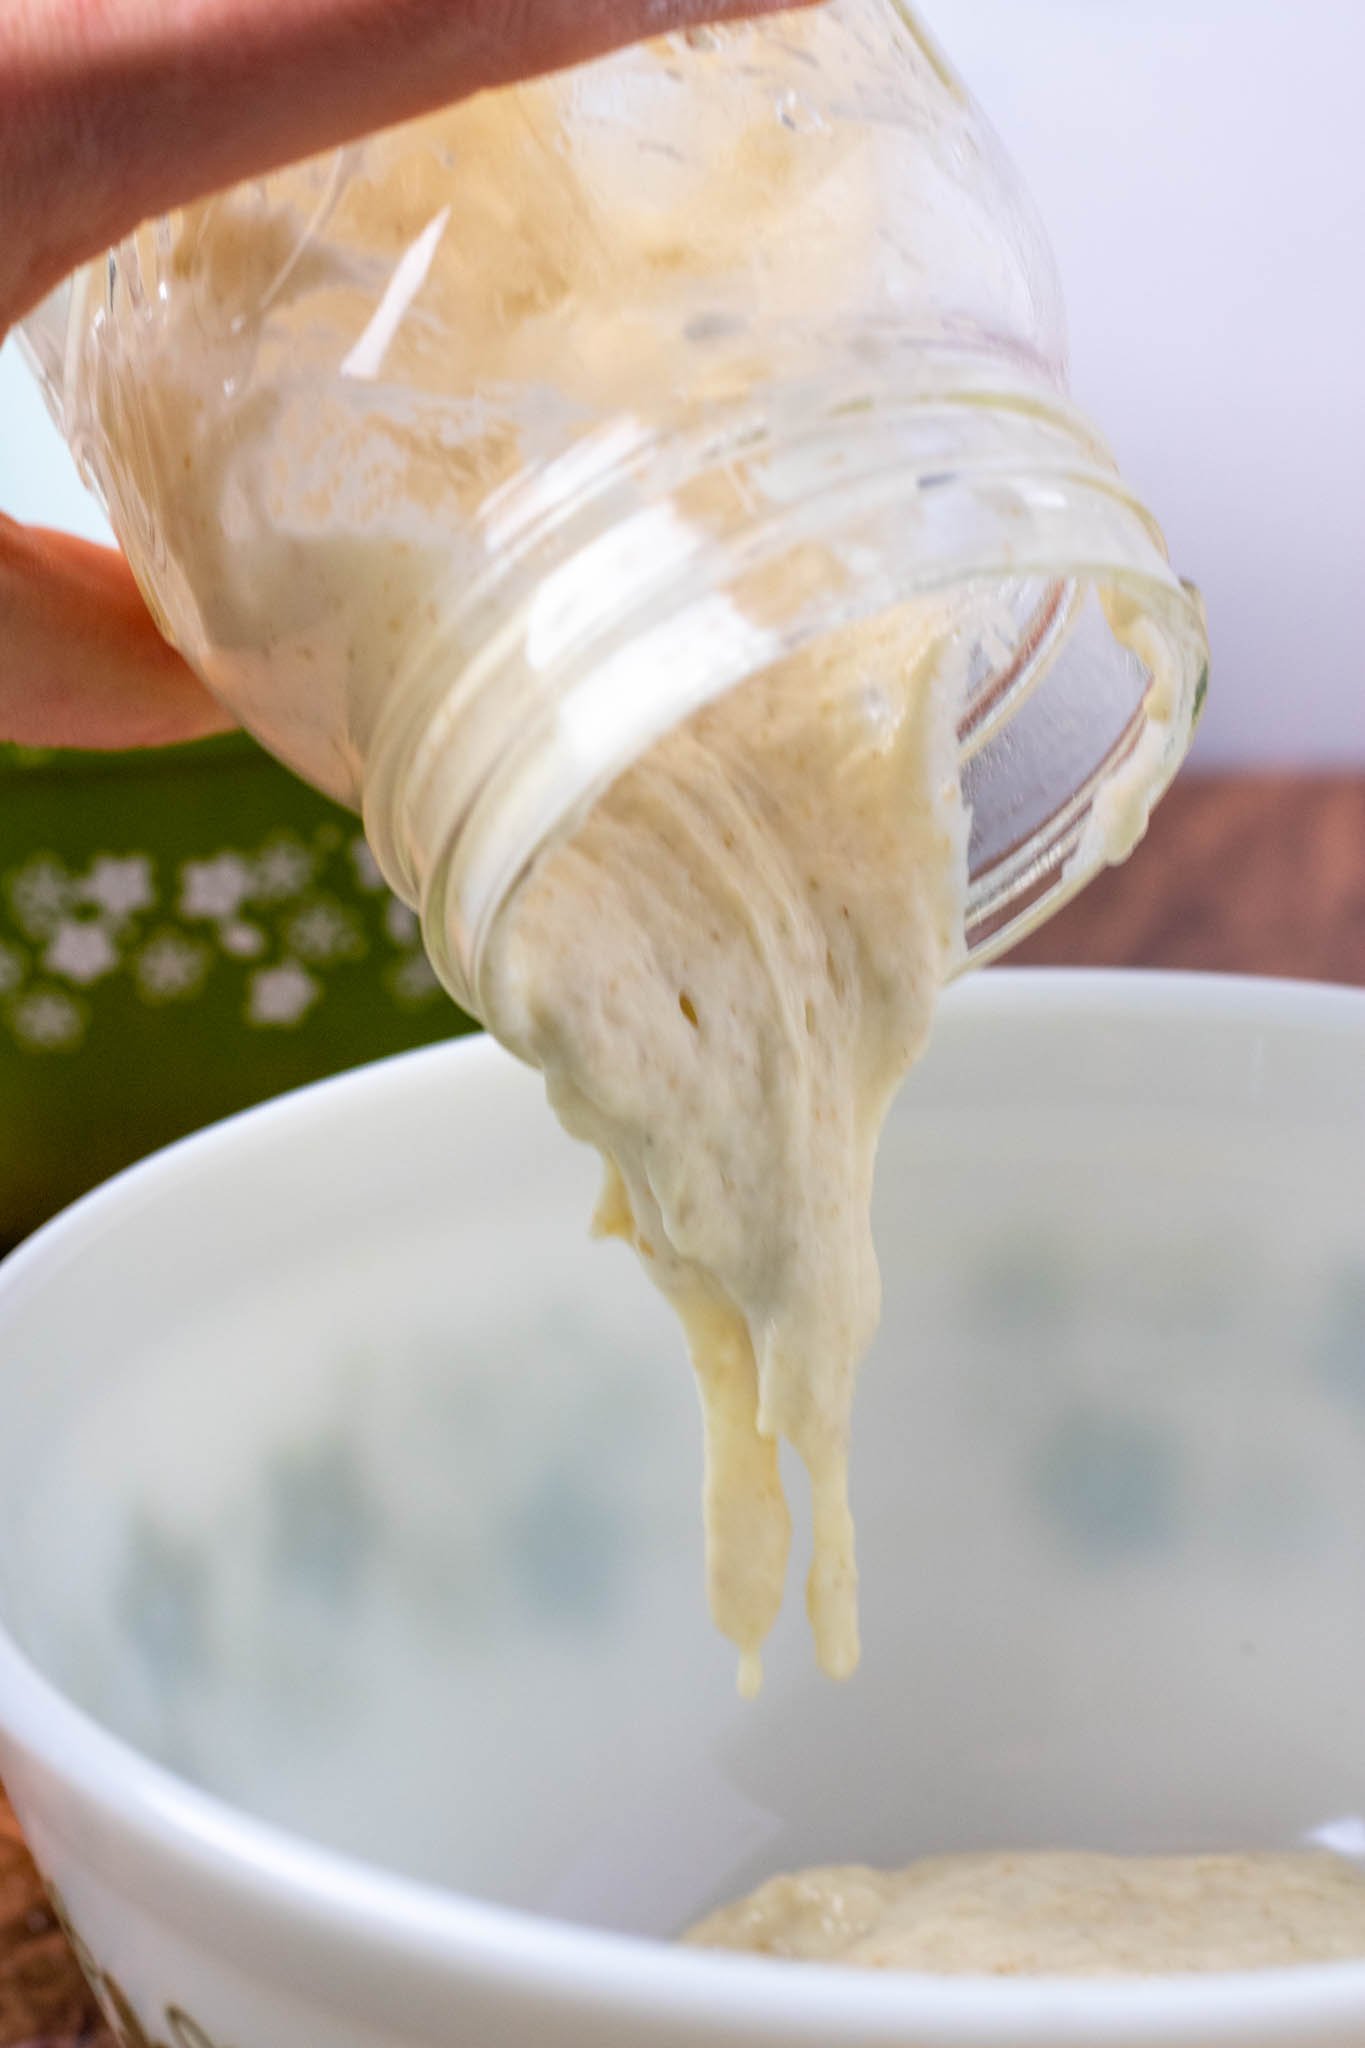
1. Build the levain
Note: Please refer to my guide on How To Make A Sourdough Starter if you do not have a sourdough starter.
My guide on sourdough levains explains the difference between a starter and a levain. Learn how to make a stronger sourdough starter with my sourdough starter tips guide.

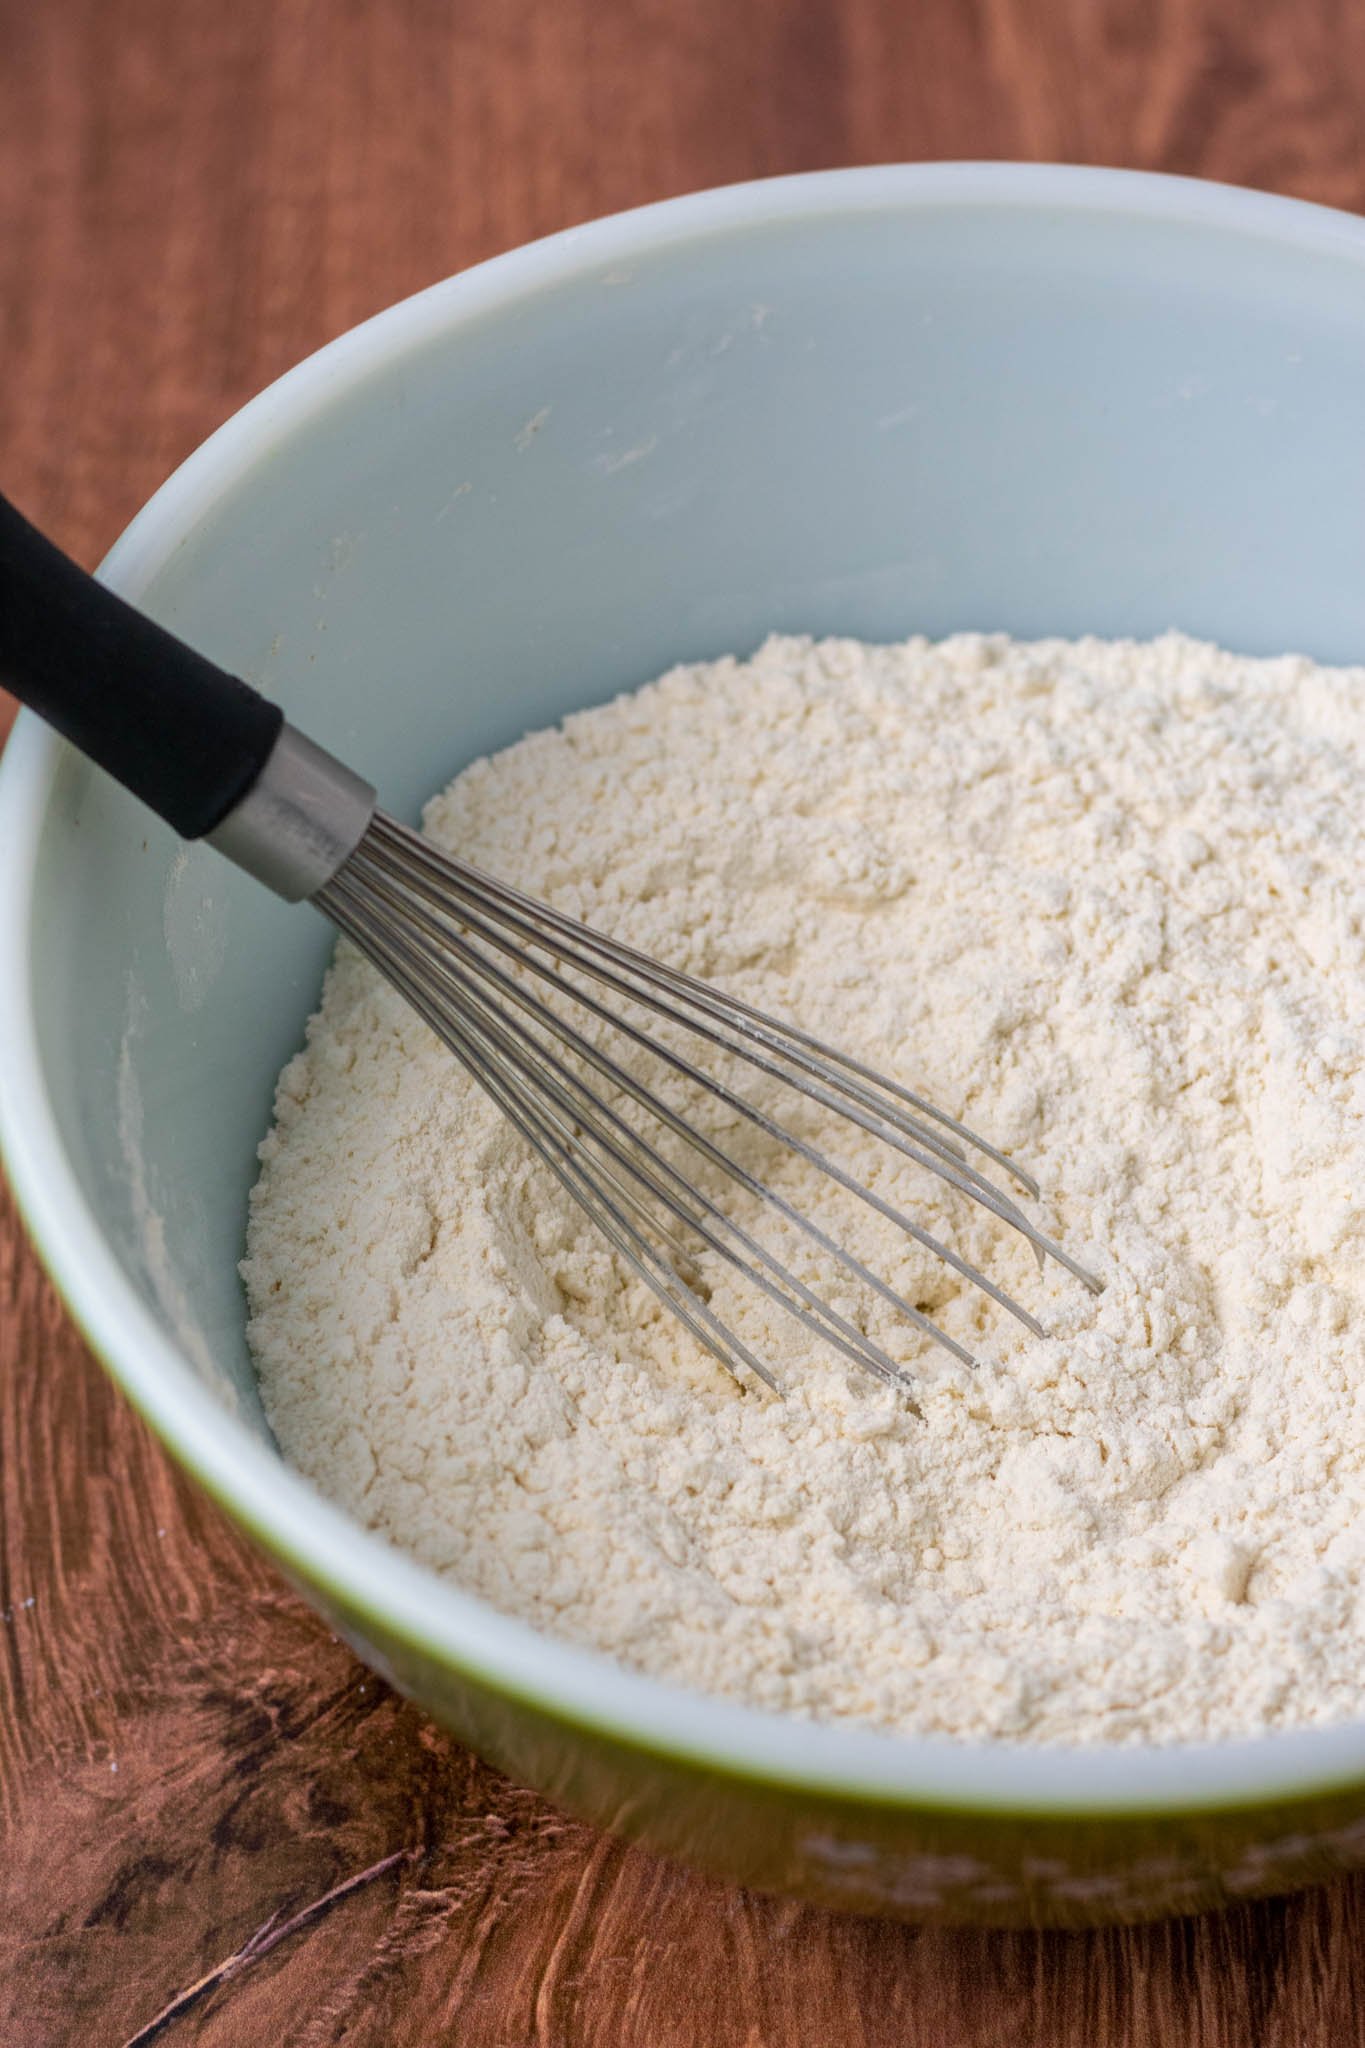
2. Mix the dry ingredients
- 340g bread flour
- 40g granulated sugar
- 7g sea salt
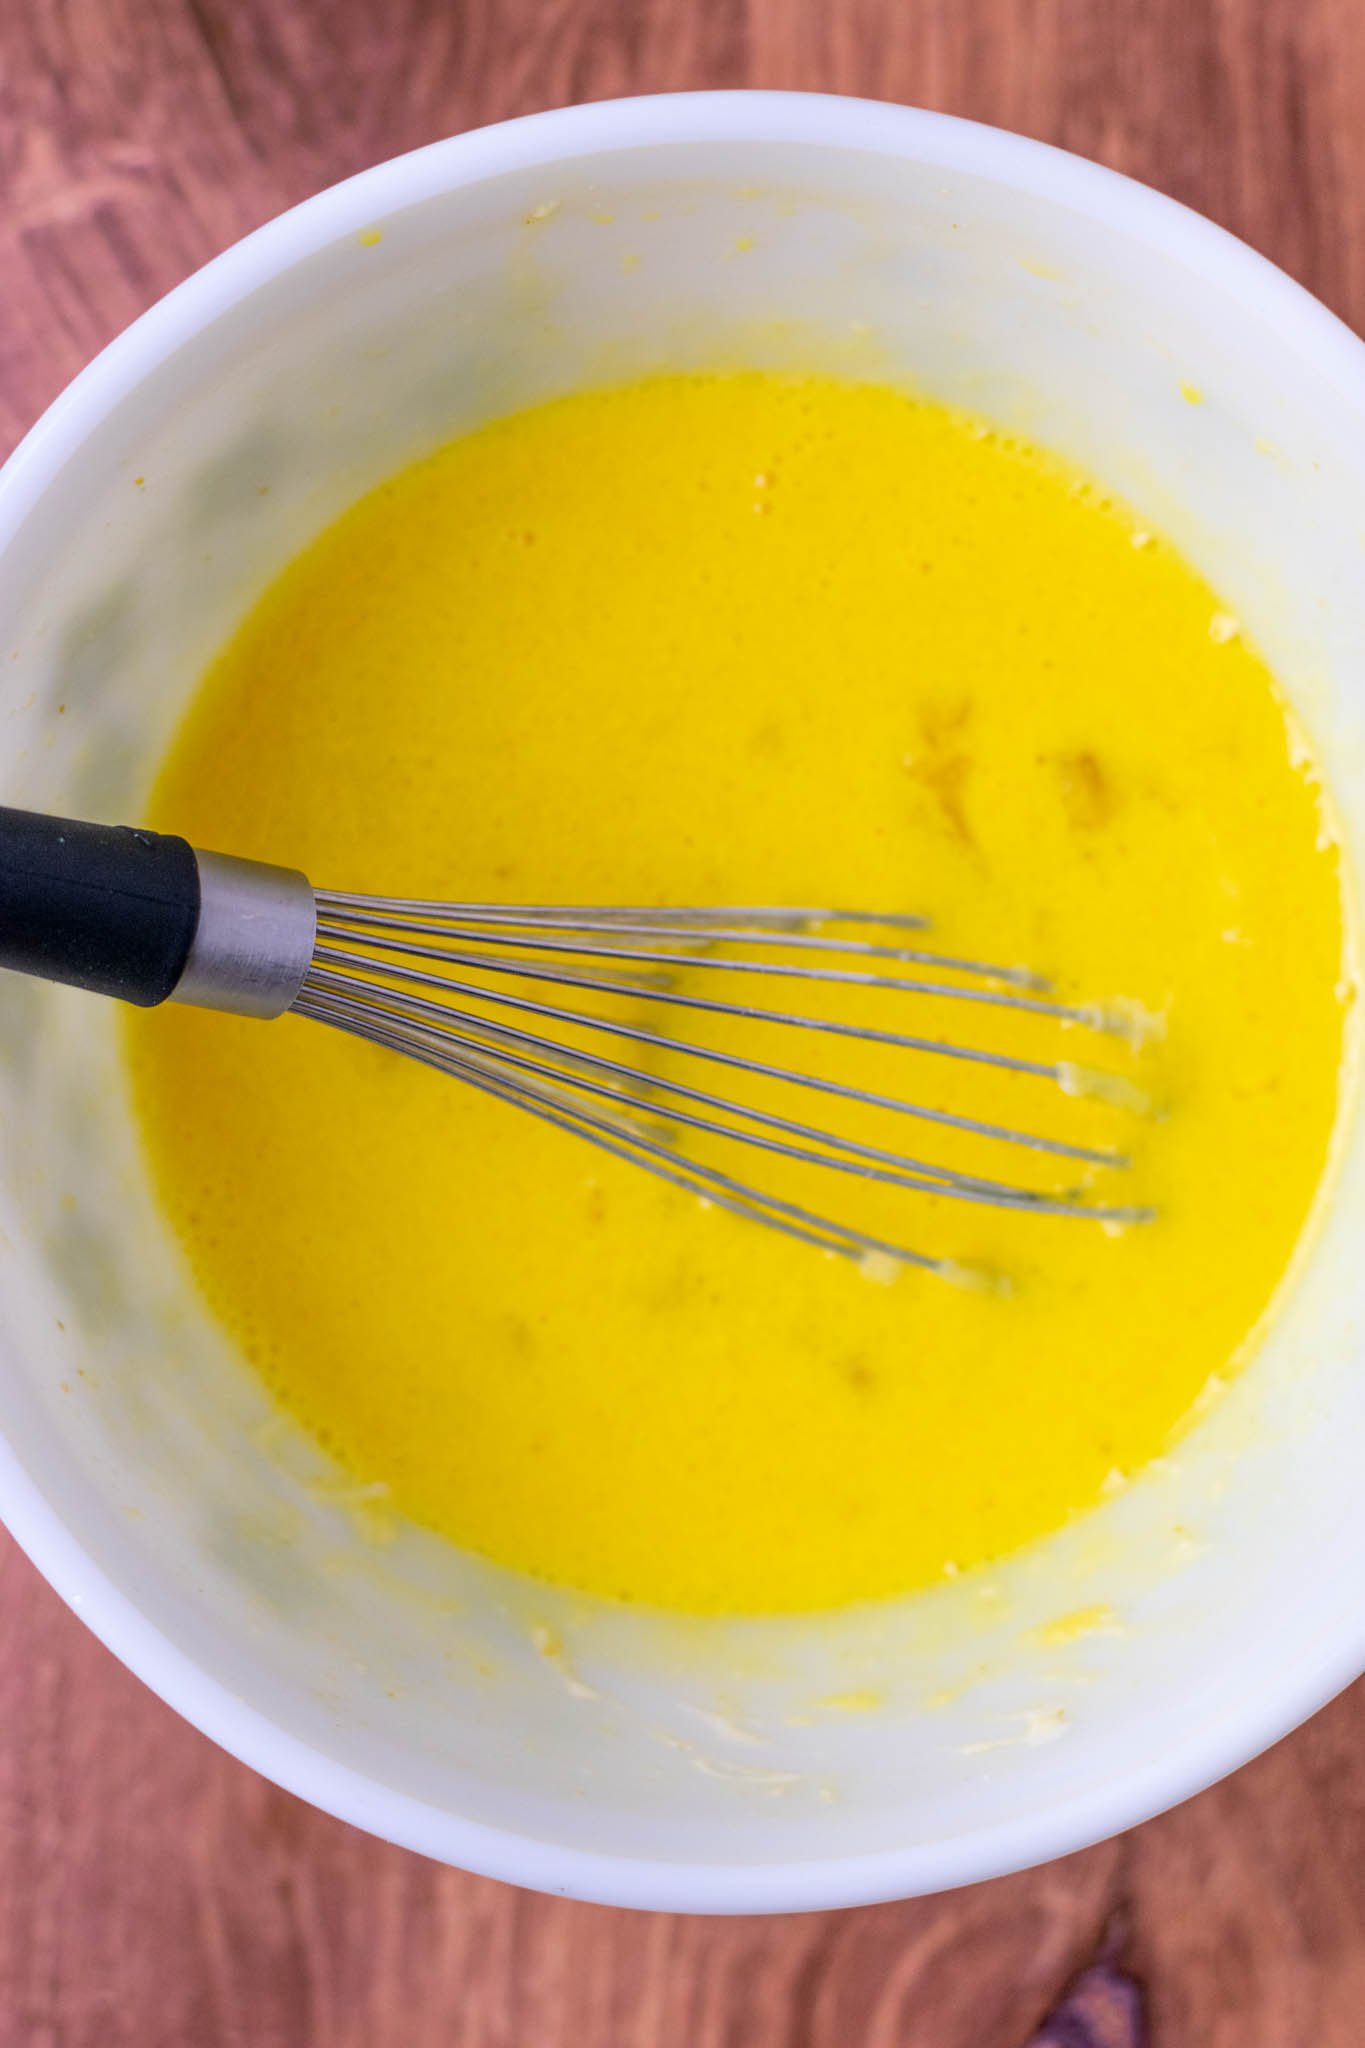
3. Whisk the wet ingredients
- Ripe levain (125-150g)
- 60g warm water
- 40g neutral oil
- Two large eggs
- One egg yolk
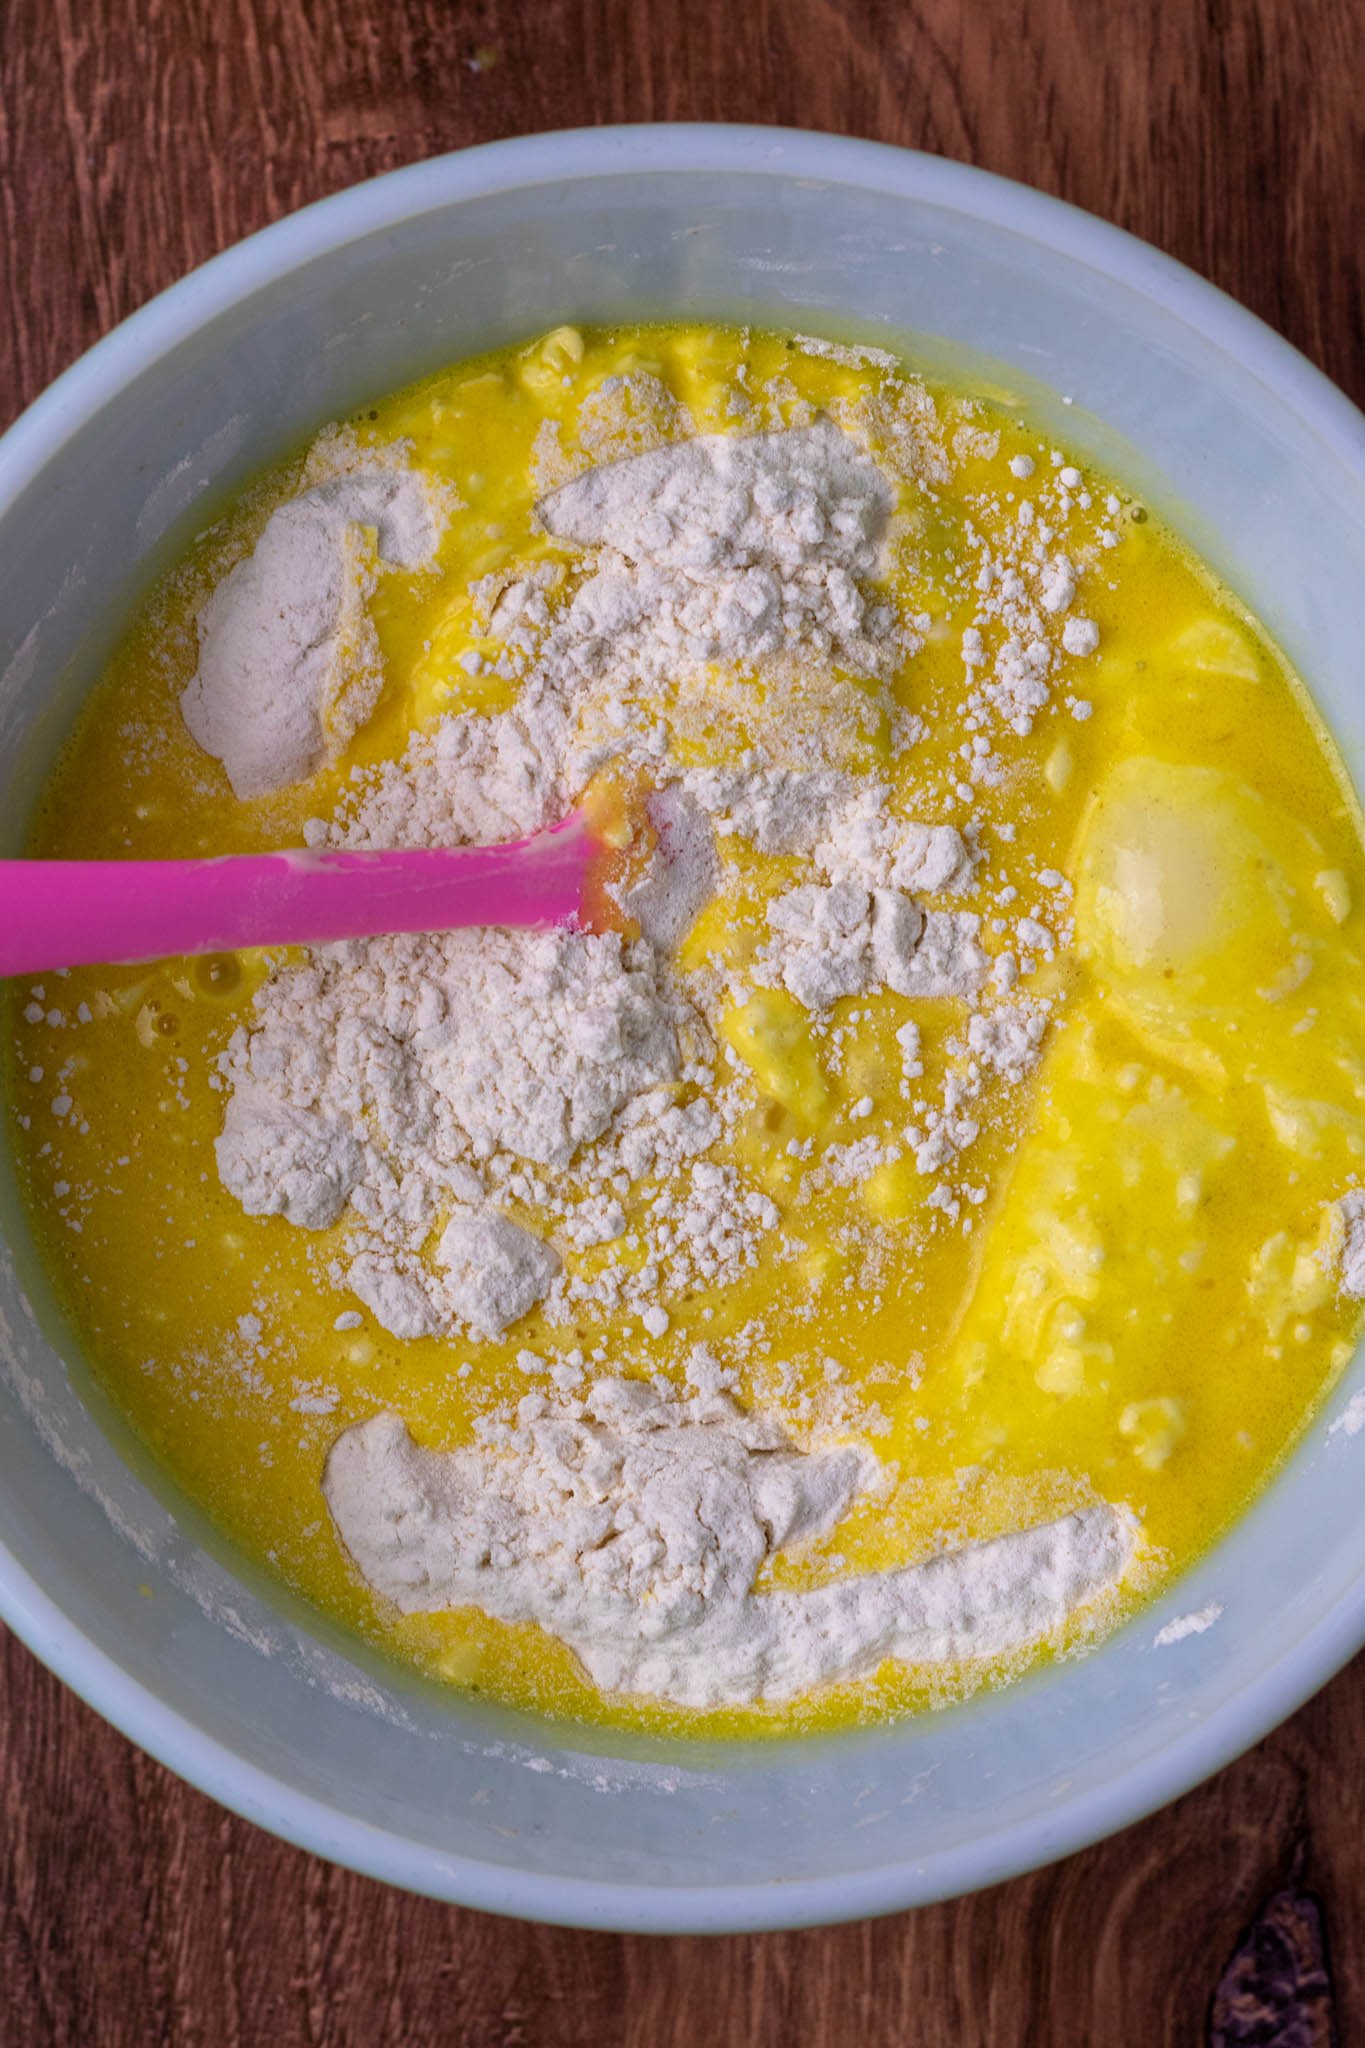
4. Mix the wet and dry ingredients
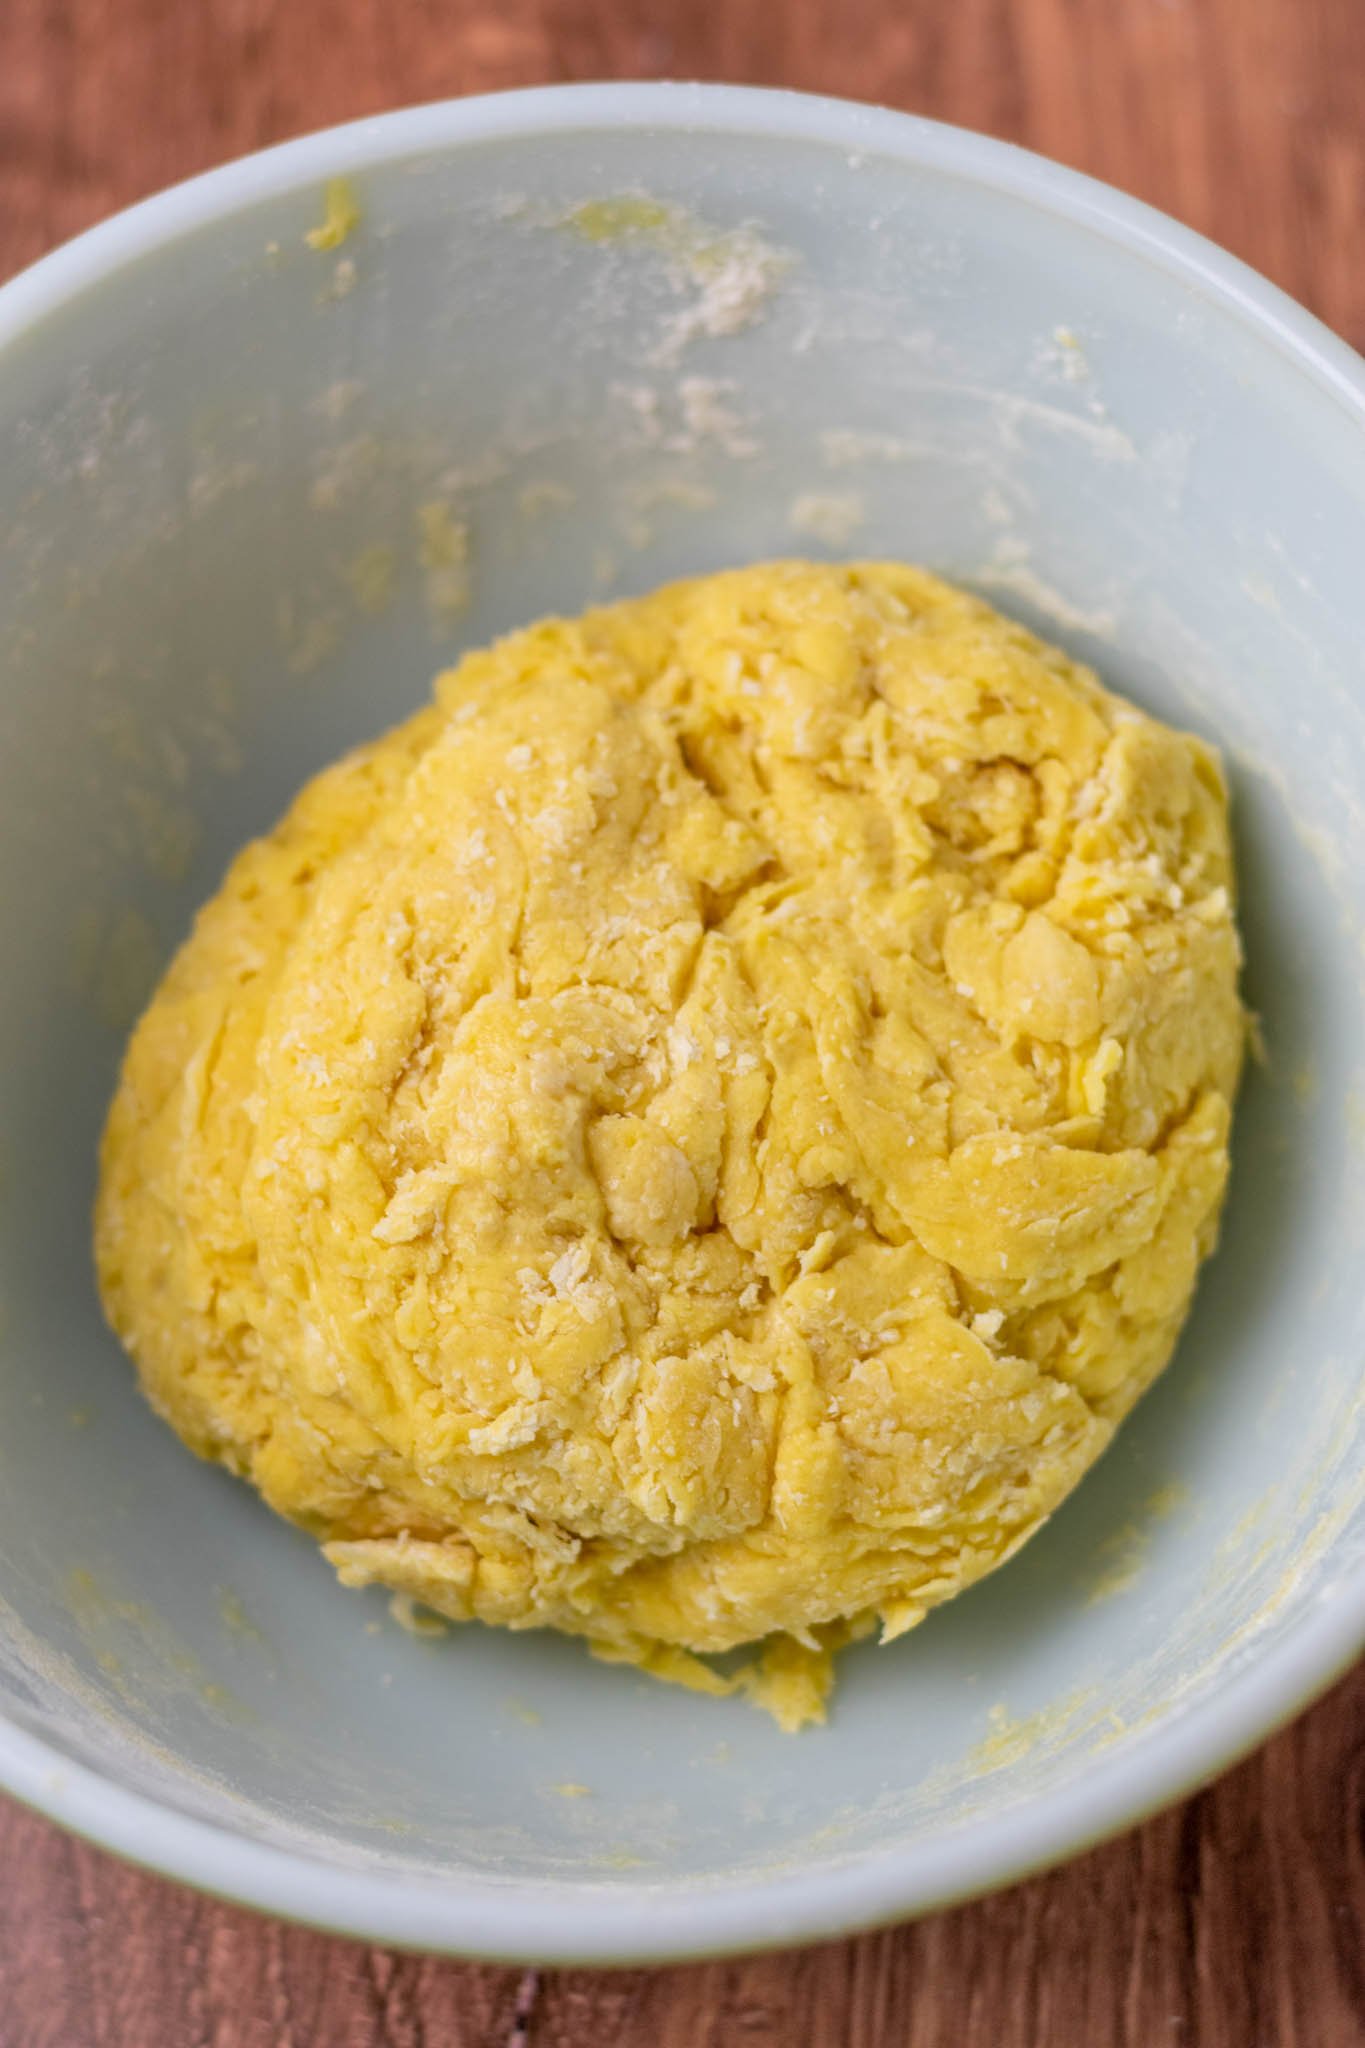
5. Knead
- At first, the dough will stick to your hands, and it will be tempting to flour the dough more. Don’t! As you knead the dough, it will continue to hydrate the flour; the dough will come together. Adding more flour to the dough during kneading will result in dense challah.
- If the dough is unbearably sticky, only lightly flour your hands (not the dough itself).
- This dough is stiff; I would not recommend using a mixer so it doesn’t overheat.
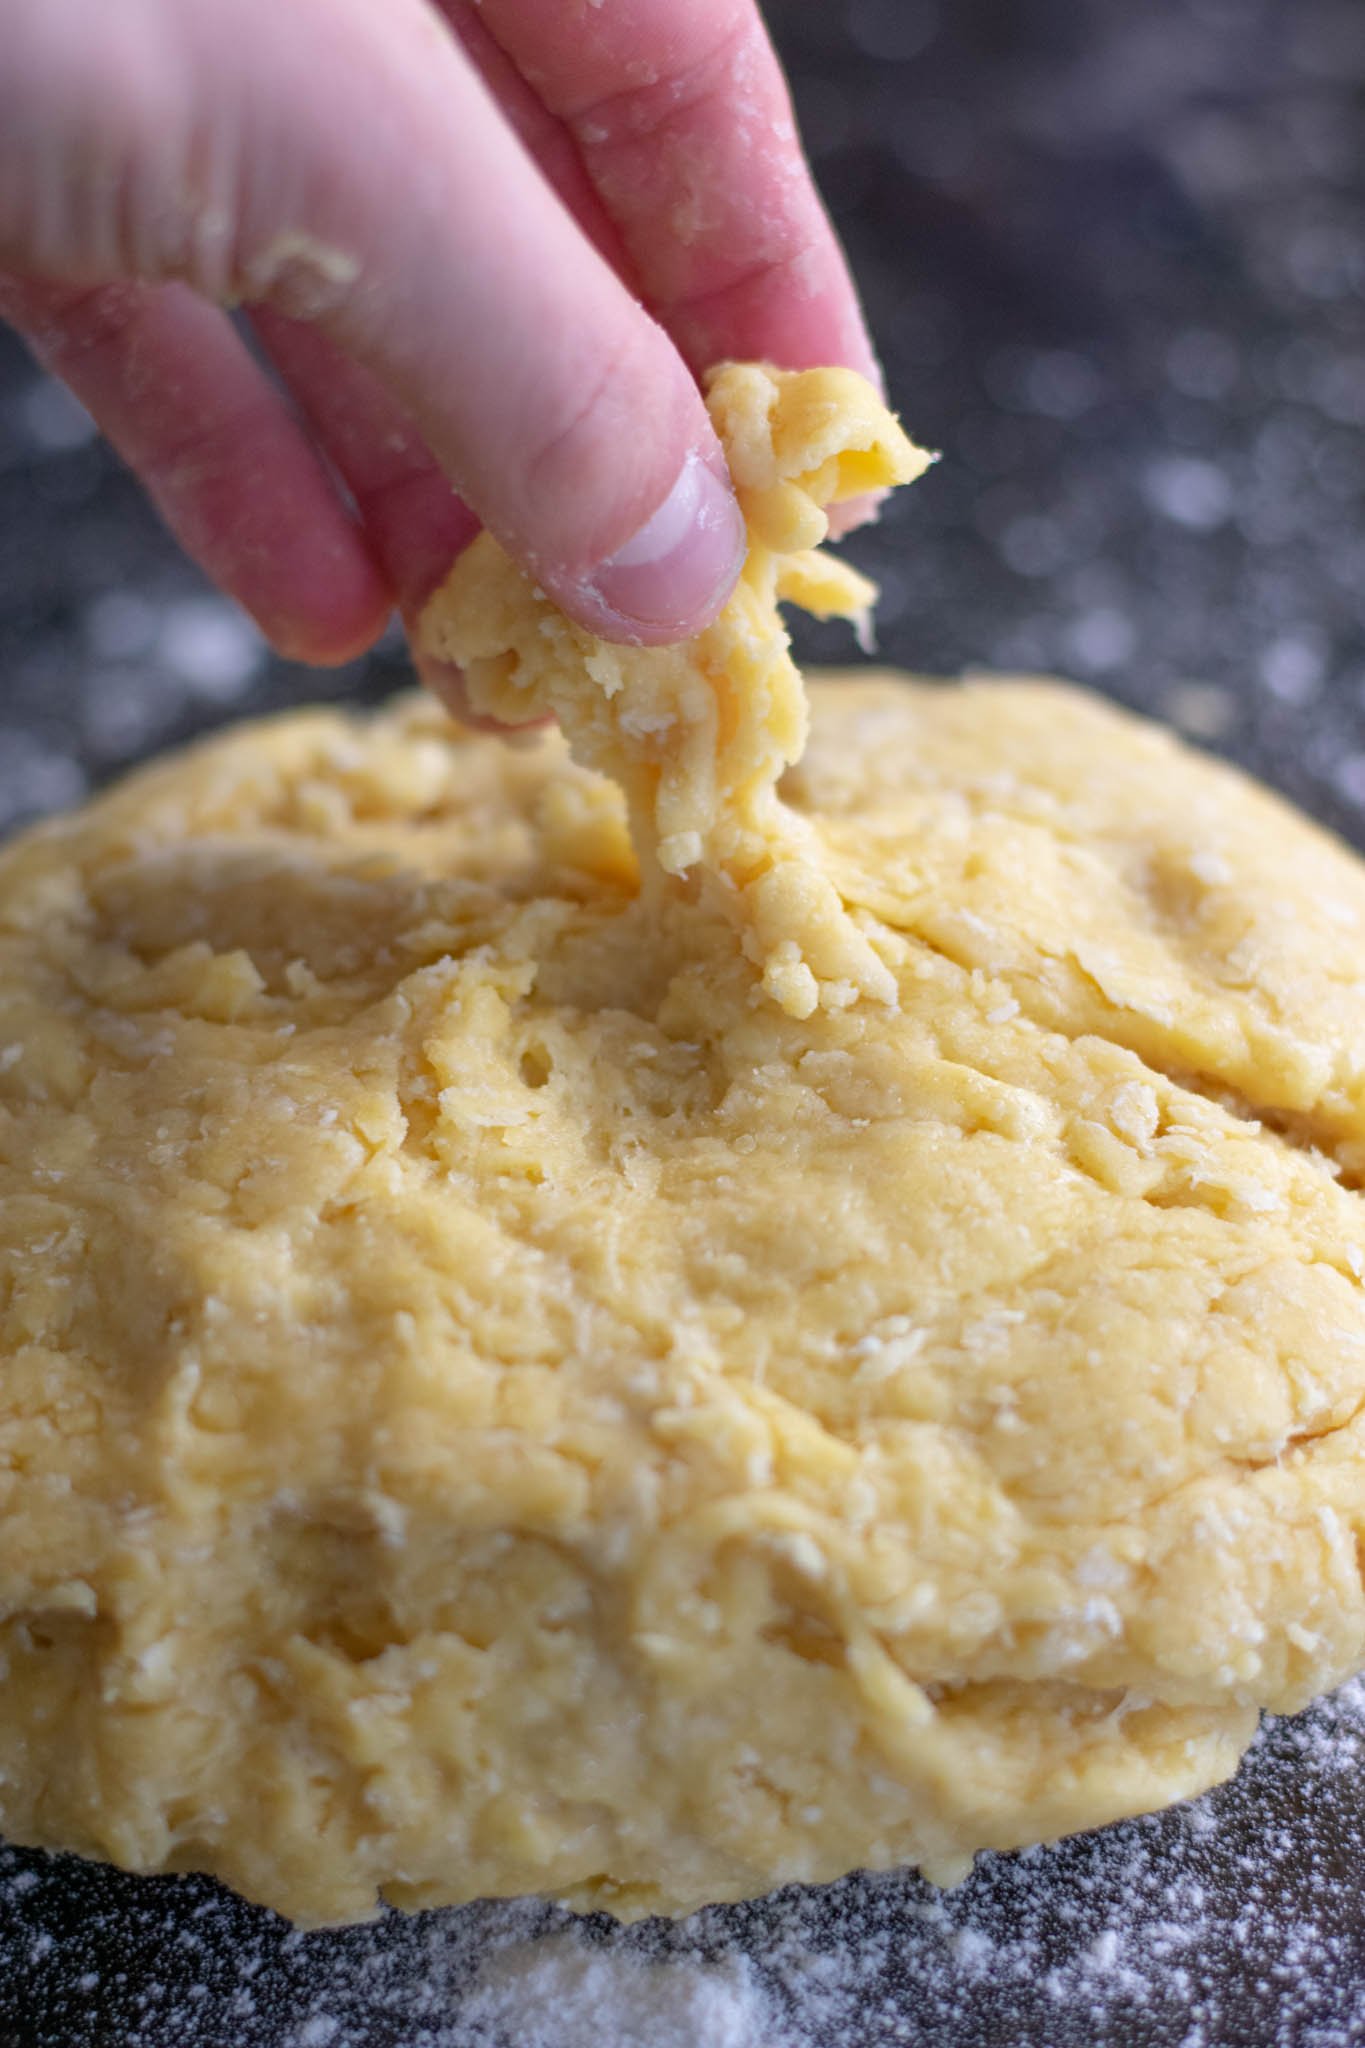
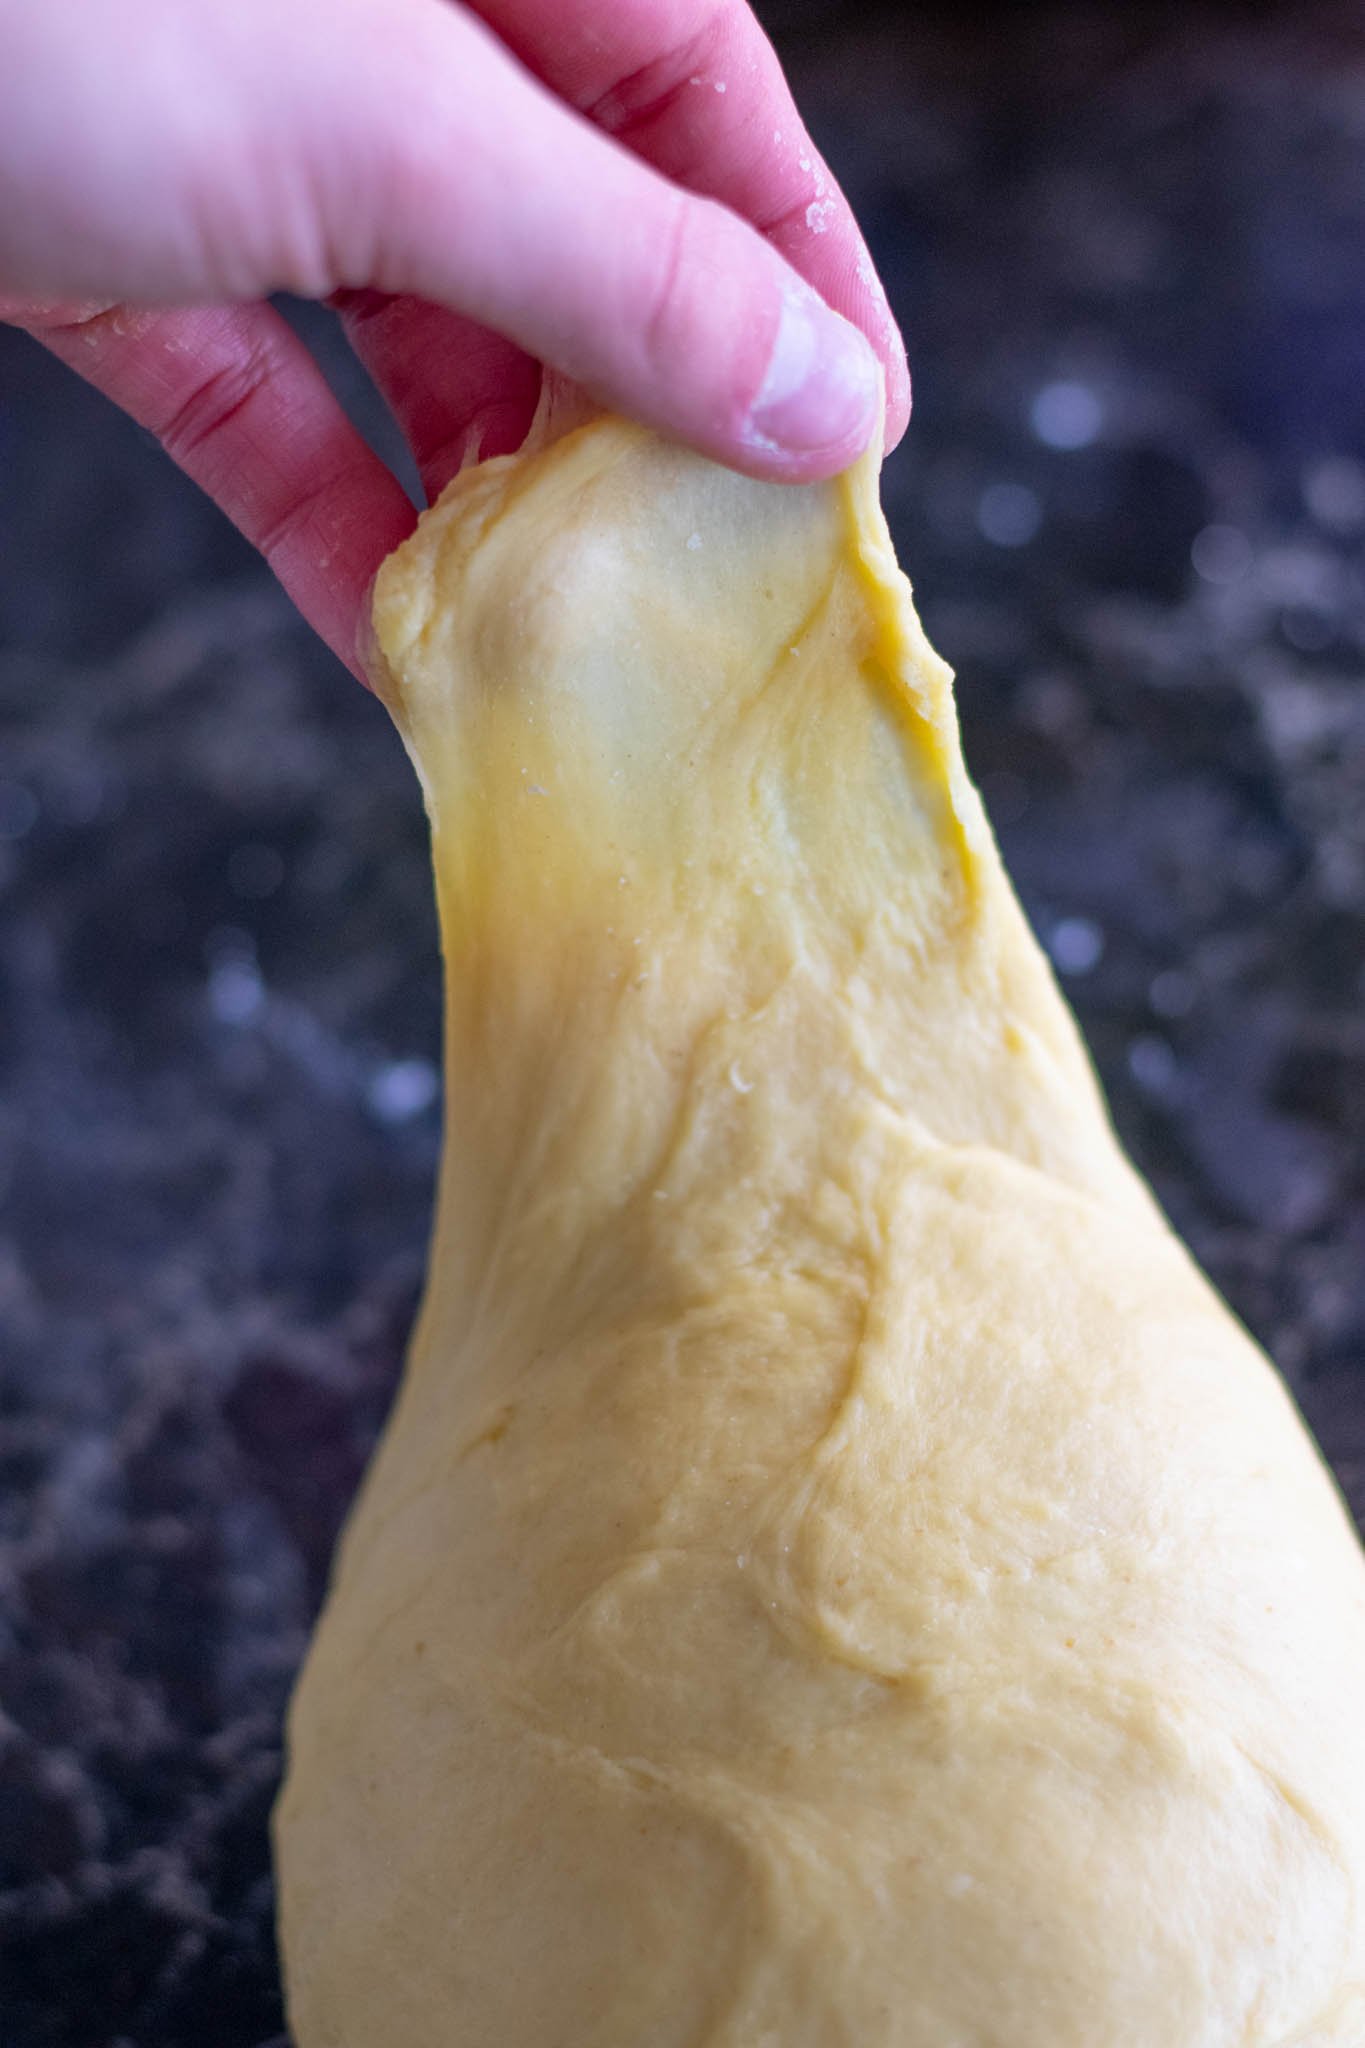
Knead the dough for about 8-10 minutes until the dough is completely smooth, and you can perform the windowpane test on a portion of the dough.
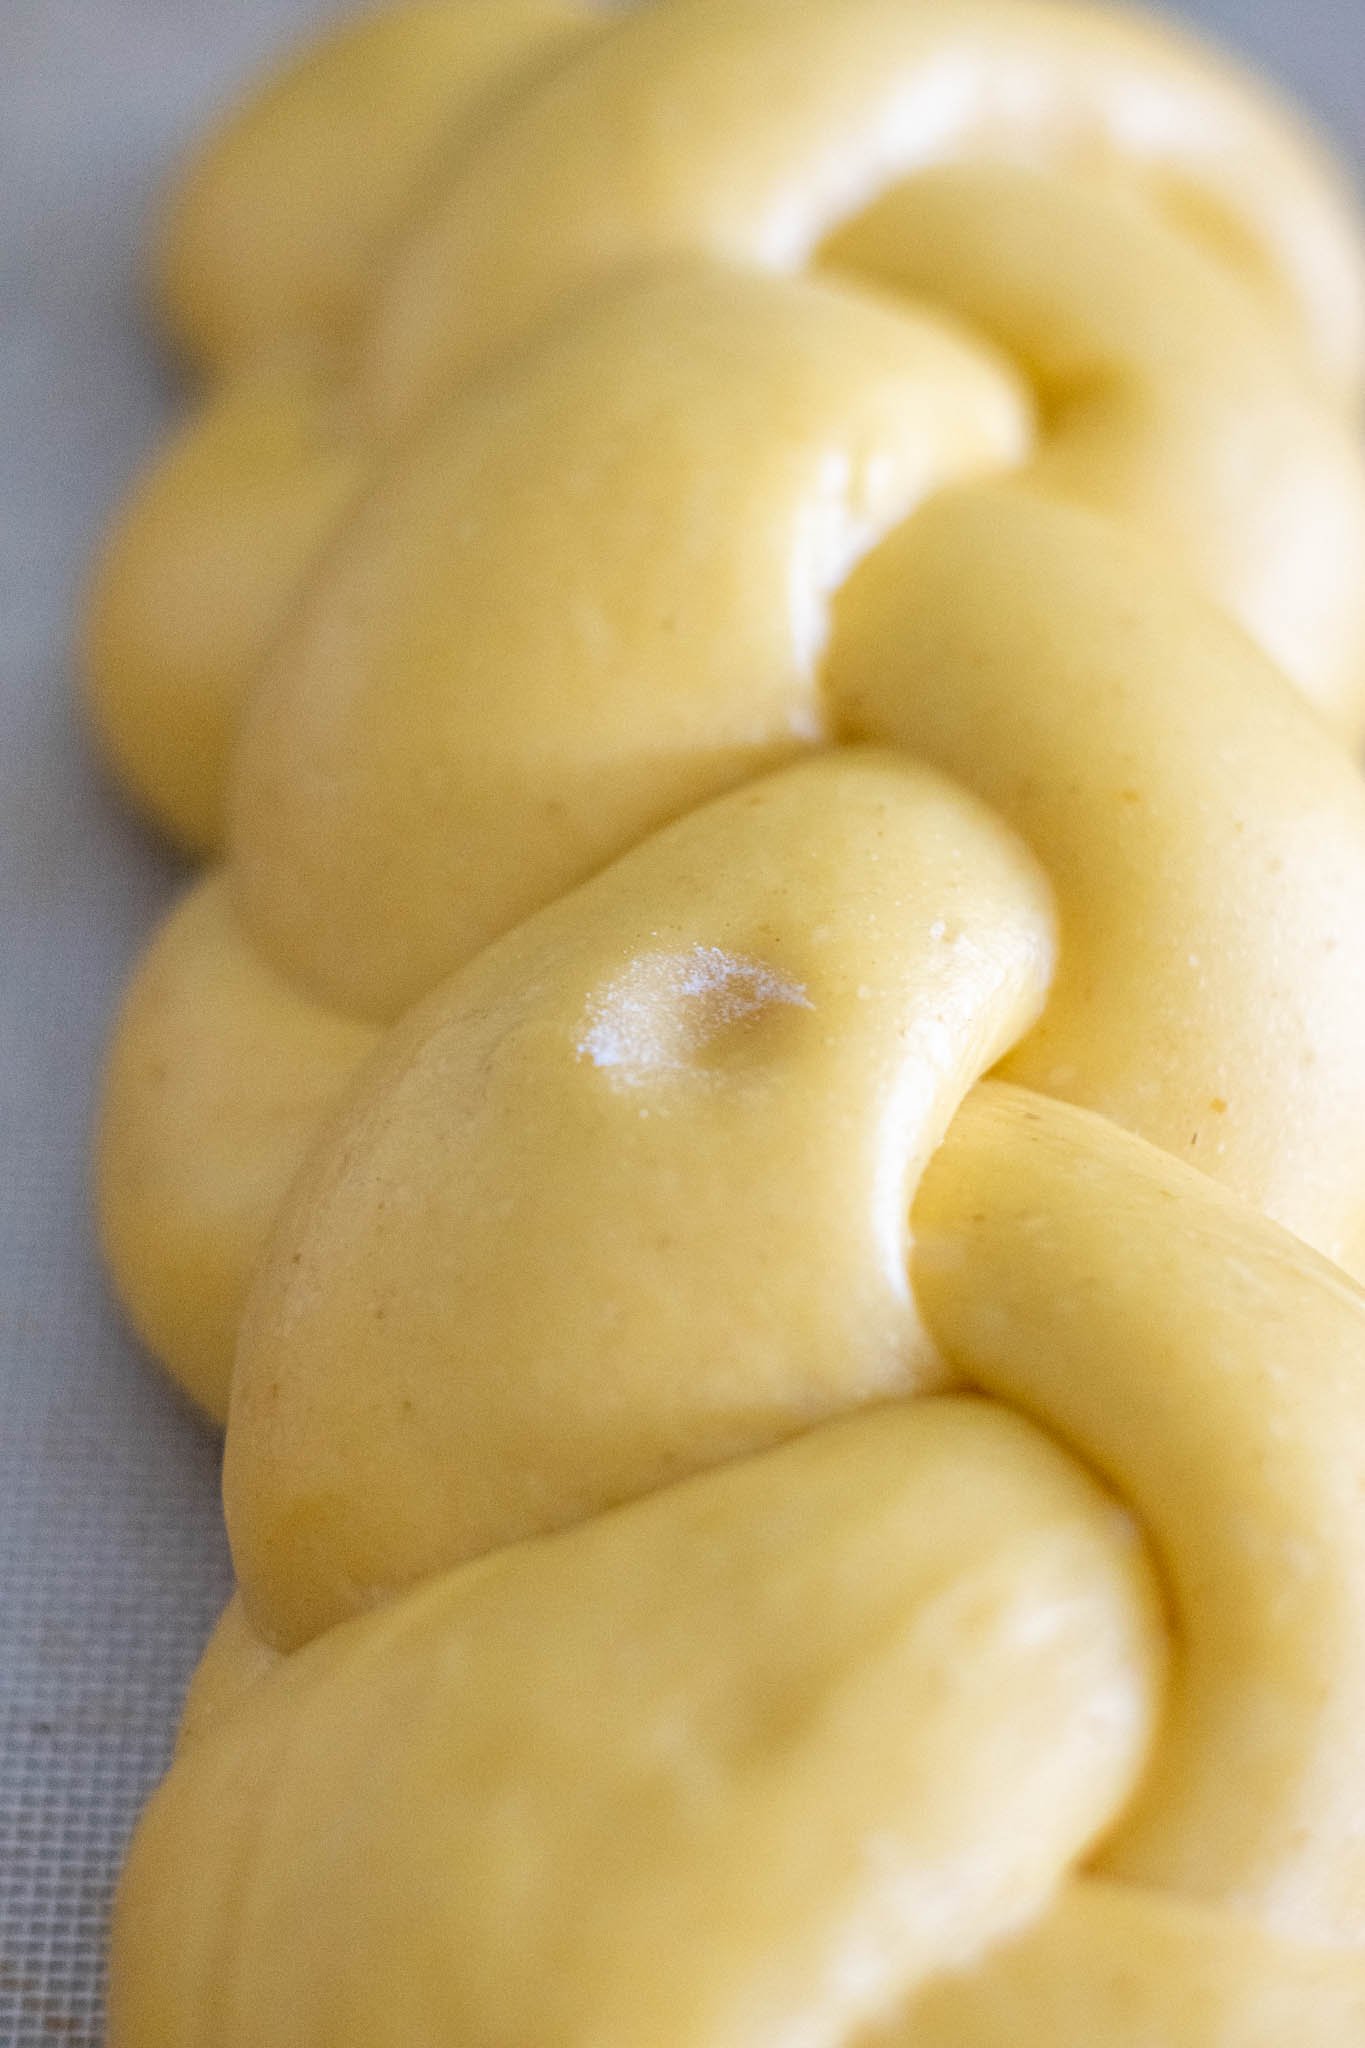
What is the windowpane test?
The windowpane test is a valuable tool to know if you’ve developed enough gluten in the dough. To perform the windowpane test, gently pull up a small portion of the dough between your fingers. If the dough quickly tears, it has not developed enough gluten, as seen in the photo below before kneading.
The dough passes the windowpane test if you can stretch it into a thin, translucent film that light can pass through without breaking (like a windowpane!).
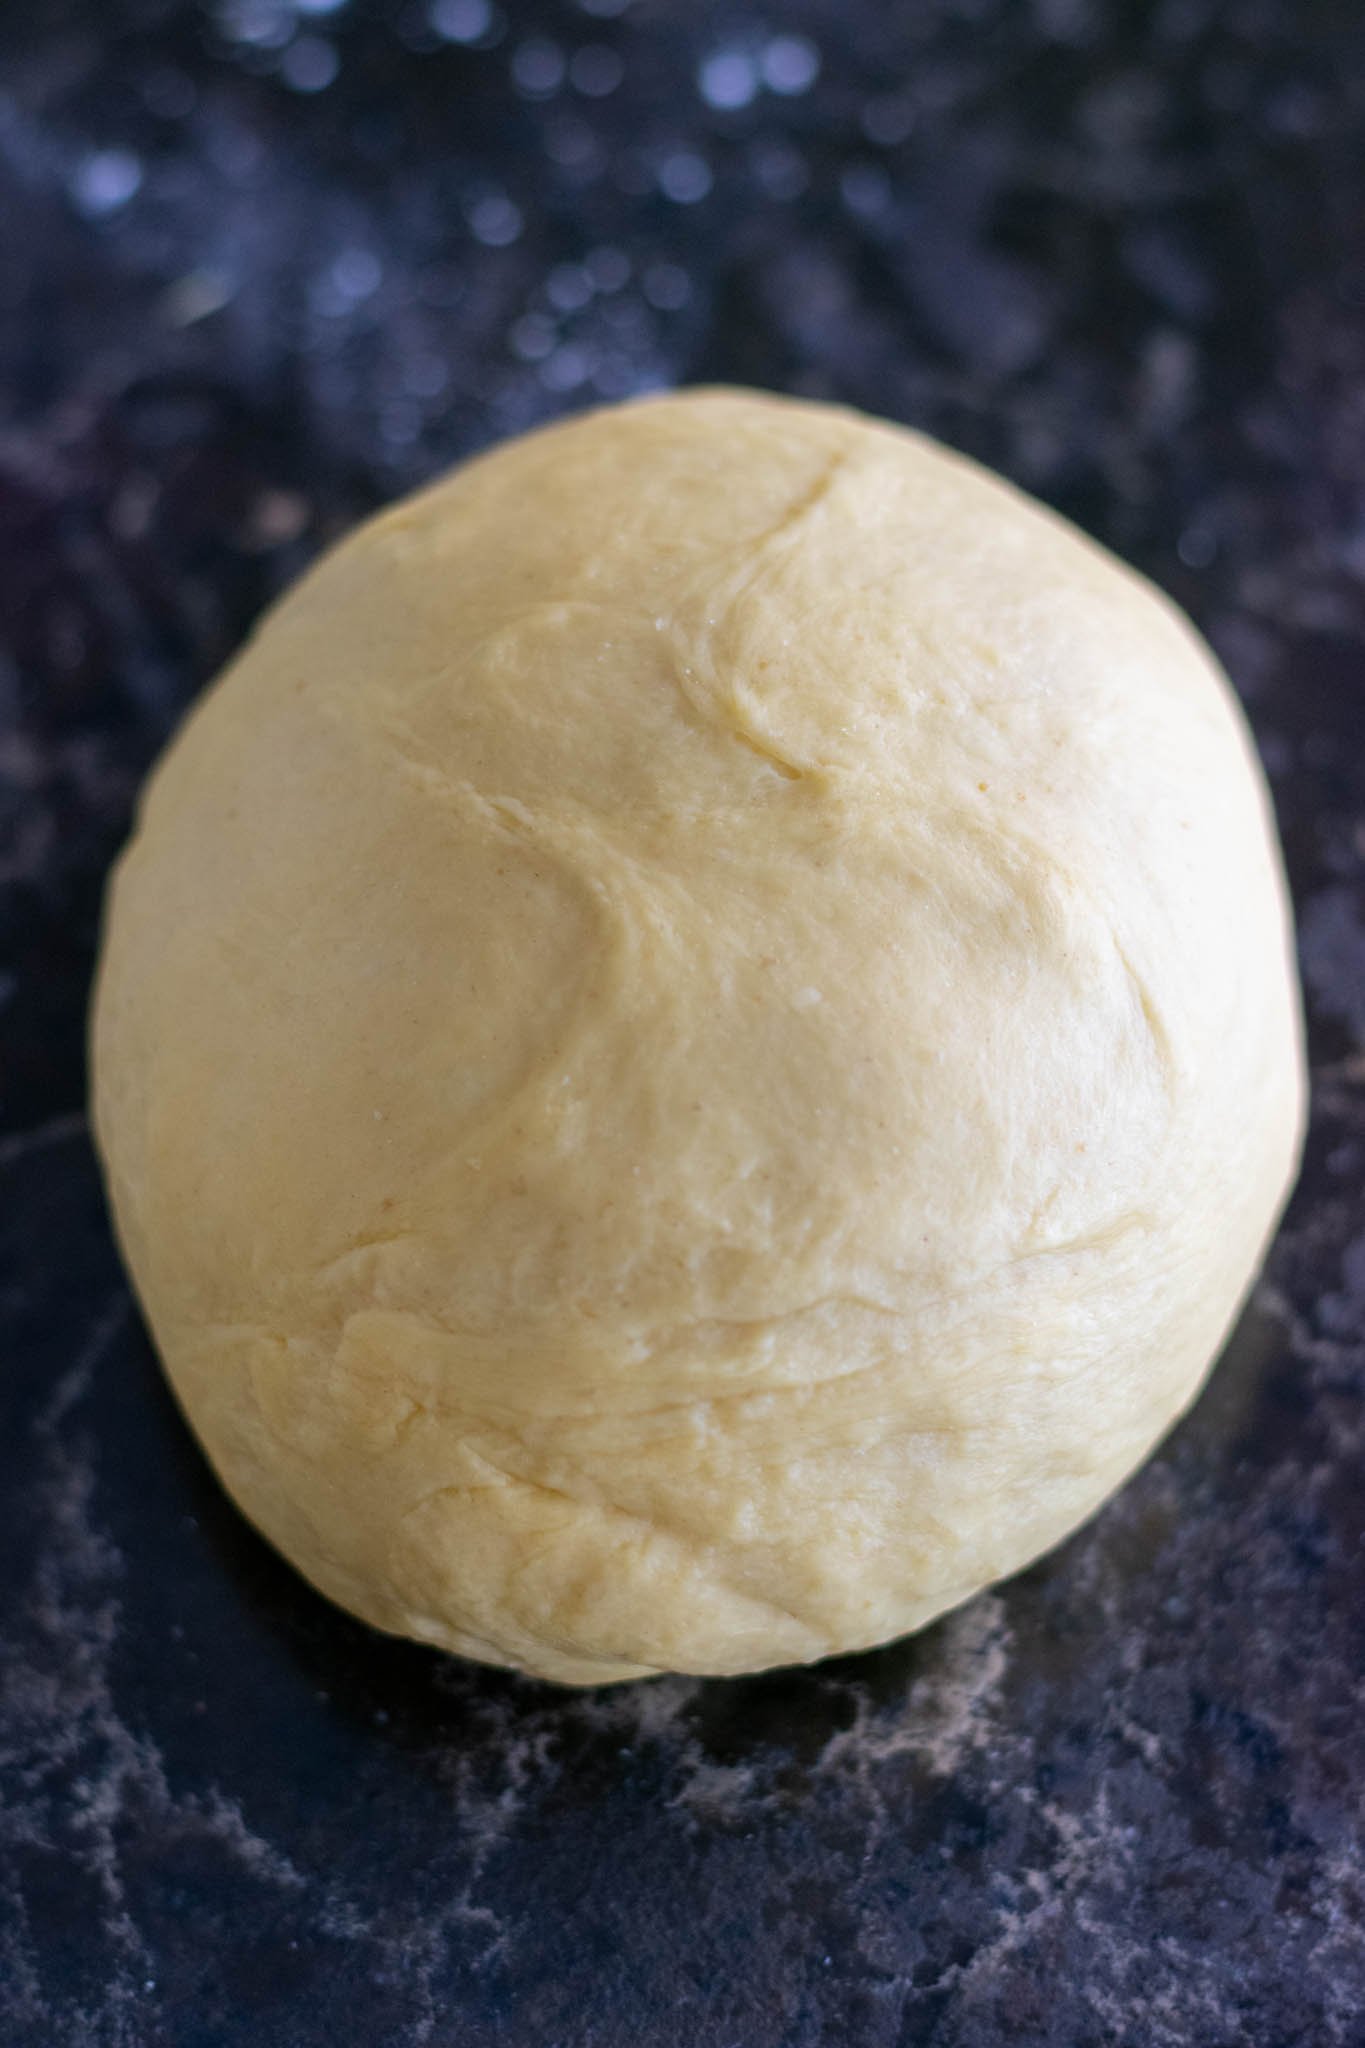
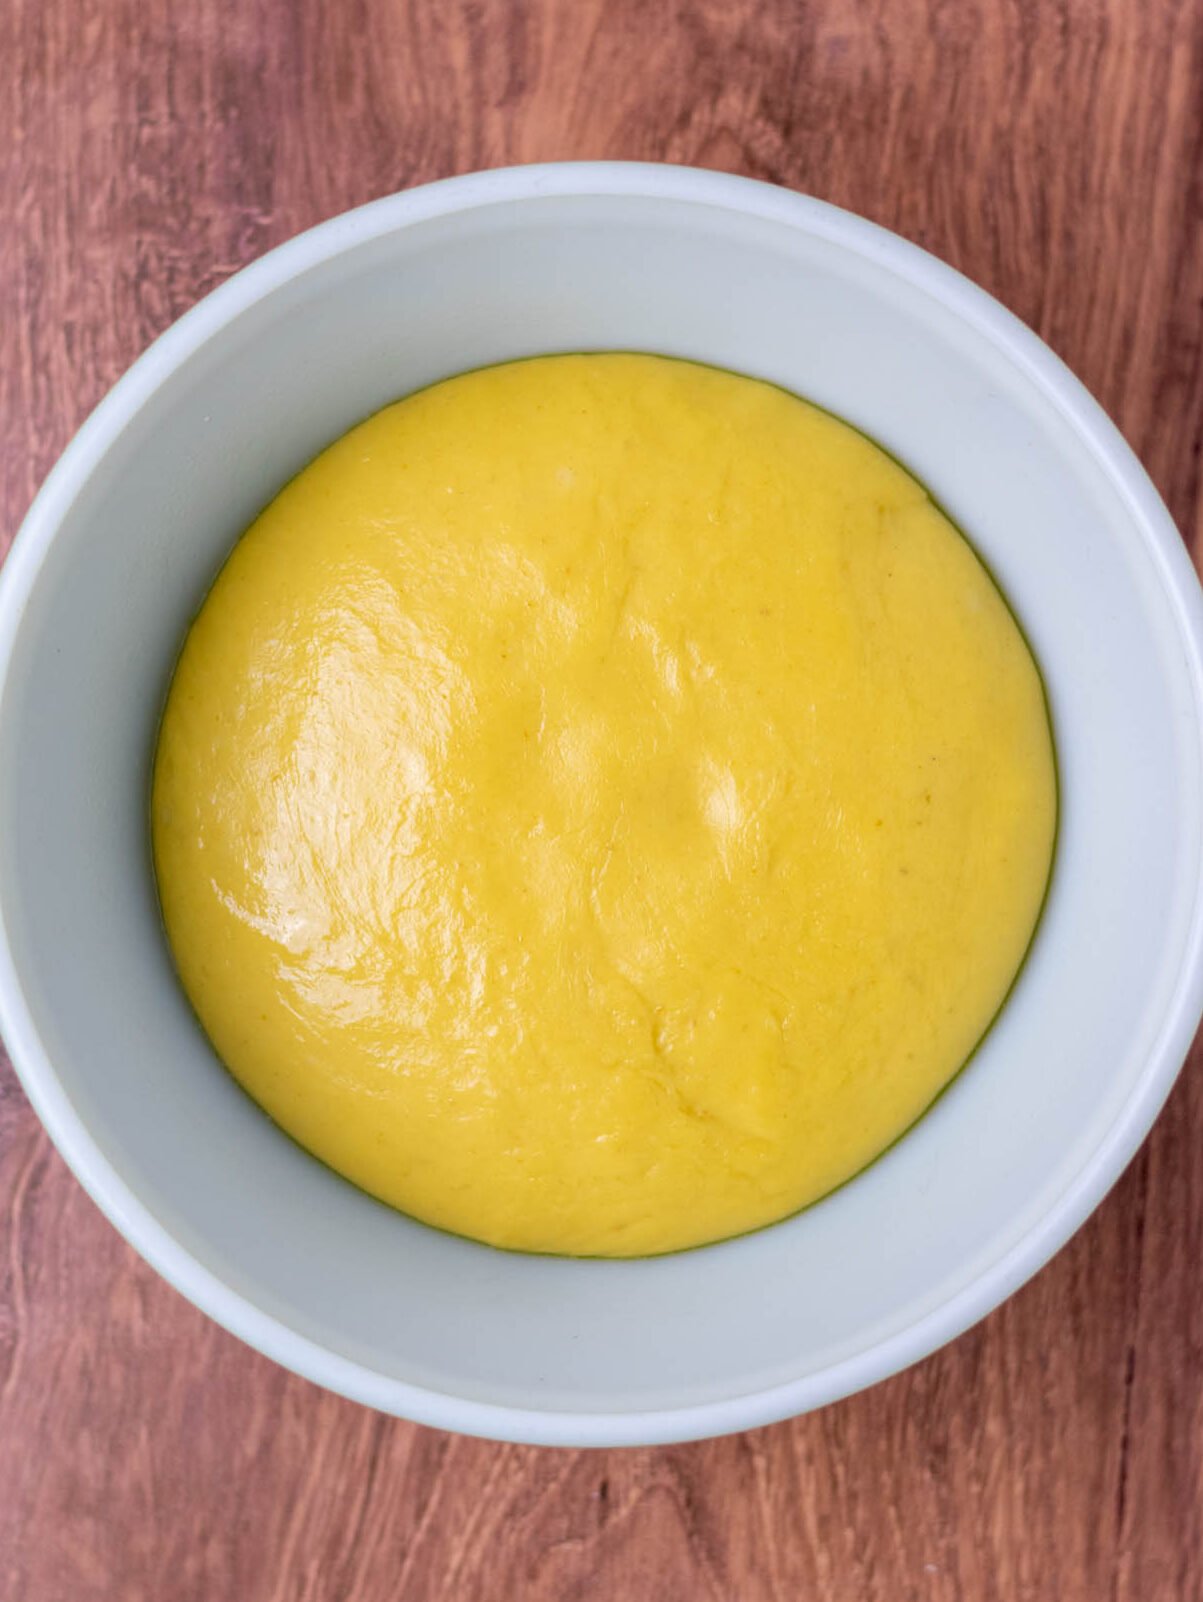
6. First Proof
Place the kneaded sourdough challah dough into a lightly oiled bowl for proofing.
Proof the dough until doubled and a noticeable amount of gas has formed in the dough. At 78ºF, this should take about five hours.

Notes:
- Because this is an enriched dough, sourdough challah can take longer to proof. Ideally, place the dough in a warm & humid environment like a bread proofer or an oven with the light turned on.
- Unlike My Everyday Sourdough Bread recipe, this dough is unlikely to overproof unless left in a warm environment for hours longer than called for (in which case the dough can spoil). You will degas the dough when you braid it, so getting this first proof exactly correct is less critical than making a loaf of artisan-style sourdough bread.
7. Cold Overnight Proof
The cold-proof, or retard, slows down fermentation and will give the sourdough challah a more complex flavor. Proofing it overnight also allows you to bake it at a later time.
With the dough covered, place it in a cold refrigerator for an overnight proof of 12-18 hours.
Note: I haven’t proofed this dough for longer than a day in the refrigerator, but if you do, I would love to hear how it turned out in the comments below!
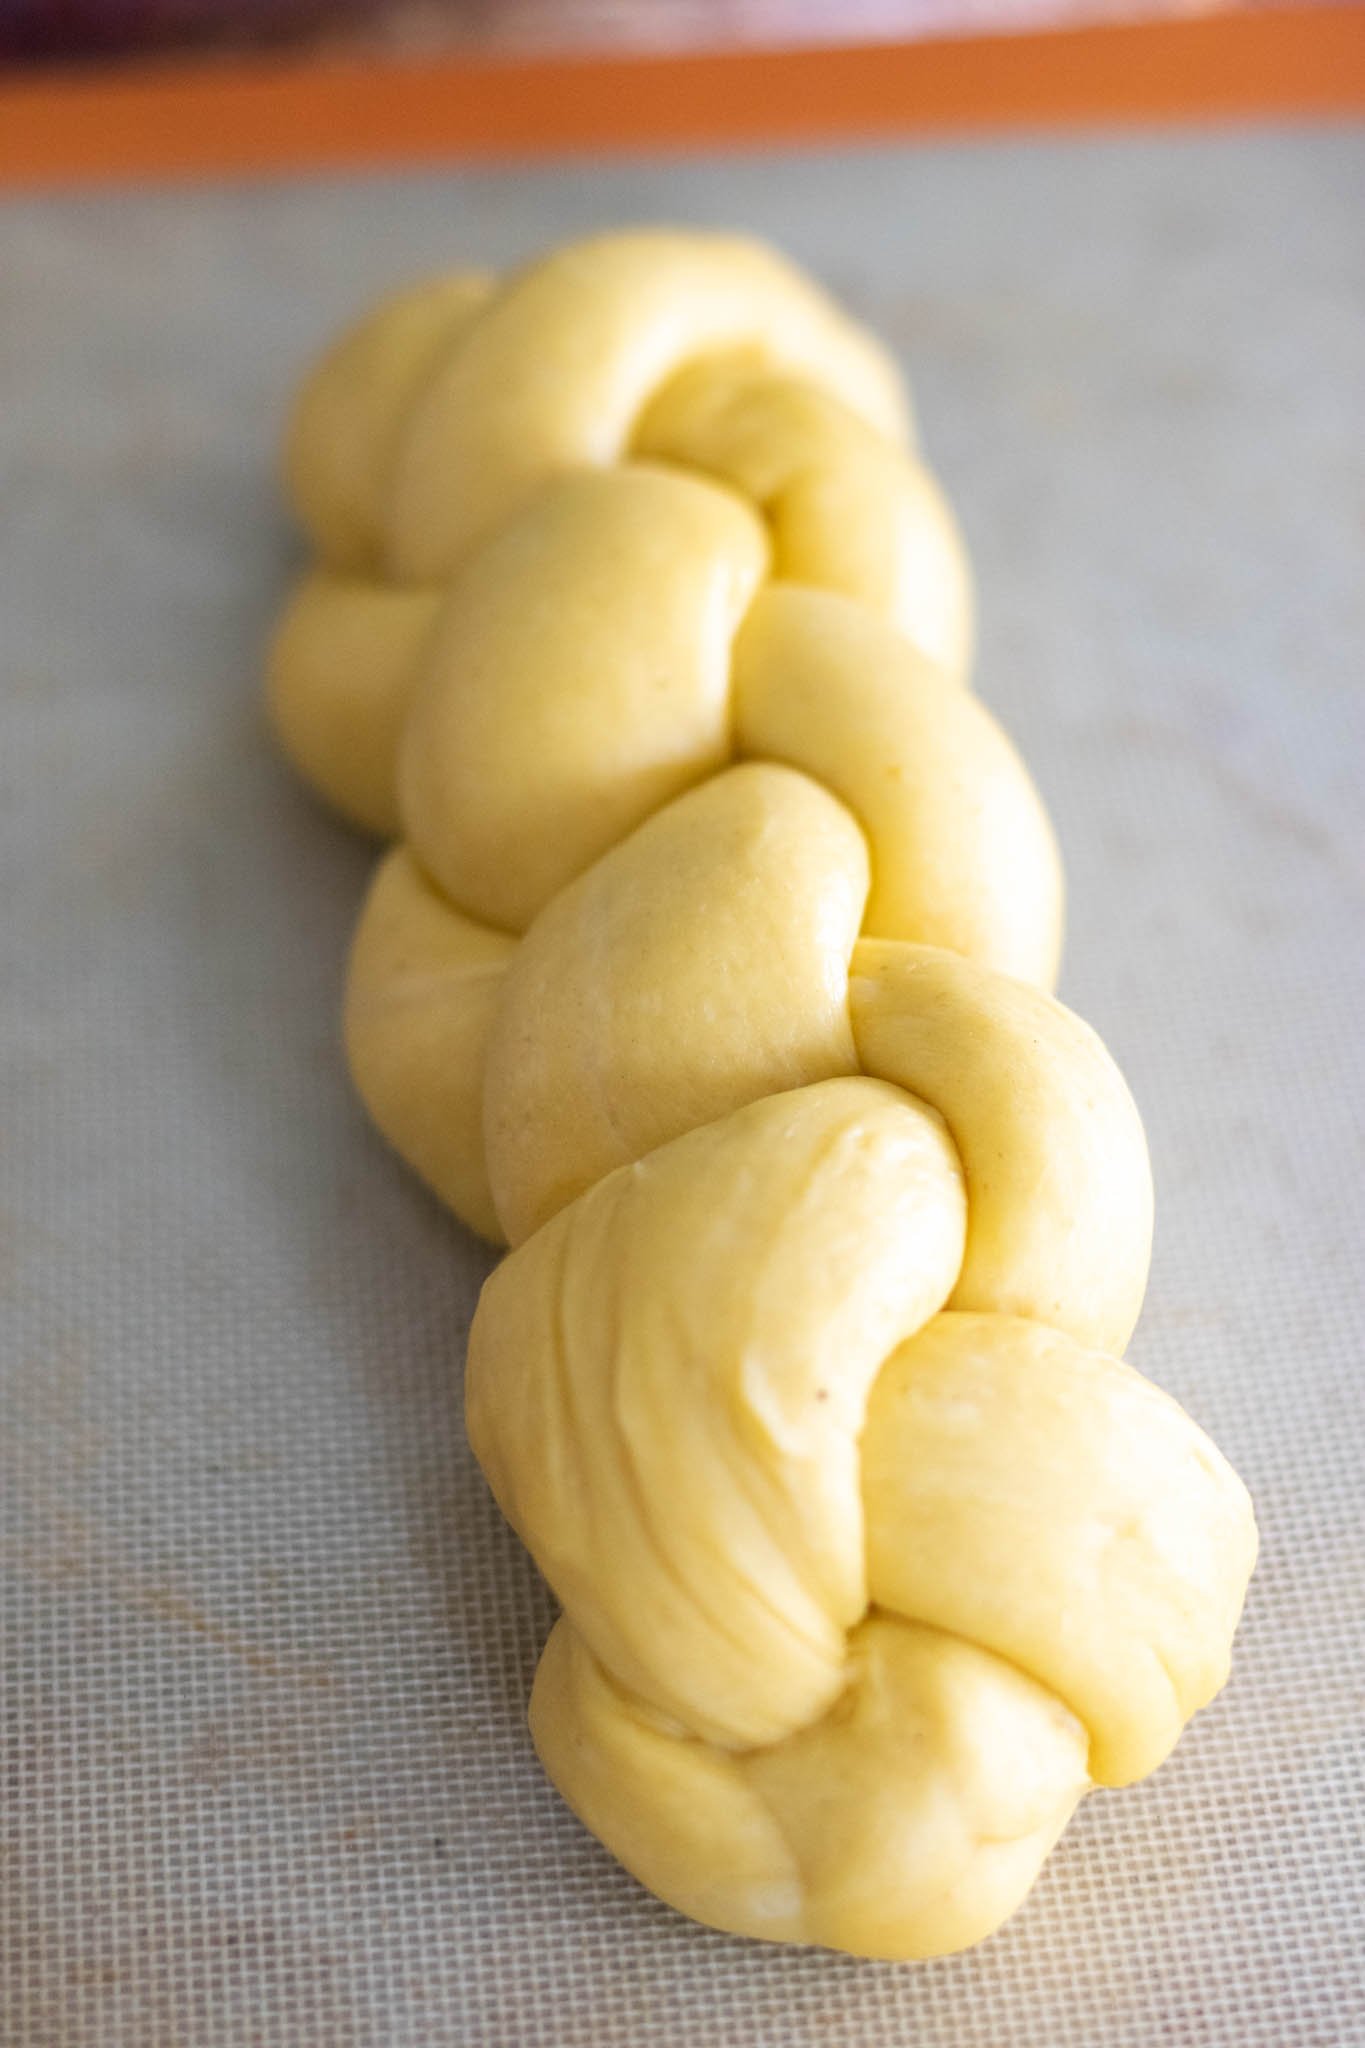
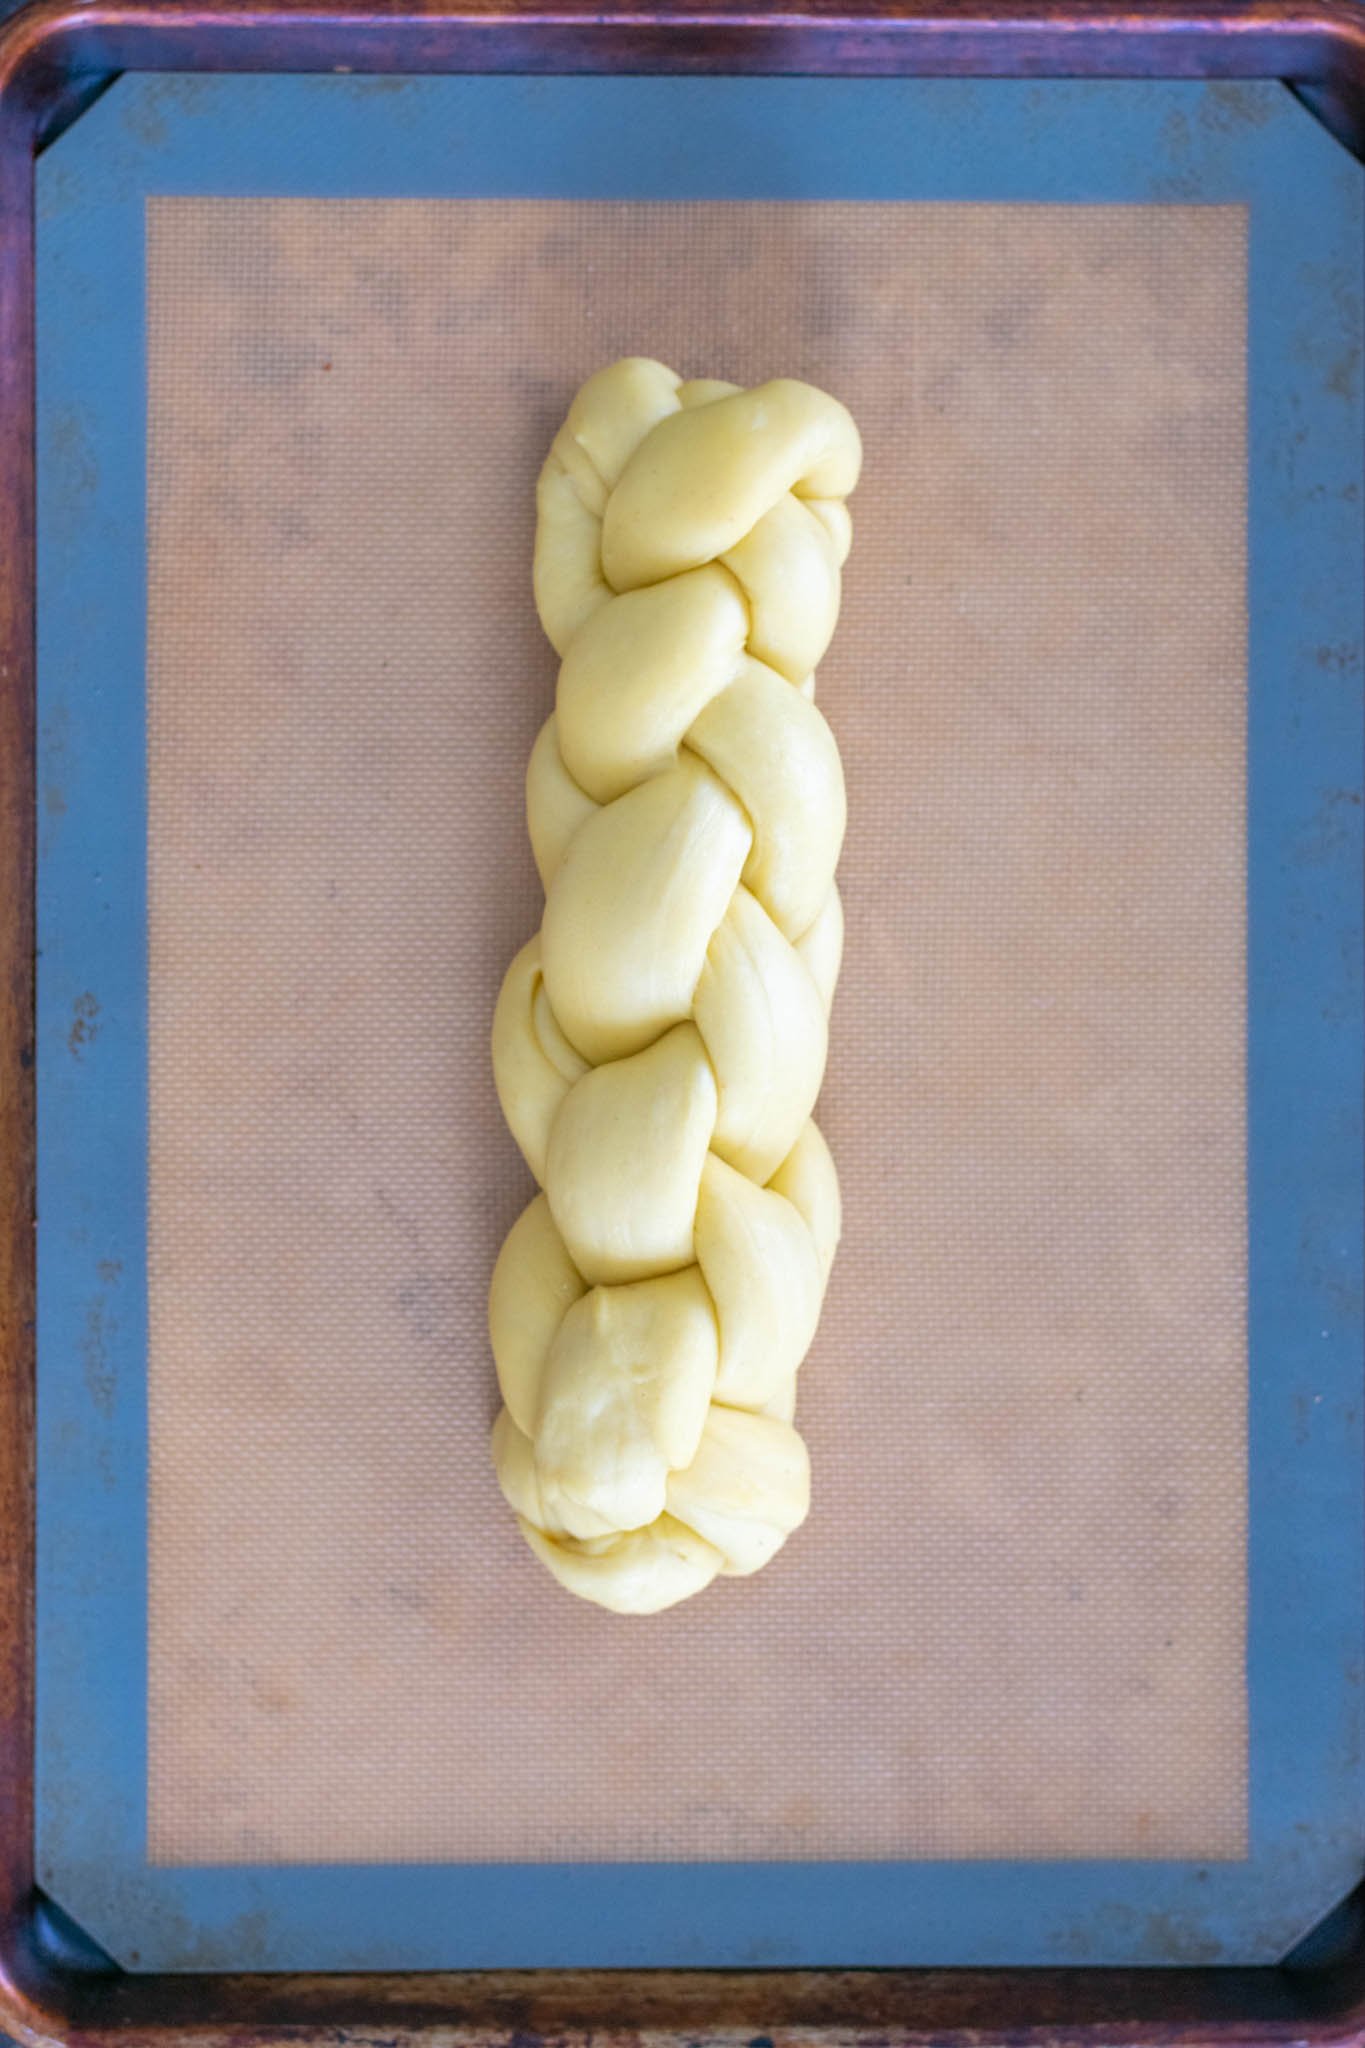
8. Shape & Braid the Challah
Braiding is perhaps the most intimidating aspect of making challah if you’re unfamiliar.
Am I a challah braiding expert? No, but I find this basic method works well and still provides an impressive loaf!
I’ve opted for a four-strand braid for this recipe based on the size of the dough, but you’re welcome to braid it differently, of course.
If you’re looking for an easier-to-braid loaf, check out my sourdough babka recipe.
Degas and roll into ropes
Take the chilled dough out of the refrigerator, punch it down slightly with your hand to degas it, and turn it out onto a lightly floured workspace.
Divide the dough into four equal parts using a bench or bowl scraper.
One at a time, press each section of dough into a small, flat rectangle.
Gently roll up the dough from one side (it doesn’t matter which) until you have a short rope.
Using both hands and starting from the center of the rope, roll it out until it is 14-16” long. The rope should be skinnier on the ends.
Set aside and repeat with the remaining ropes until you have four ropes of equal length.
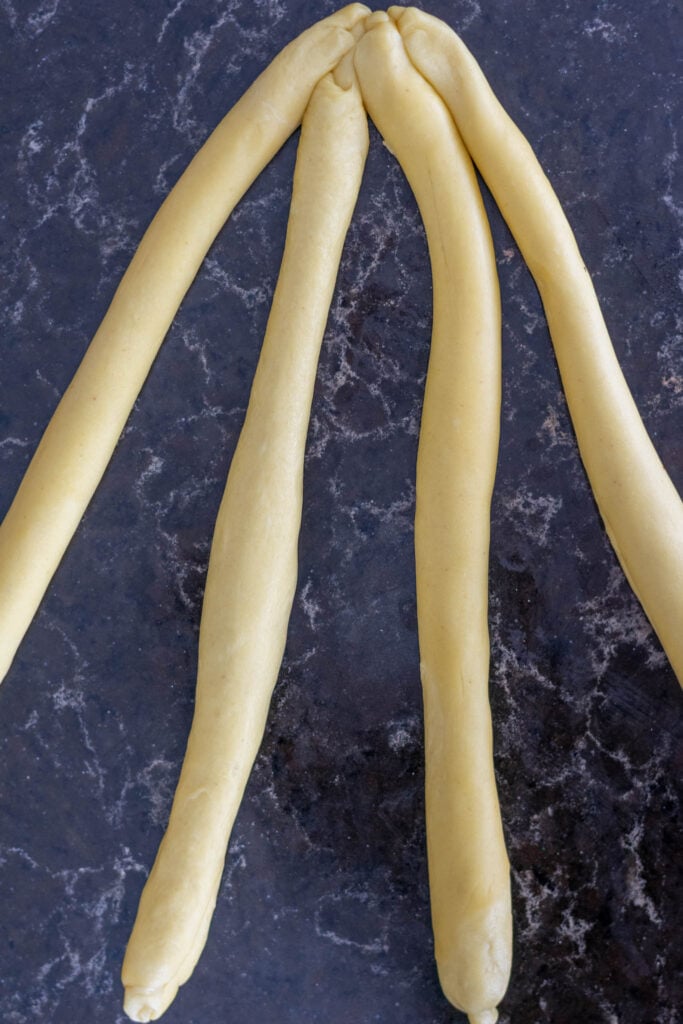
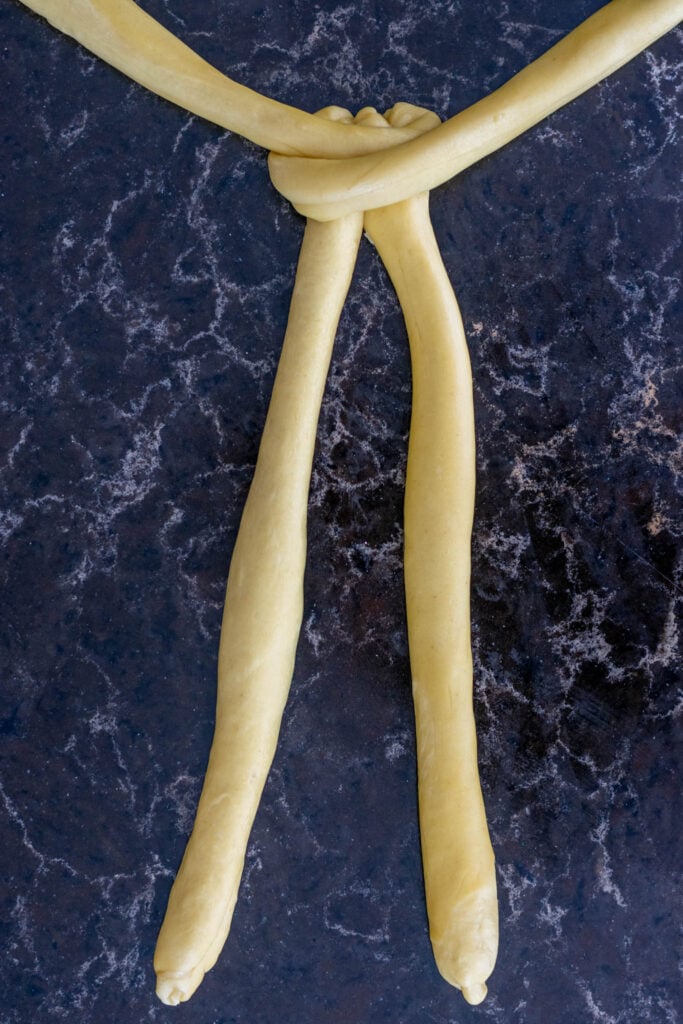
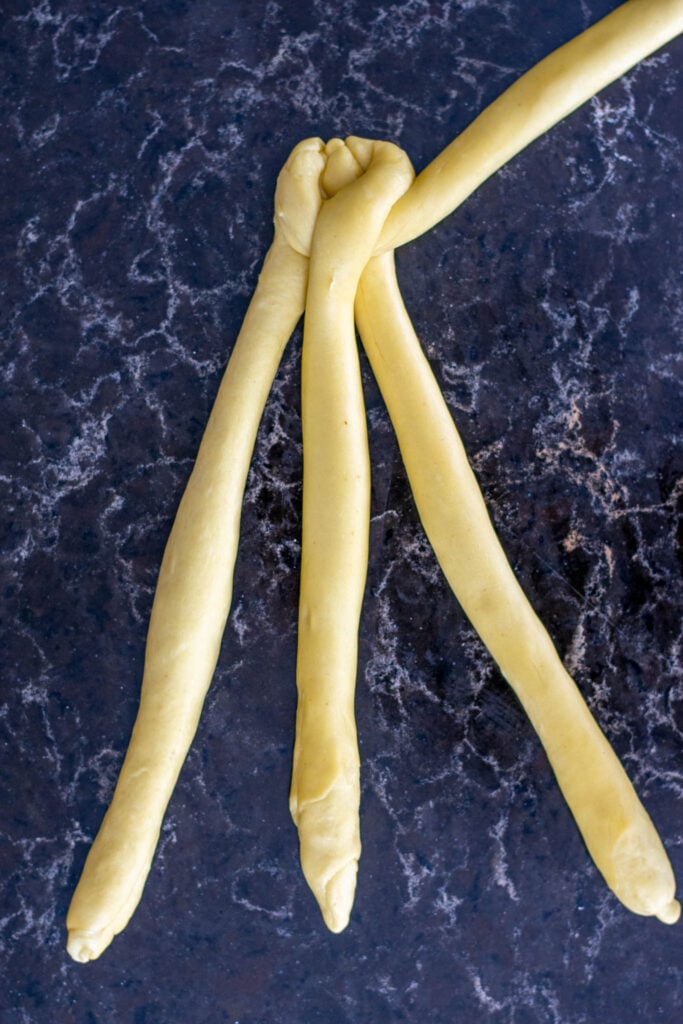
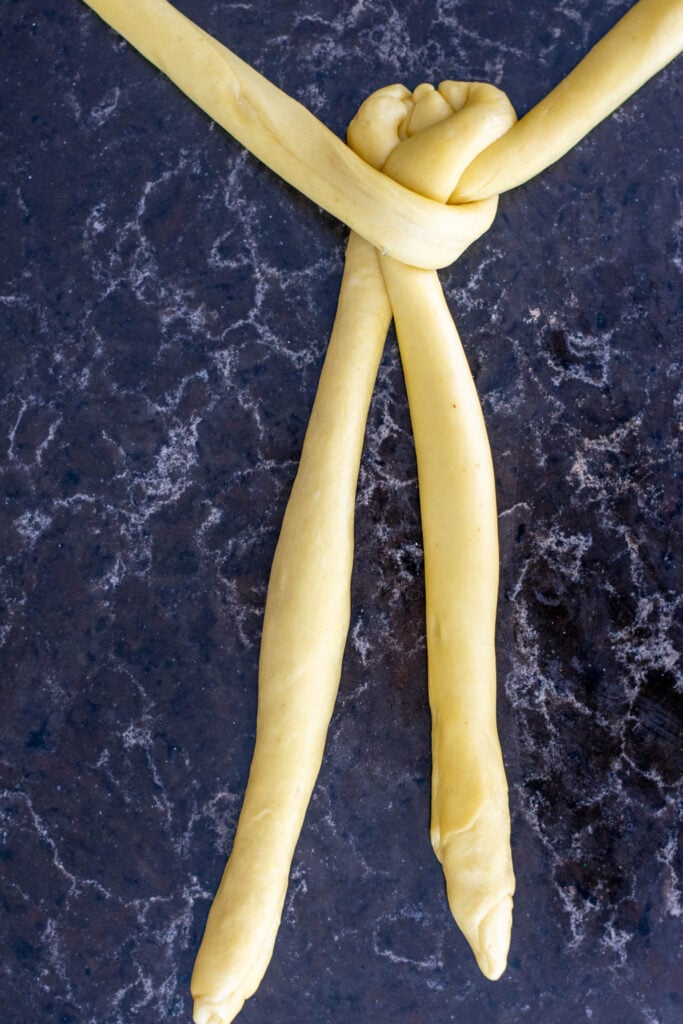
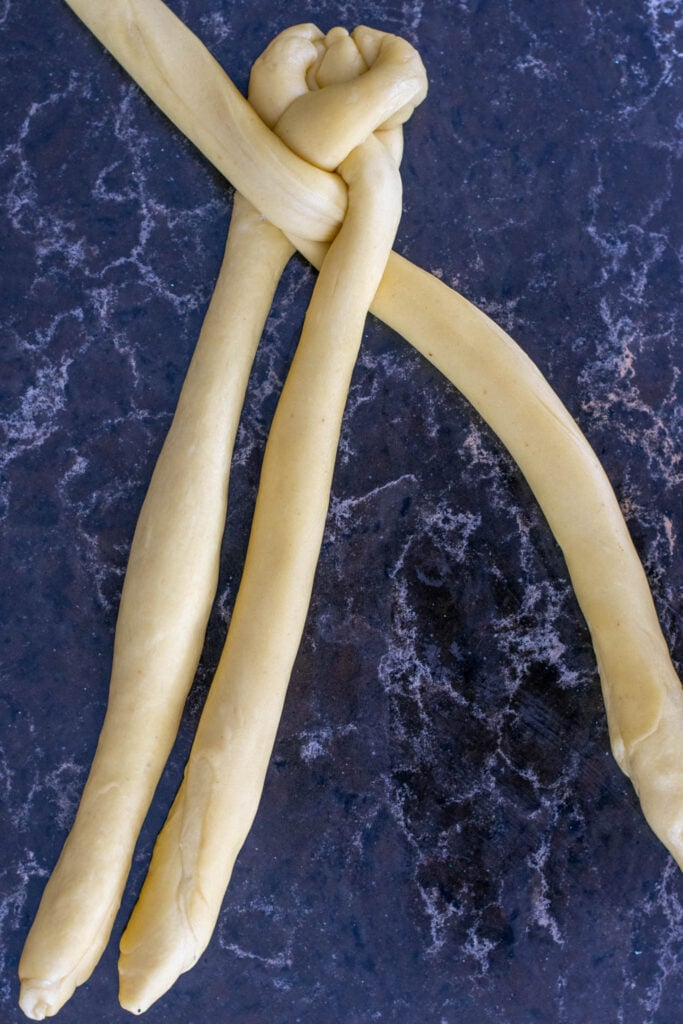
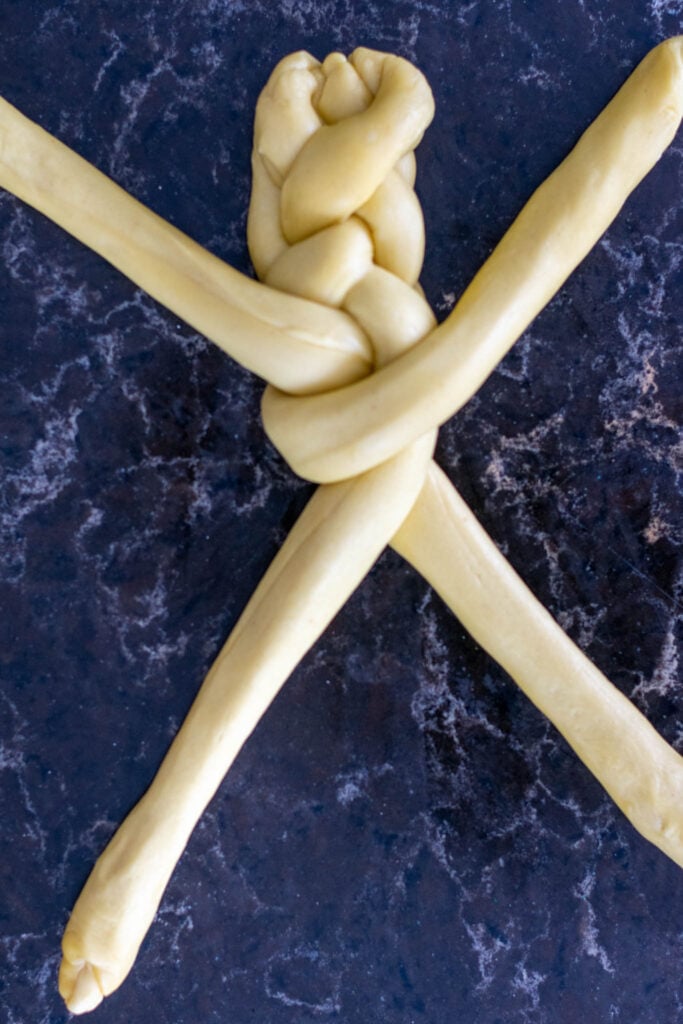
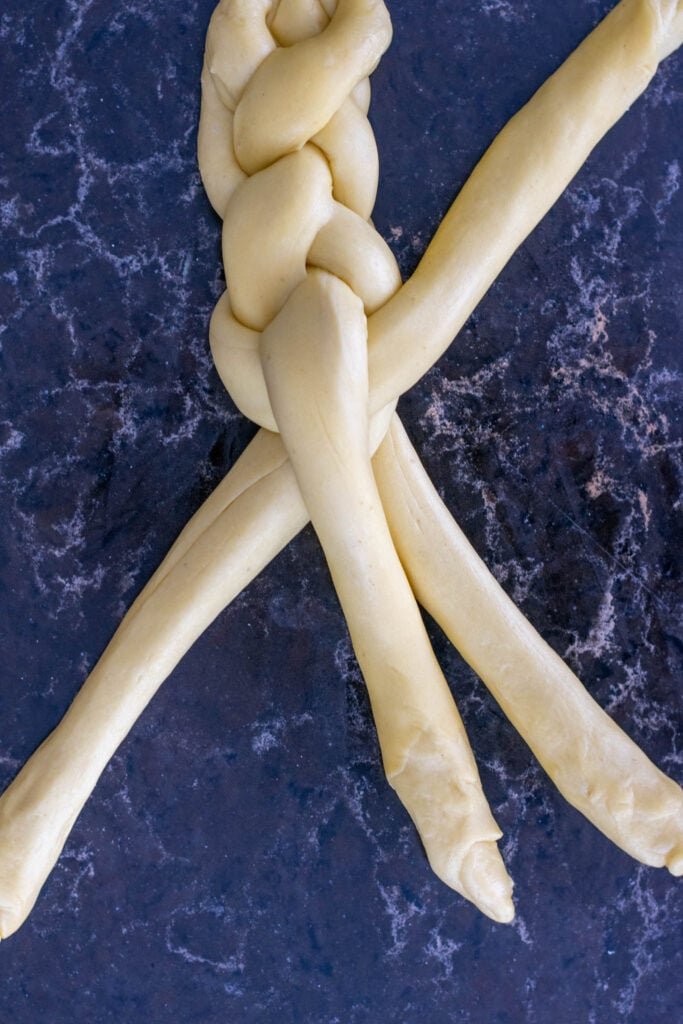
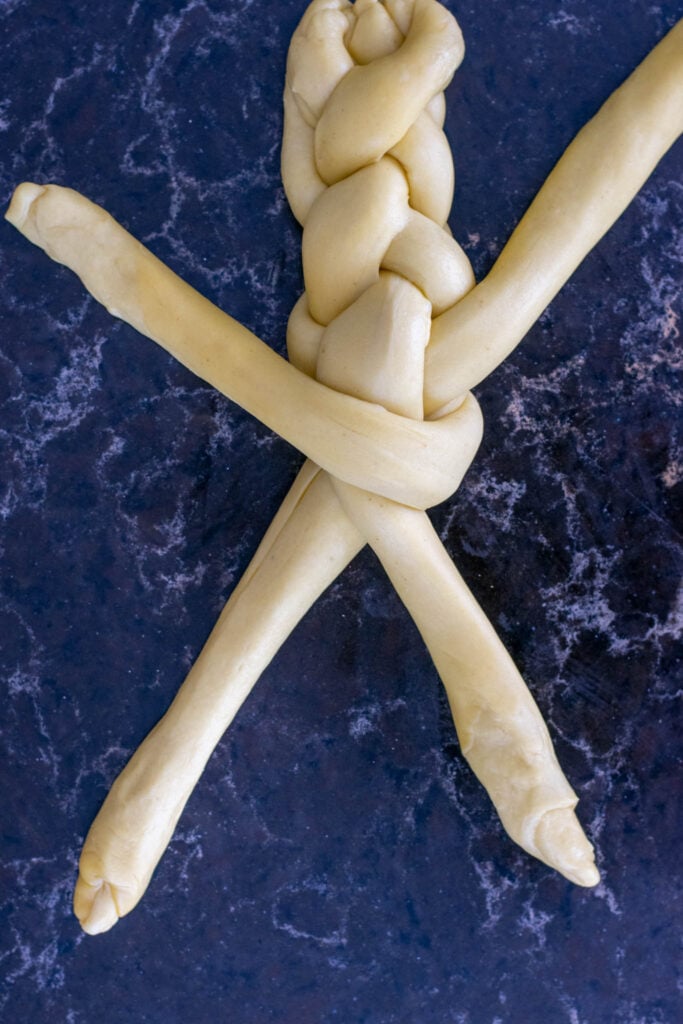
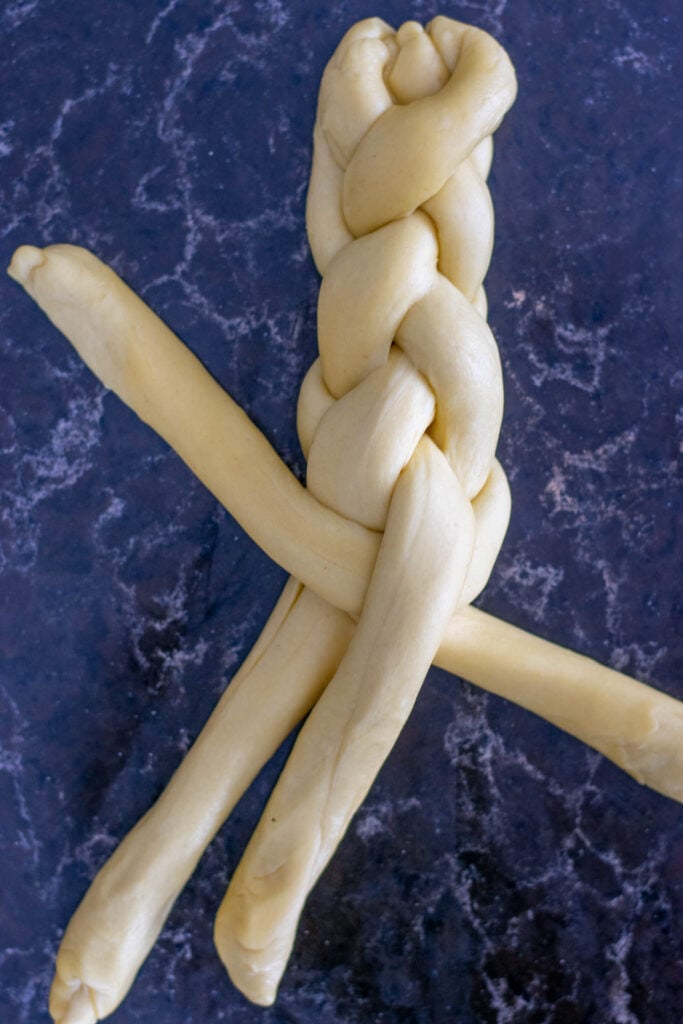
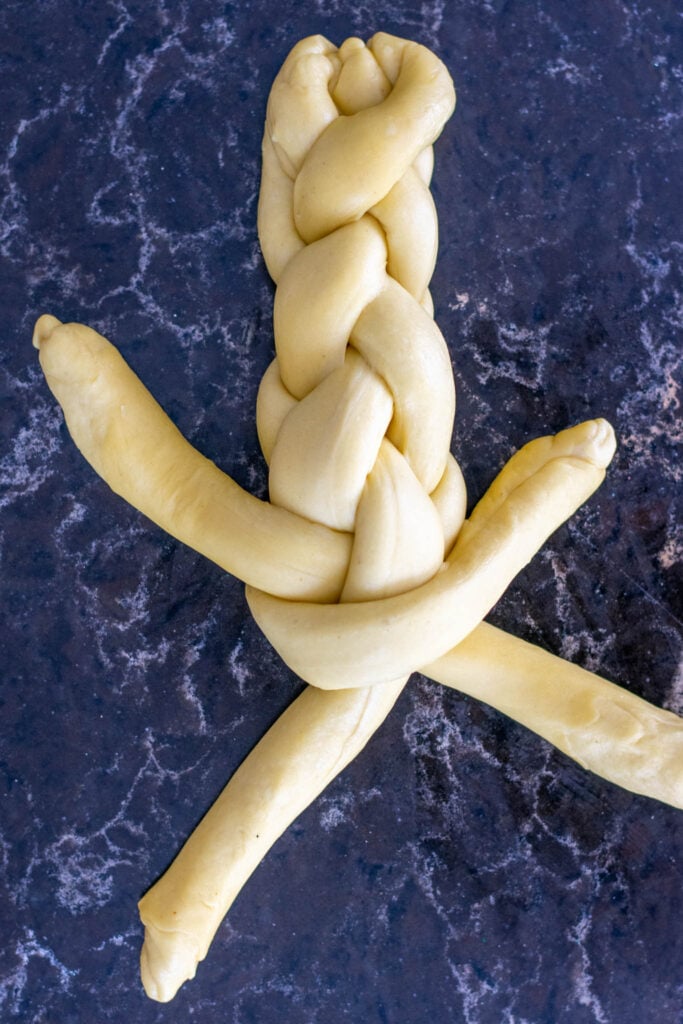
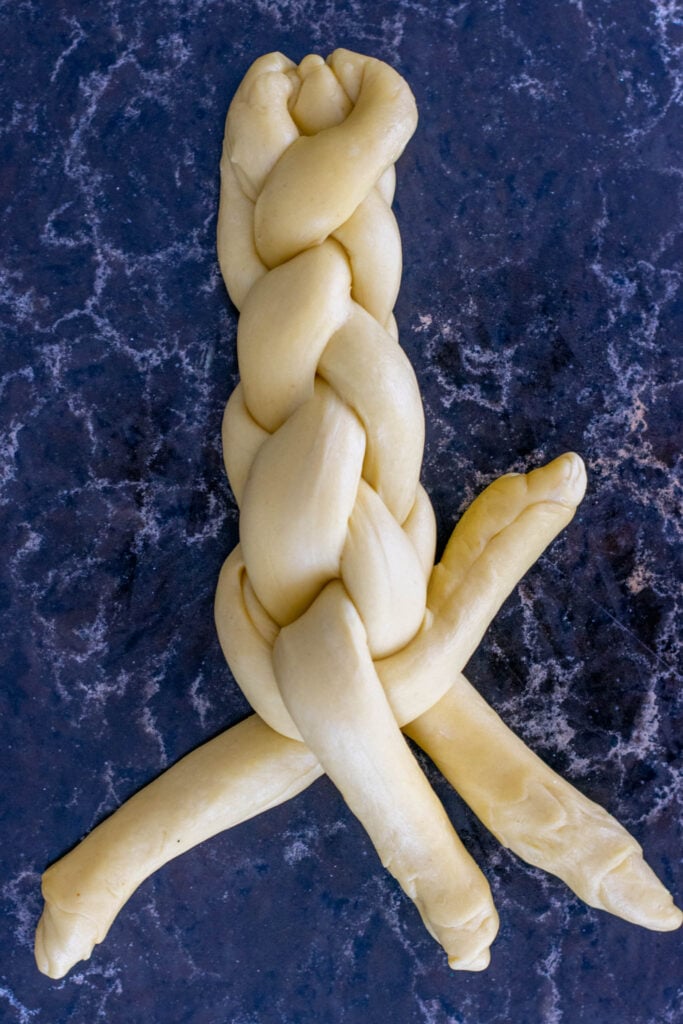
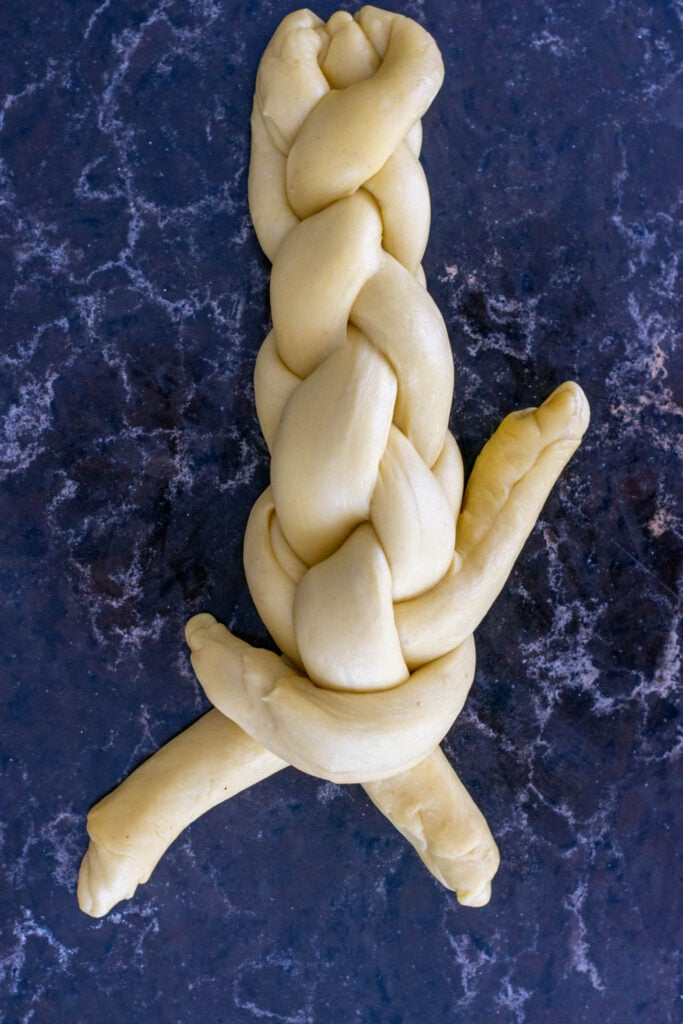
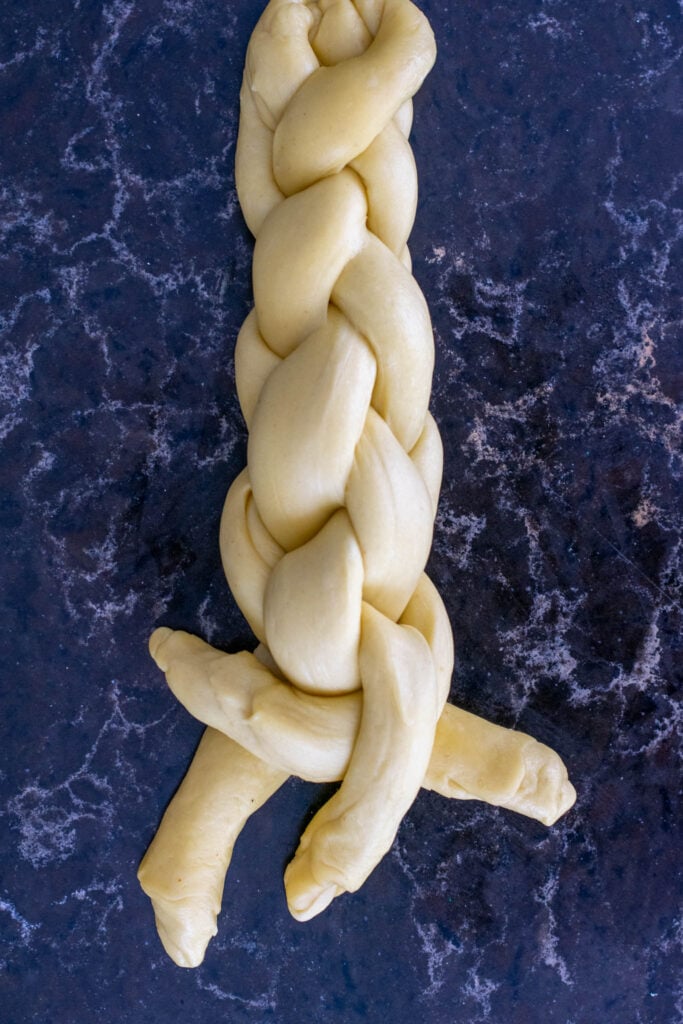
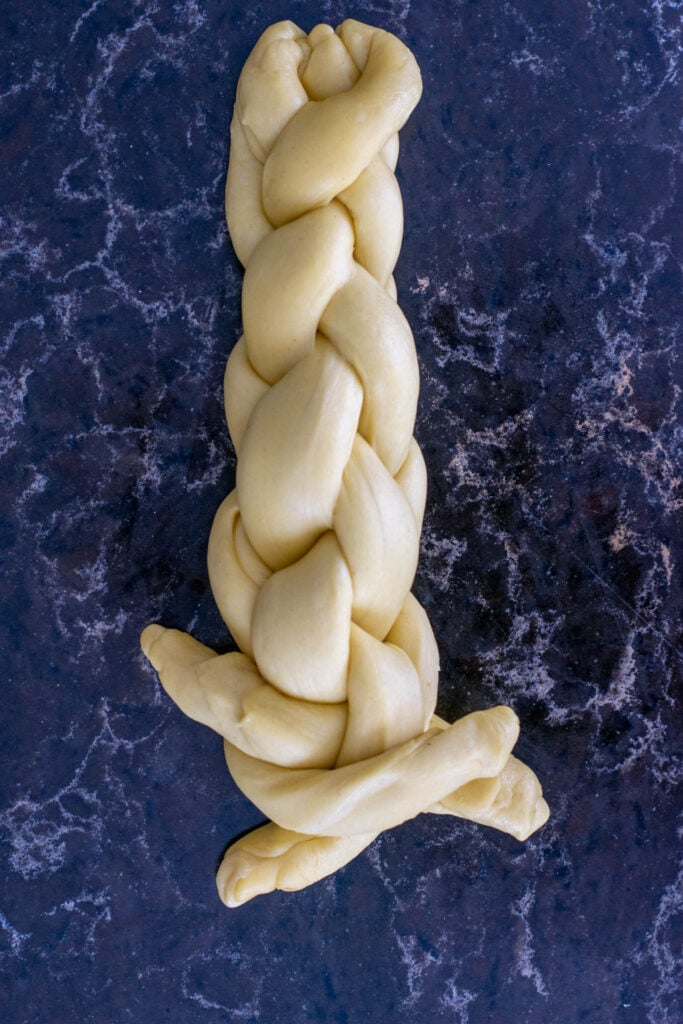
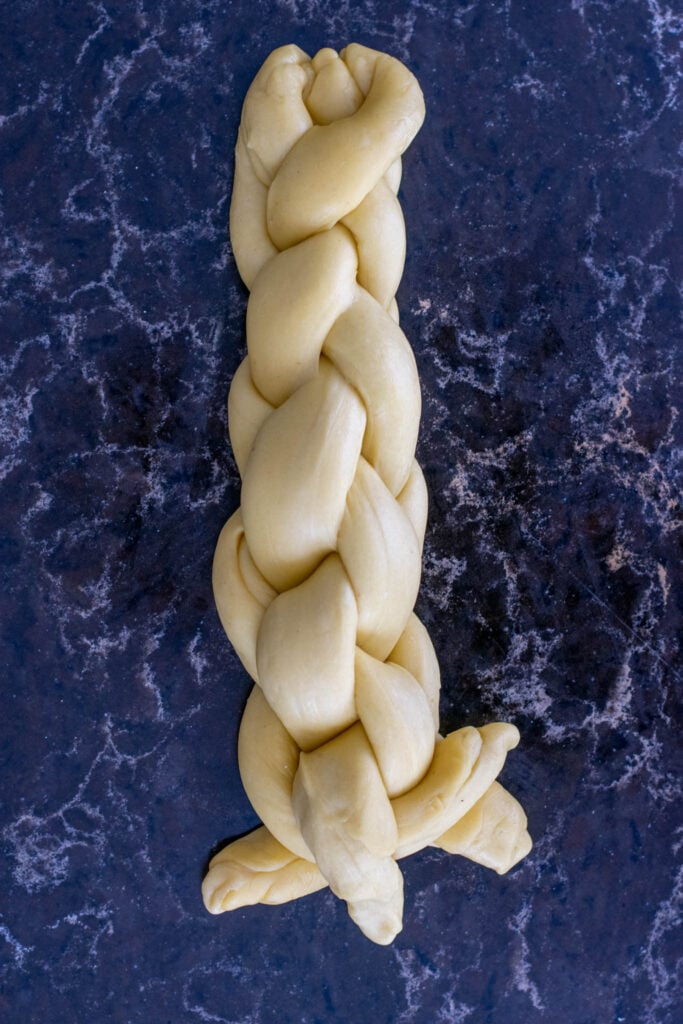
How to Braid a Four-Strand Challah
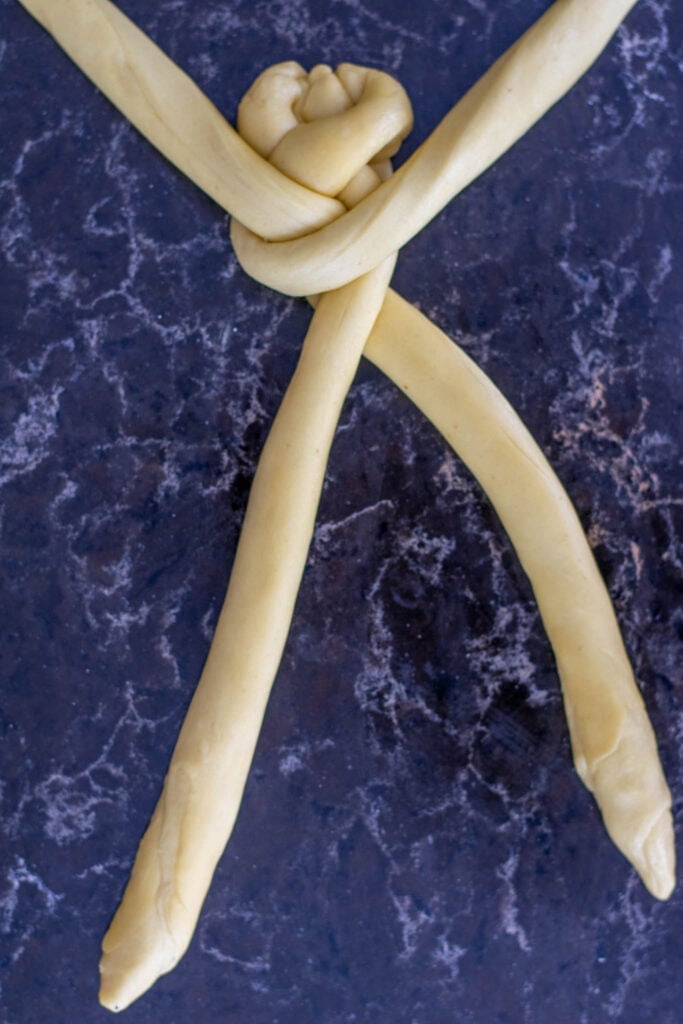
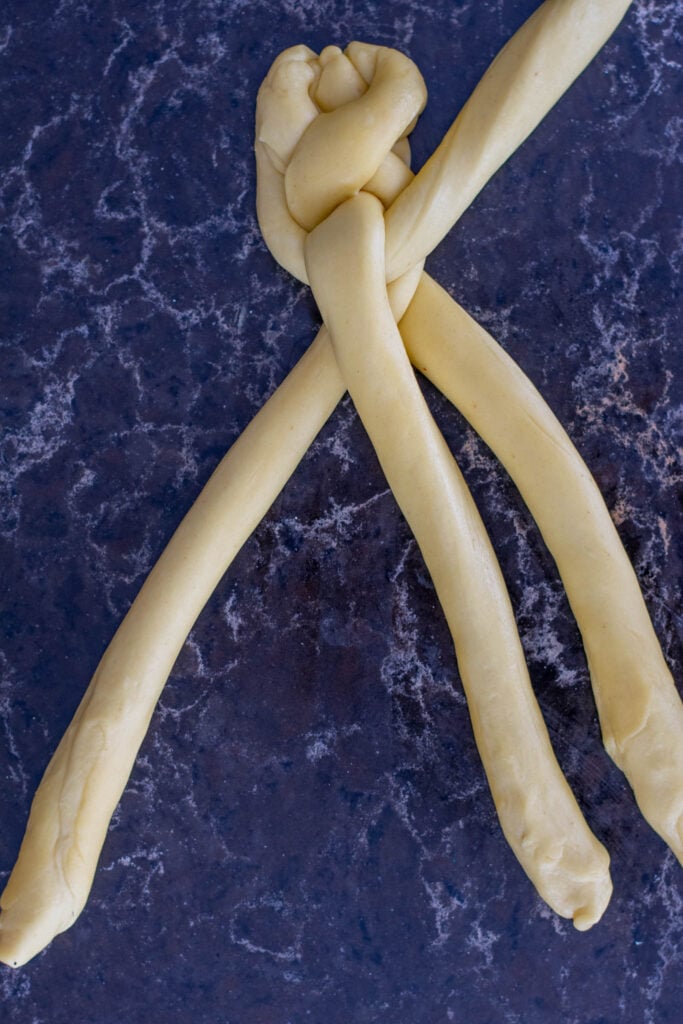
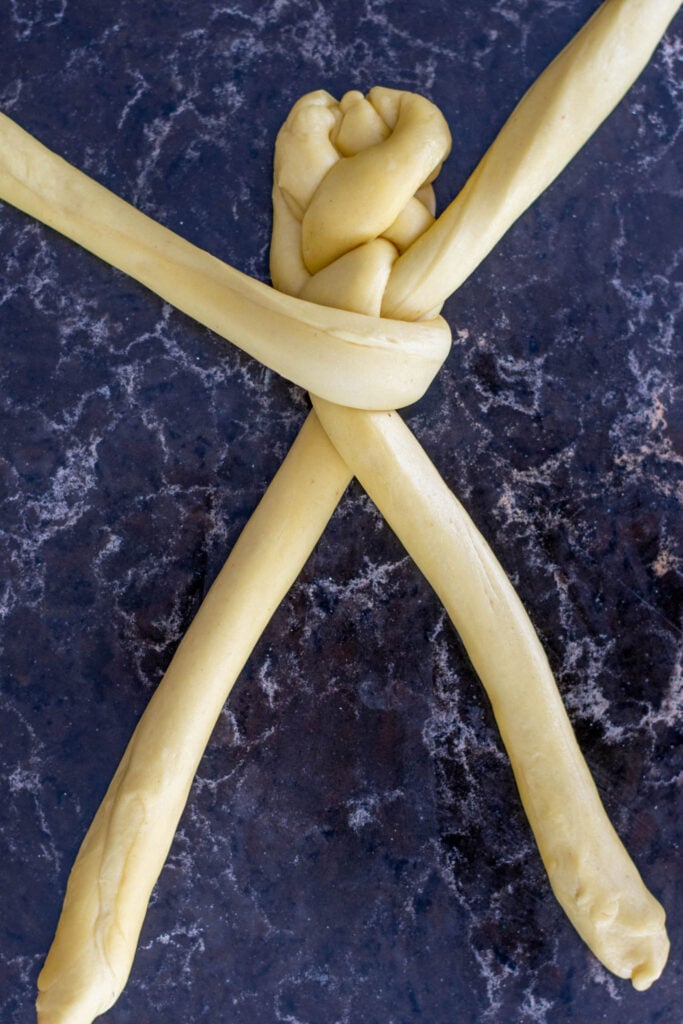
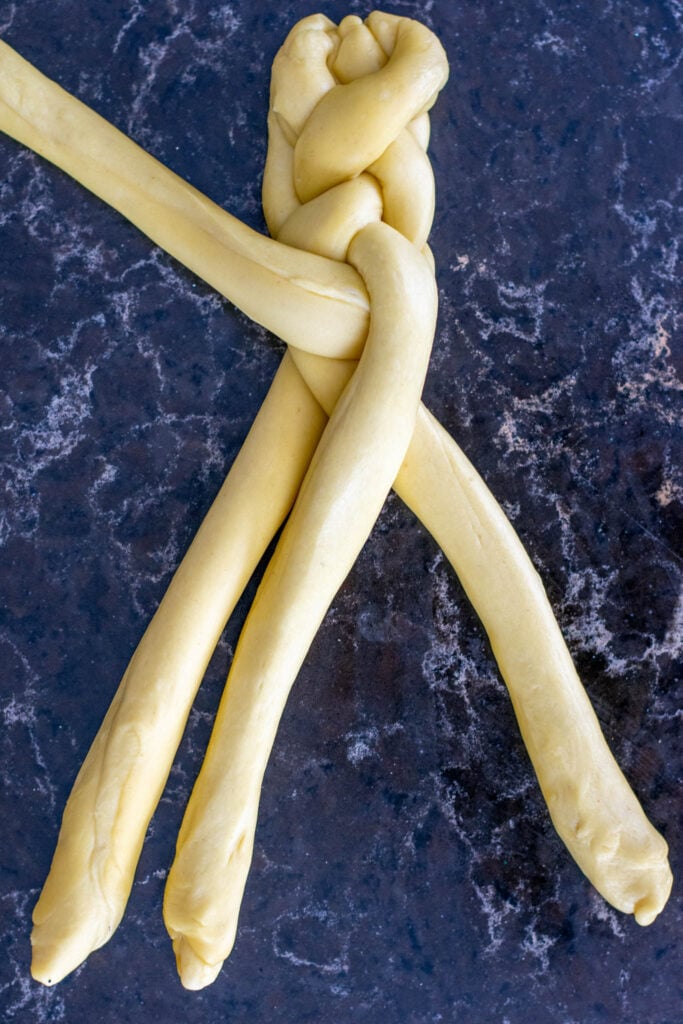
Please follow the braiding images below as I find the visual to be the most helpful to braid challah, but you can also follow the written instructions below:
- Set the four ropes parallel to each other and pinch the four furthest ends of the ropes together (image 1).
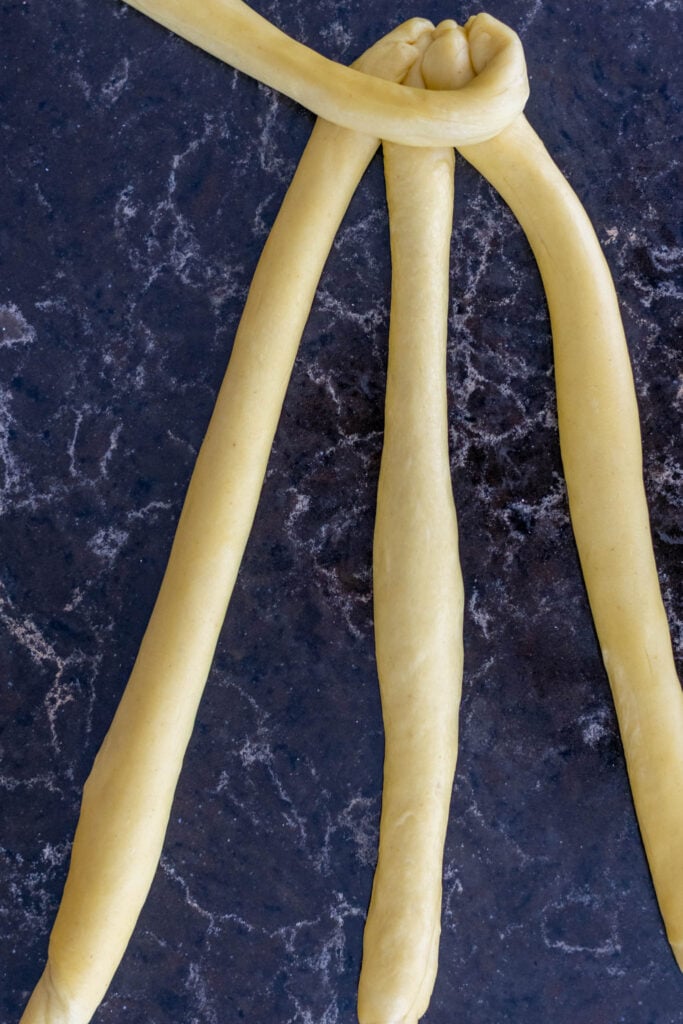
- Move the rope furthest to the right and bring it up and over to the left of the other three ropes (image 2).
- Place the previously furthest rope to the left and bring it up and over to the right of the other ropes. Essentially, the two ropes traded places. (image 3).
- Place the rope on the top left down and in between the two ropes on the bottom (image 4).
- Replace the rope that was in the top left with the rope furthest to the right on the bottom (image 5).
- Place the rope on the top right down between the two ropes on the bottom (image 6).
- Replace the rope that was in the top right with the rope further to the left on the bottom (image 7).
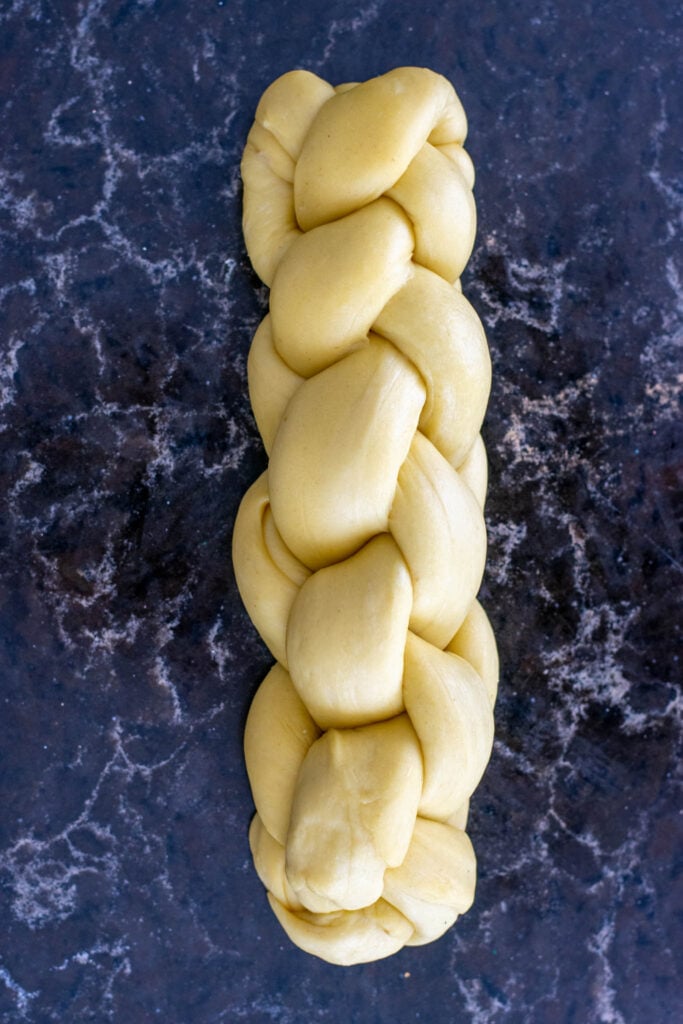
- Repeat this alternating pattern (from images 4-7) until you reach the ends of the ropes (image 20).
- When you reach the end of braiding, slightly pinch together both ends of the challah to secure it. Barely tuck both ends underneath the challah to neaten up (image 21).
Note: While tempting, try not to stretch the ropes as you braid the dough or you will have an oblong, somewhat lopsided challah.
9. Final Proof
After the challah is braided, gently place it onto a half-sheet pan with a reusable silicone baking mat or parchment paper.
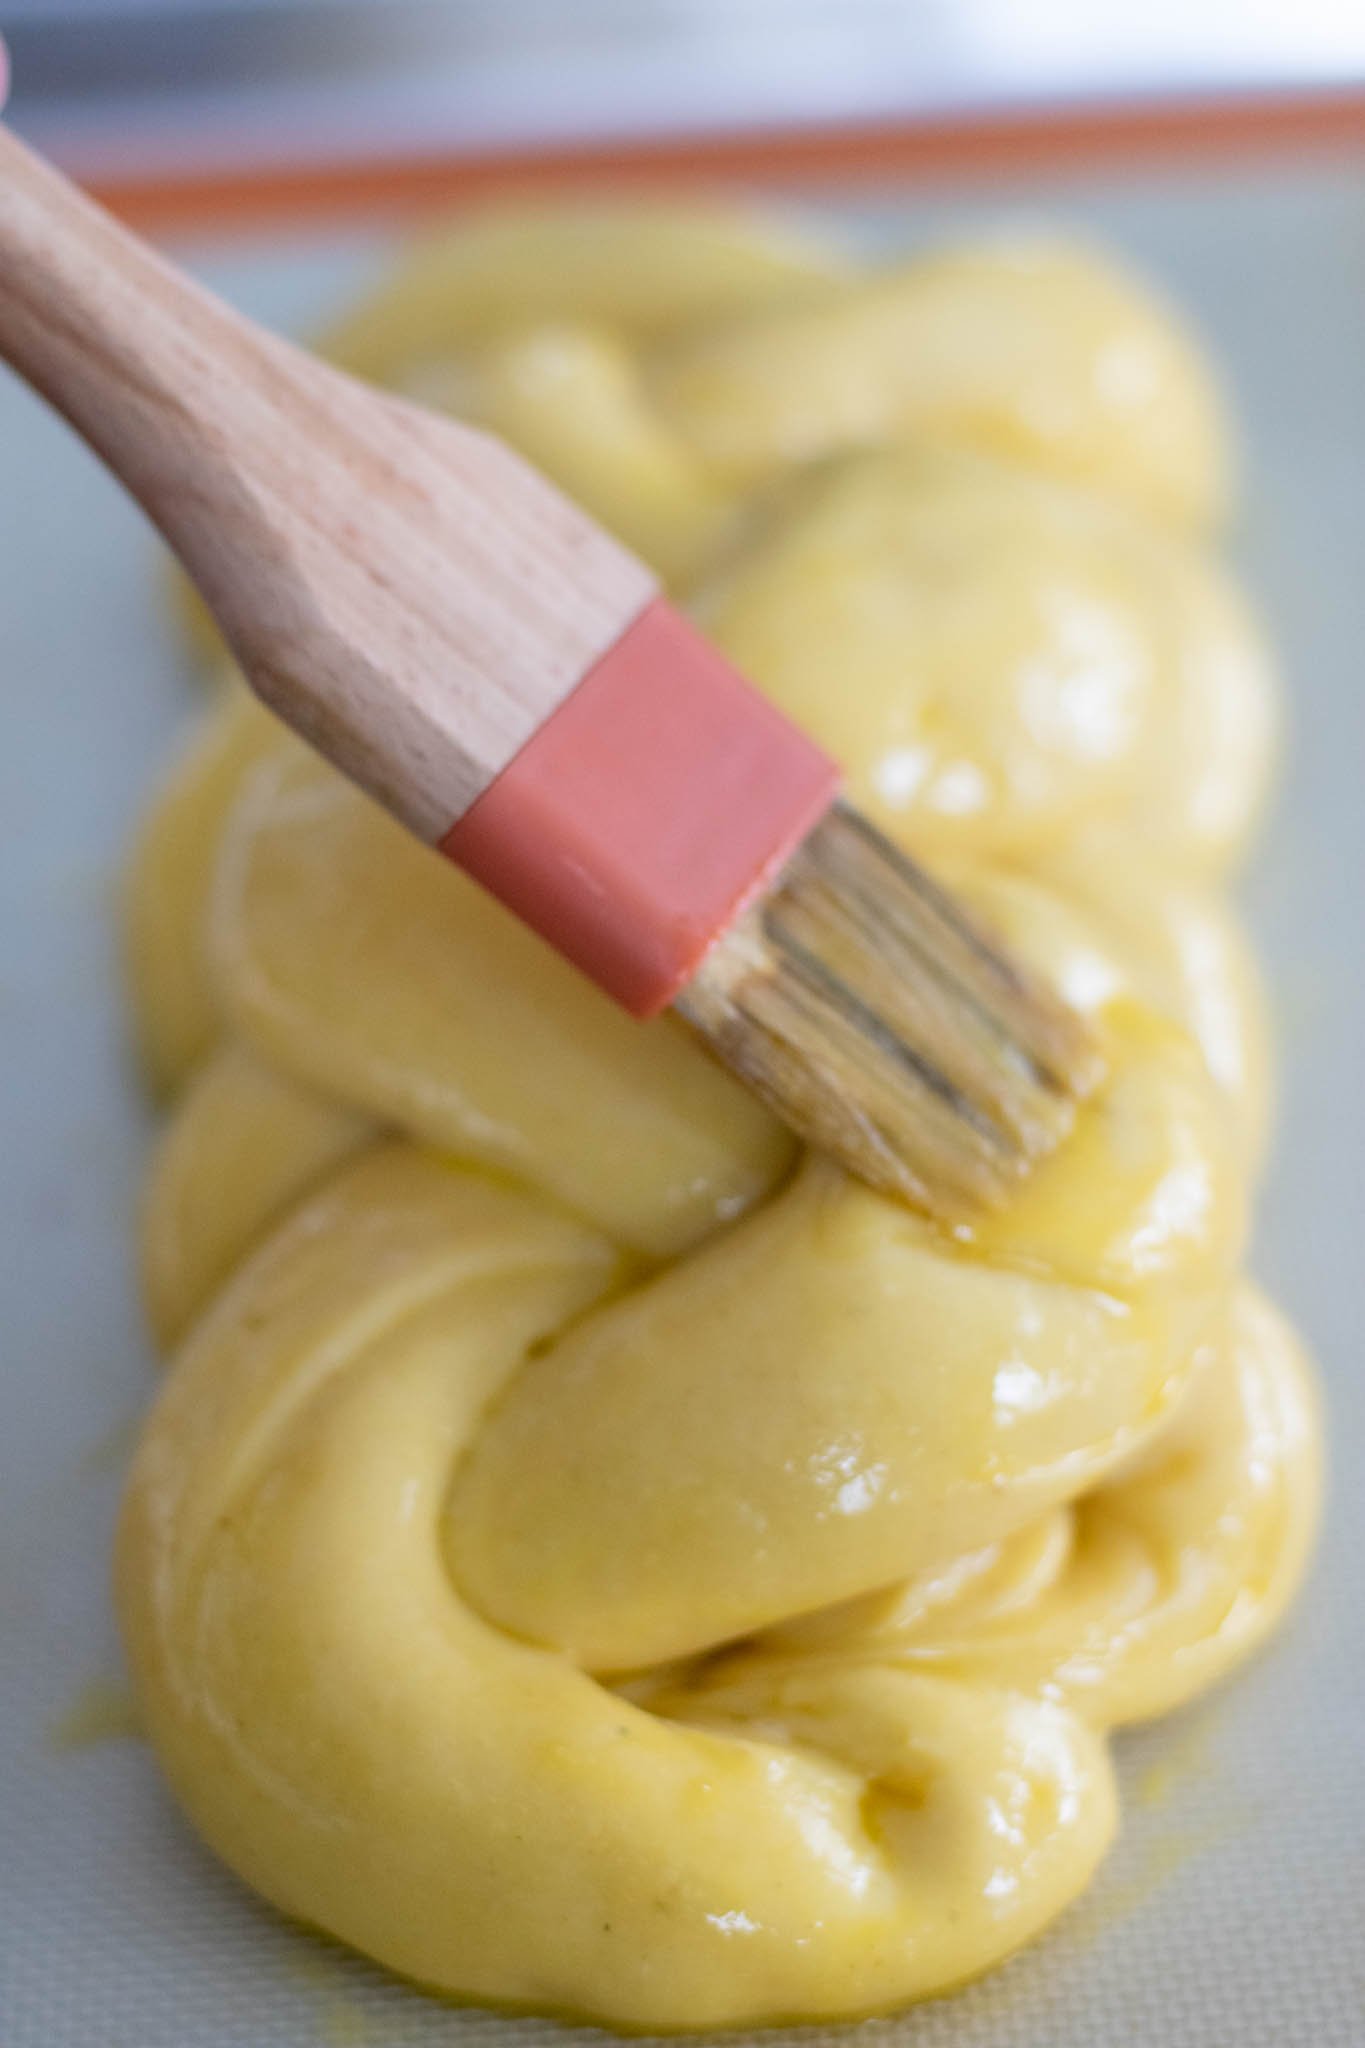
This sourdough challah gets a double egg wash (before and after proofing) for a brilliantly shiny and golden crust.
Thoroughly whisk one egg with a small whisk or fork in a small bowl. Use a pastry brush to apply an egg wash over the challah. Refrigerate the rest of the egg wash for later.
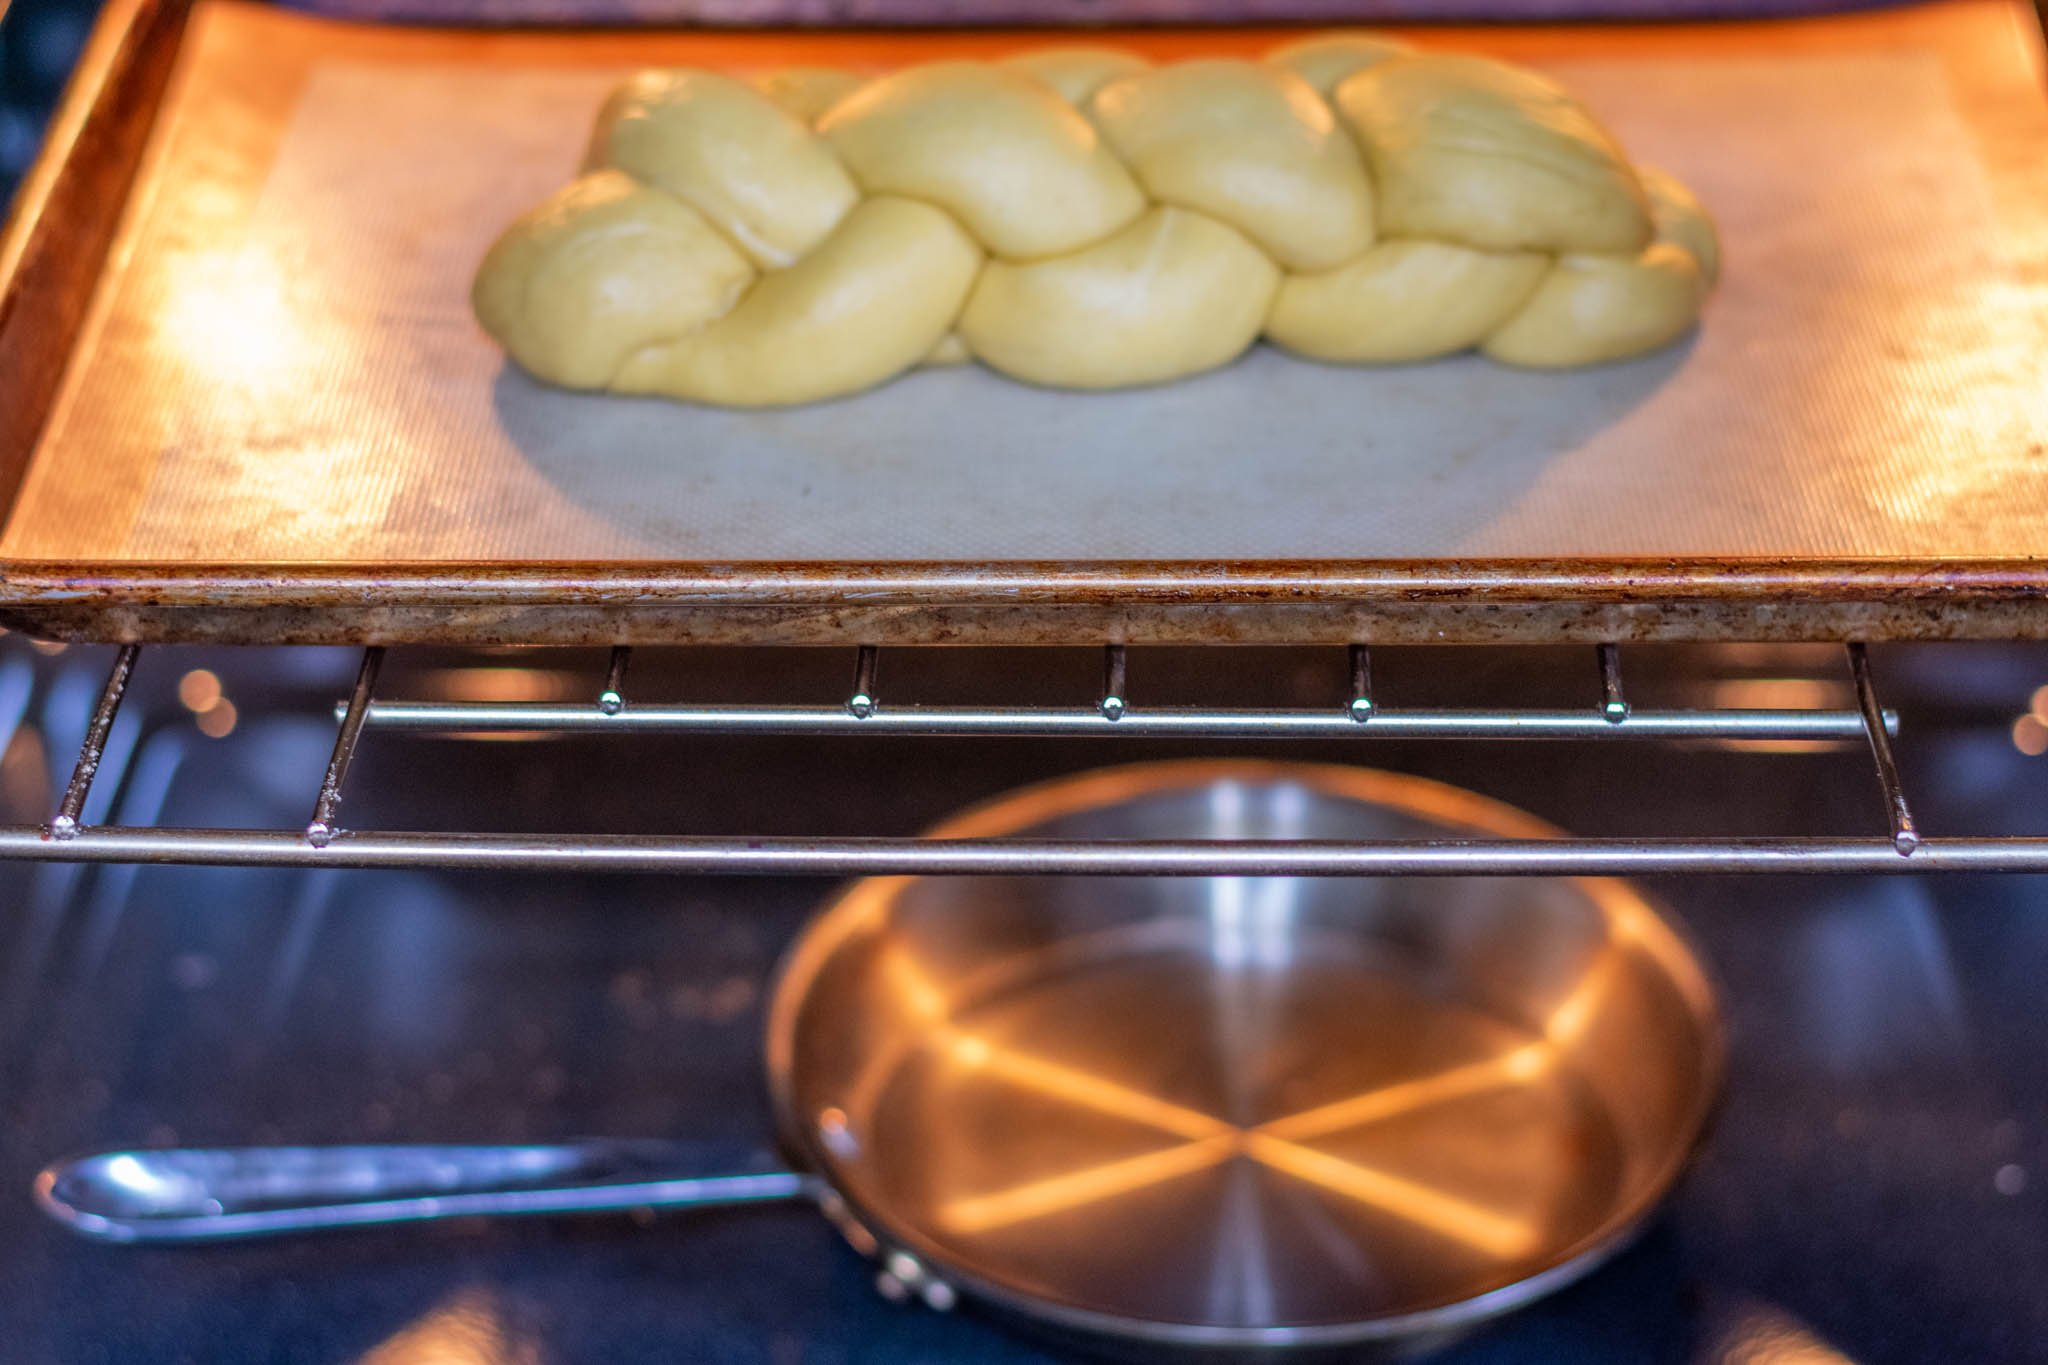
Then, place the baking sheet in an ideally warm and humid environment to proof. The humidity will help keep the challah from forming a dry crust.
In a method I learned from proofing croissants, you can create a warm and humid environment for this challah by keeping it in an oven with the light turned on and with a small pan of just boiled water in the bottom of the oven.
If you have a small thermometer and hygrometer, place them on the pan to measure the temperature and humidity. I try to keep mine at 78ºF and 60-80% humidity.
Alternatively, you can also lightly mist the pan and cover the challah with plastic wrap.
Proof the challah until it doubles in size, is somewhat poofy, and feels full of air.
At 78ºF, proofing typically takes between 4 to 5 hours.
Perform “the finger poke test” to tell if your challah is fully proofed.
Take a floured finger and gently poke the challah. The dough is under proofed if it immediately springs back.
If the dough leaves a small indentation and slowly springs back, it is likely proofed! Does your poke leave a crater that doesn’t spring back? It might be over-proofed.
10. Bake
Preheat the oven to 350ºF (if you were proofing the challah in an oven, be sure to take it out along with the water pan!).
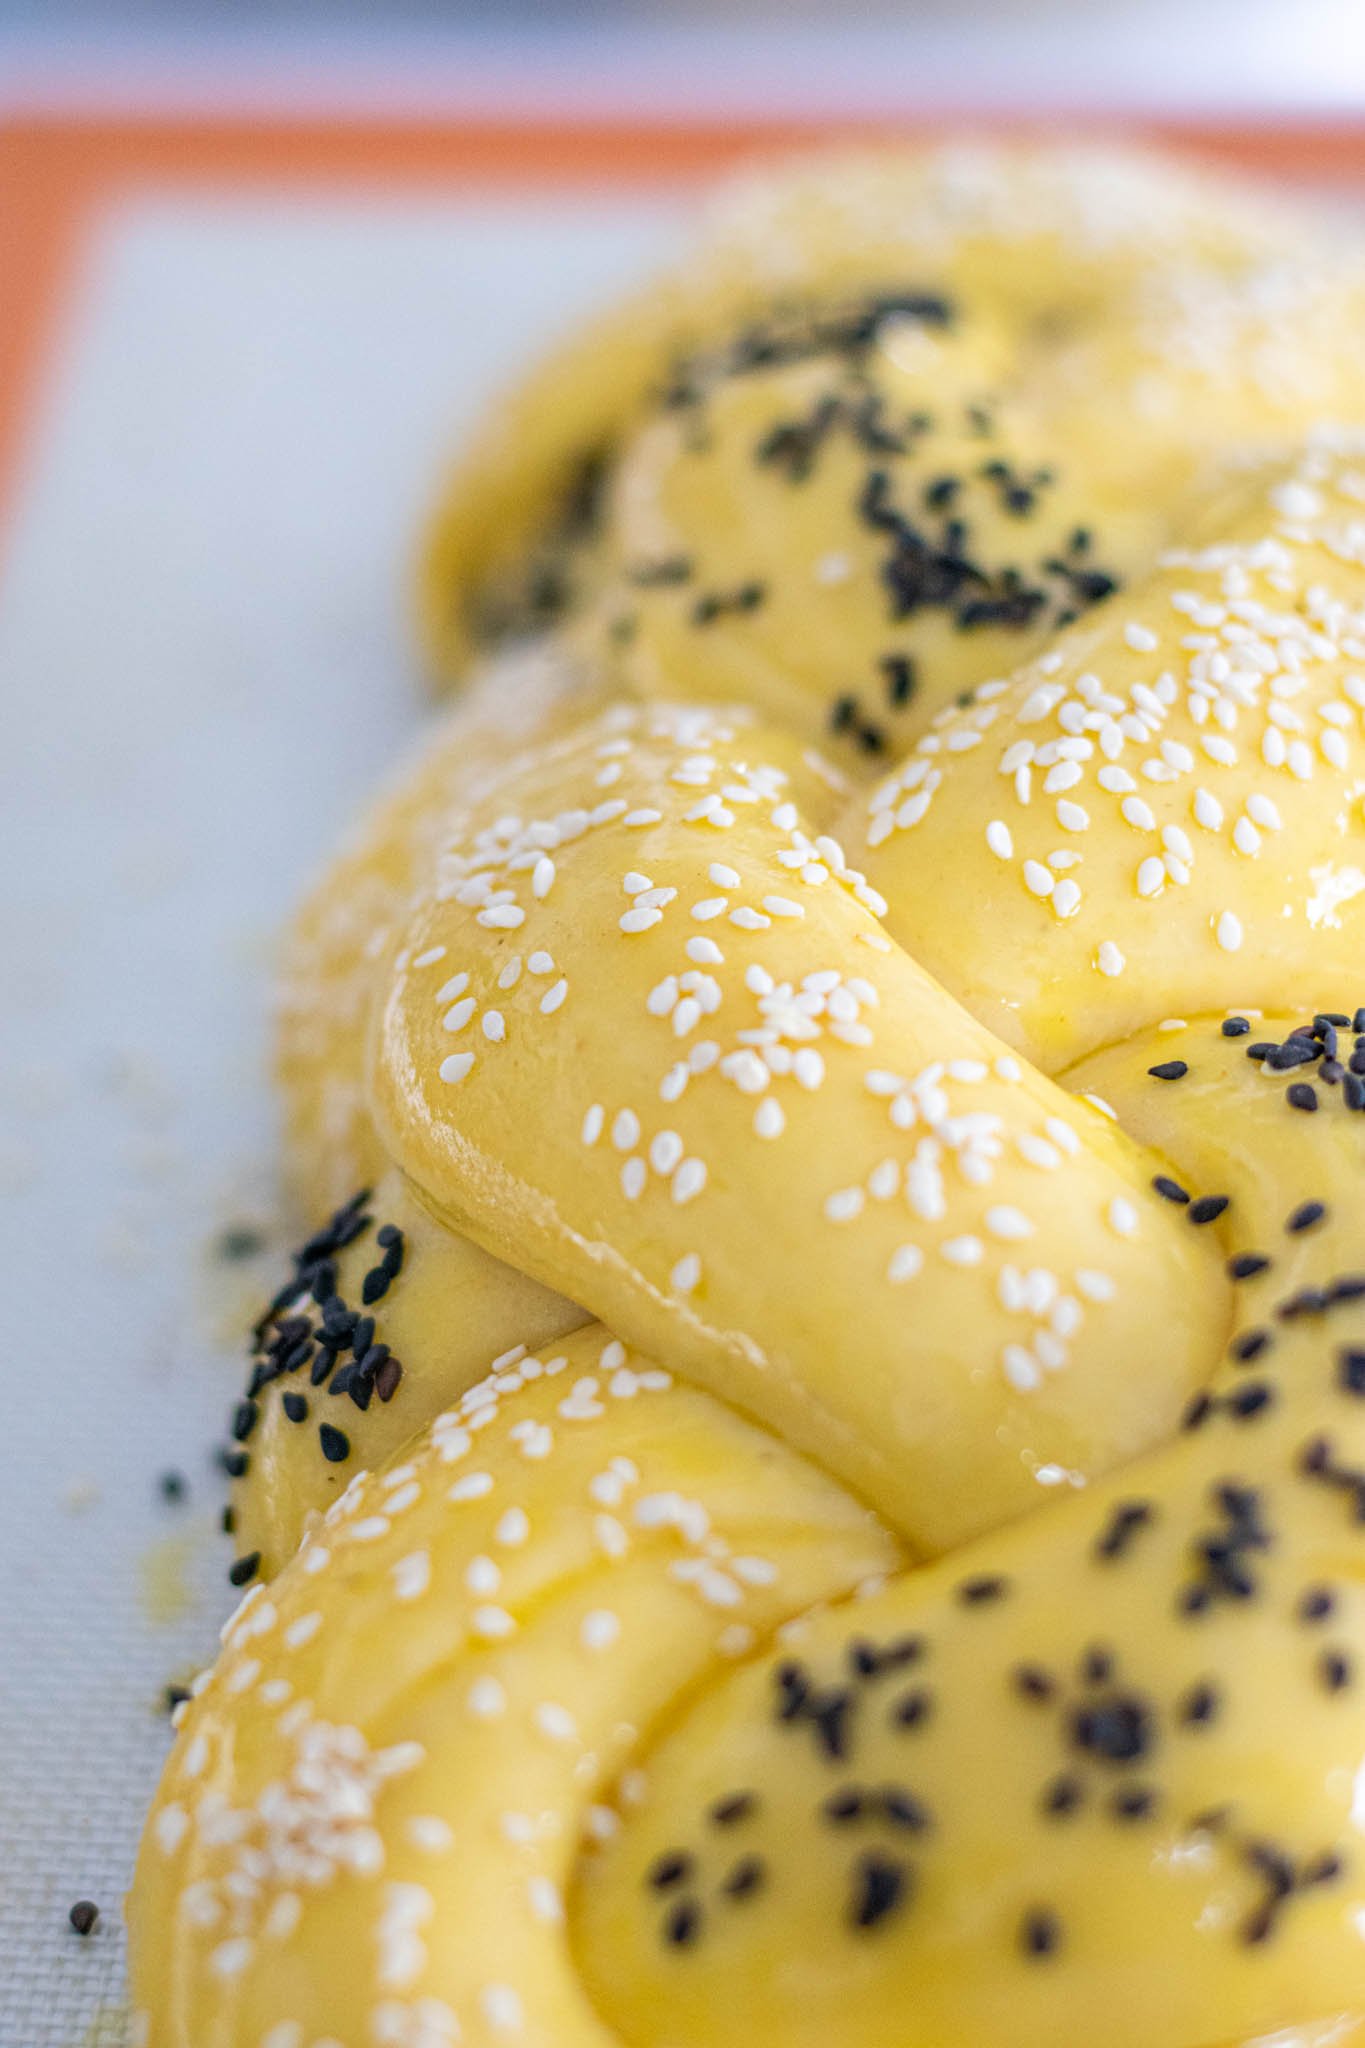
While the oven is preheating, brush the remaining egg wash onto the challah.
Sprinkle the challah with a topping of your choice. Poppy and sesame seeds are both traditional and delicious! But feel free to get creative- everything bagel seasoning, flaky salt, fennel seeds, za’atar, etc., are all great.
Bake for 35-40 minutes, rotating the pan halfway through to evenly brown.
When done, the challah crust should be shiny and evenly golden brown. The bottom will be firm and should sound hollow if you thump it. If you’d like to check the internal temperature, it should read between 190-200ºF.
Finally, allow the challah to cool on a wire rack for at least an hour before slicing or pulling it apart.

How to Serve:
There are many ways to enjoy this sourdough challah.
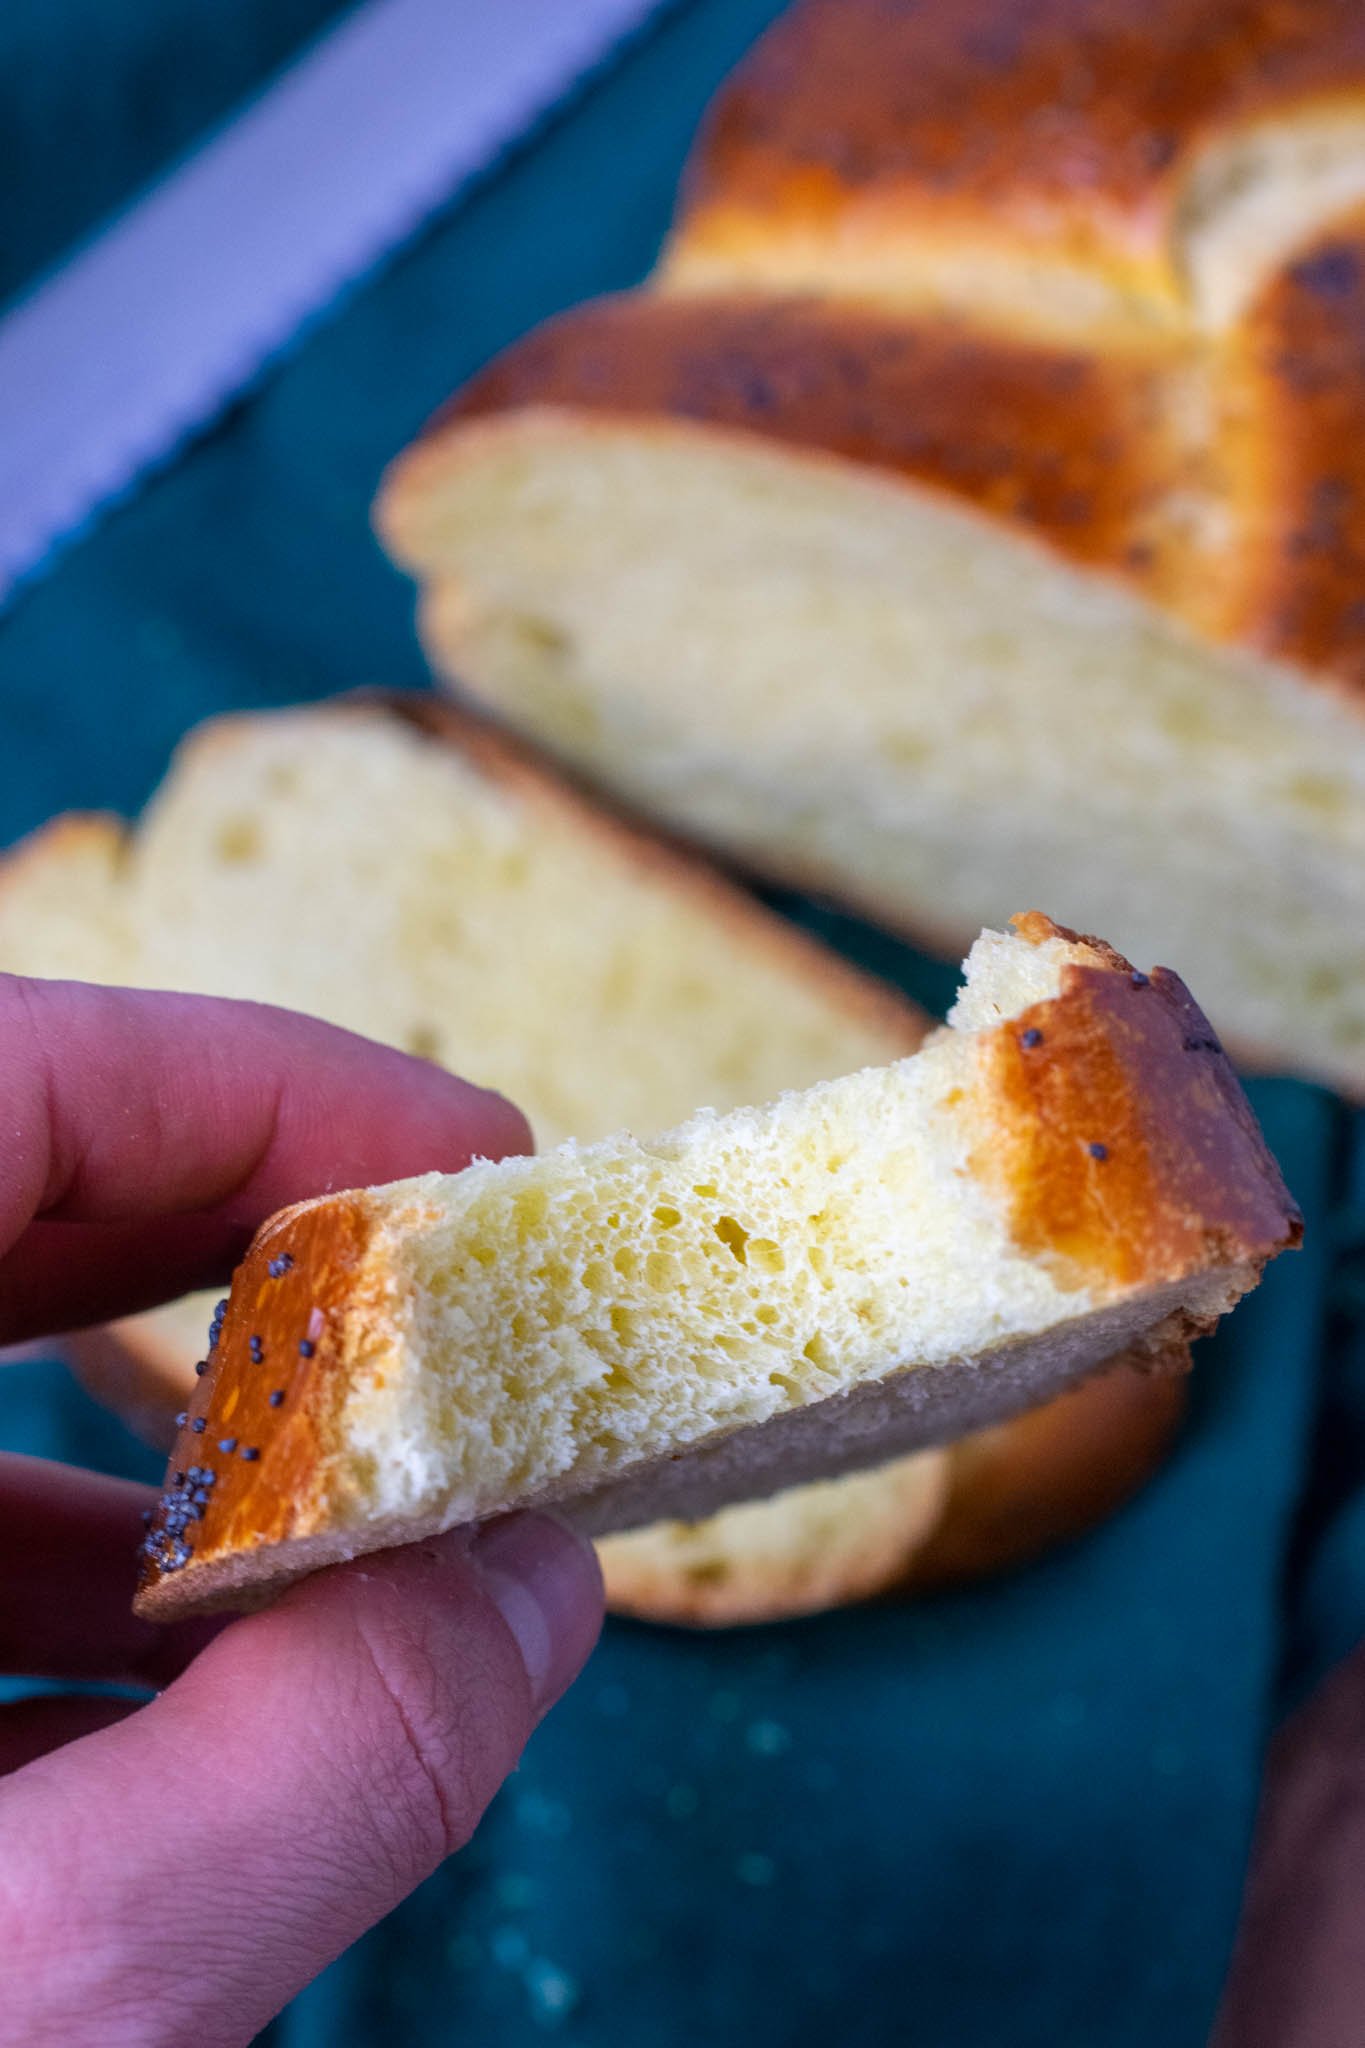
With its striking braid, it’s a beautiful bread to have at the center of your table. Slice or pull apart the bread and enjoy it on its own.
It’s also heavenly slightly toasted with butter and jam, or with flaky salt.
How to Store:
This challah is best on the day it’s baked.
Once cut, it can dry out faster than some other types of breads. Wrap it in a tea towel and keep in a brown paper bag for a couple of days. If the challah hardens or dries out some, slightly warm or toast it.
However, challah freezes well! Cut slices and keep them in a freezer-safe bag for a couple of months at least.
Have extra slices? It’s the perfect bread for making the best french toast, bread pudding, or Sourdough Cinnamon French Toast Sticks.
Sign up for my newsletter to get my exclusive Sourdough Challah French Toast recipe!
❓FAQs
Can I double the recipe?
Yes. Double the recipe and divide the dough in half or make one large challah with additional braids.
Why is my challah dry and dense?
It likely needed longer proofing or too much flour was added during shaping and braiding.
Why did the braids on my challah tear?
This occurs when challah is underproofed.
⭐️⭐️⭐️⭐️⭐️
Please leave a rating, comment or question below! Tag me on Instagram or Facebook @SourdoughBrandon or PIN this recipe on Pinterest to come back to it later!

Sourdough Challah Recipe
Equipment
- 1 Pastry Brush, for egg wash
- 1 Brød and Taylor Folding Proofer, optional but helpful
Ingredients
Levain
- 50 grams Sourdough Starter
- 50 grams Bread Flour
- 50 grams Warm Water
Sourdough Challah Dough
- 340 grams Bread Flour
- 40 grams Granulated Sugar
- 7 grams Sea Salt
- Levain, see above, or 150g of active sourdough starter
- 60 grams Warm Water
- 40 grams Neutral Oil, vegetable, canola, grapeseed, etc.
- 2 Eggs
- 1 Egg Yolk
- 1 Egg, for egg wash
- Sesame or poppy seeds, for topping
Instructions
- Build the Levain:Mix together the sourdough starter, bread flour, and warm water in a clean and empty jar. Cover and let sit in a warm location for about five hours until doubled, bubbly, and ripe.Alternatively, skip this step and use 150g of active sourdough starter.50 grams Sourdough Starter, 50 grams Bread Flour, 50 grams Warm Water
- Mix the dry ingredients: When your levain has doubled in size, mix together the bread flour, granulated sugar, and sea salt.340 grams Bread Flour, 7 grams Sea Salt, 40 grams Granulated Sugar
- Mix the wet ingredients: In a separate bowl, whisk together the levain, warm water, neutral oil, eggs, and egg yolk until thoroughly mixed.60 grams Warm Water, 40 grams Neutral Oil, 2 Eggs, 1 Egg Yolk, Levain
- Mix together the wet and dry ingredients: Pour the wet ingredients into the bowl of dry ingredients. Use a spatula to mix together the ingredients until most of the flour is hydrated and the dough comes together into a sticky and shaggy ball.
- Knead:Place the dough onto a lightly floured work surface. With lightly floured hands, knead the dough for 8-10 minutes until it is completely smooth and the dough develops enough gluten to pass the windowpane test. The dough will start off extremely sticky but will come together as it is kneaded. Flour as minimally as possible.
- First Proof:Place the dough into a lightly oiled bowl, cover, and proof in a warm location for about 5 hours at 78ºF. Proof the dough until it is doubled and there is a noticeable amount of gases built up in the dough.
- Overnight Proof:Place the covered bowl in a refrigerator to proof overnight for 12-18 hours.
- Degas and Shape into Ropes:The next day, slightly punch down the dough to degas it. Dump the cold dough onto a work surface and divide it into four equal pieces.One at a time, press each piece into a small, flat rectangle. Gently roll up the dough from one side until you have a short rope.Use both hands and starting from the center of the rope, roll the rope out until it is 14-16 inches long. The rope should be skinnier on the ends. Set aside and repeat with the three remaining pieces of dough until you have four that are of equal length.
- Braid:Please follow the braiding instructions and images in the guide above as I find they're the most helpful.Lay the four equal ropes of dough parallel to each other and pinch one end together. Braid the challah following the pattern in my guide (or if you're braiding in another pattern). Don't braid the challah too tight and try not to stretch the ropes as you braid the dough.When you reach the end of the braid, pinch both ends of the dough and slightly tuck both ends underneath the challah to neaten it up.
- Final Proof:Transfer the shaped challah onto a half sheet pan lined with a reusable silicone baking mat or parchment paper. For an extra shiny crust, this dough will get two egg washes. Whisk together one egg and use a pastry brush to apply the egg wash to the challah. Reserve the remaining egg wash for later in a refrigerator.Place the half sheet pan in a warm and humid location* to proof for about 5 hours at 78ºF. Proof the dough until it is doubled in size, is somewhat poofy, and feels full of air.1 Egg
- Bake:Preheat oven to 350ºF (177ºC).While the oven is preheating, brush the remaining egg wash onto the challah. Sprinkle toppings of your choosing onto the challah (sesame or poppy seeds are excellent).Bake the sourdough challah for 35-40 minutes, rotating the pan halfway through to evenly brown. When done, the challah should be shiny, evenly golden brown, the bottom will be firm and sound hollow if tapped, and the internal temperature should read between 190-200ºF.Cool on a wire rack for at least one hour before serving.Sesame or poppy seeds
Video
Notes
- This sourdough challah is best served on the day it’s made. With any remaining challah, store in a brown paper bag or wrapped in a tea towel and bread bag. Warm or toast up slices if slightly hardened. It also makes excellent Sourdough Challah French Toast.
- Slices can be frozen in a freezer-safe bag for at least two months.


I’ve gotten to the braiding stage and I must say that the dough/braids were a bit sticky. I’m concerned that the entire shaped loaf is going to congeal together either during the second proof or in the bake….I’ll have to wait and see…
Hopefully it comes together for you! I shape the challah with just a light dusting of flour, which helps it not be sticky.
Is the first proof and the overnight proof two steps? In other words do I proof 5 hours warm place and then put in fridge overnight?
Or is it you can proof 5 hours warm place or you can proof over night in fridge?
Two separate steps. First proof at room temp until it almost doubles in size and then you put it in the fridge overnight, which will slow down fermentation, improve the flavor, and makes shaping easier!
Thank you
If I’m short on time, can I not do the fridge proof and just extend the first proof?
You could skip the overnight proof. Proof until it’s doubled in size and then divide and shape. Just note that it might make the ropes harder to divide and shape. I would at least freeze it for a few minutes to cool the dough down and that will help!
Beautiful images and beautiful challah. Delicious and will be making again! Very impressed.
That’s so nice of you, Jamie! I hope you continue to enjoy.
Hi Brandon, this was very helpful. The braiding pictures helped me alot. I never did that before!
I’m glad they were helpful, Paige! Braiding a challah can be intimidating if you’ve never done before so I’m happy it helped. Feel free to send along any pics to my email or on social media and I’d be happy to help further.