Sourdough Autolyse 101
This post may contain affiliate links for products and ingredients I use and recommend. For more information, see my affiliate disclosures.
One of the first steps you may come across in many sourdough bread recipes is Autolyse. The easy first resting step mixes only flour and water, but many wonder what the purpose of autolyse is and when you can skip it.
This detailed sourdough autolyse guide will walk through exactly what autolyse is, the history of it, and when it’s okay to skip autolyse.
With images and examples of autolyse in various resting stages listing the pros and cons of each, you’ll have a better understanding of the stage and why so many sourdough recipes call for it.
👉 Check out more of my sourdough guides, including my popular guides on Sourdough Bulk Fermentation, How to Make Sourdough Starter, what a sourdough levain is, and How to Dry Sourdough Starter to Keep Indefinitely.
What is Autolyse?
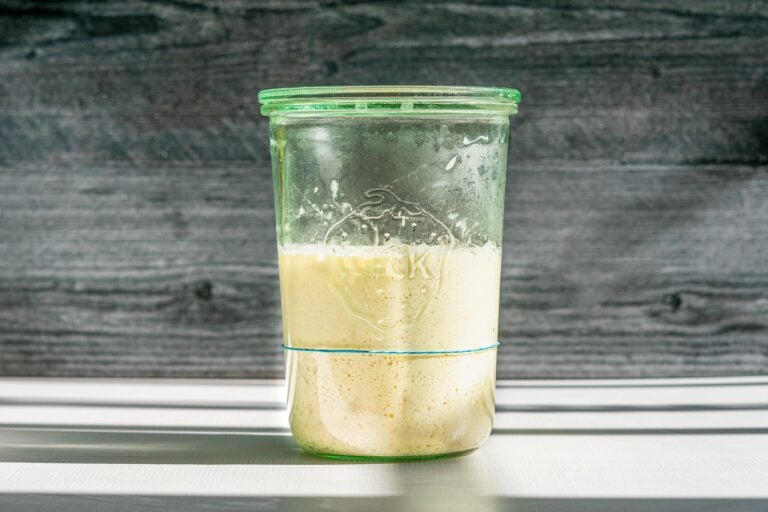
Autolyse (pronounced auto-lease) is an early resting stage of mixed flour and water in bread baking.
It’s often one of the first steps to bake sourdough bread or baguette recipes that kickstarts gluten development. But how so?
Protease, an enzyme, breaks down gluten and proteins easier, creating a more extensible dough. And amylase, another enzyme, breaks down starchs into sugars, which the yeast feed off of during fermentation. This enzymatic activity increases during autolyse.
Autolyse typically involves mixing only flour and water together and not salt or sourdough starter/yeast/levain.
In some recipes or bread books, you may see autolyse spelled as autolyze, autolysis, or even another term- fermentolyse- used (more on this later).
Some bakers and bakeries skip autolyse completely, while others consider it a helpful step to increase extensibility and reduce mixing time.

History of Autolyse
Most credit Professor Raymond Calvel as the developer of the autolyse technique in 1974 in France through bread experimentation.
Calvel was bewildered at modern French mechanical overmixing practices and what he saw as a degradation in overall bread-baking quality due to modern mixers.
While versions of the autolyse method may have existed before Calvel, he popularized and named it.
The name autolyse comes from the Greek “self-splitting.” This refers to biological cells self-digesting and destroying themselves from enzymatic activity.
One of his books, The Taste of Bread, was and still is extremely influential in reviving French bread baking techniques. The textbook details milling, baking with various wheats, oxidation, fermentation, storage, and more.
In fact, Calvel was so influential in bread baking, that he was the advisor and teacher for Julia Child and Simone Beck’s bread chapter in Mastering the Art of French Cooking.
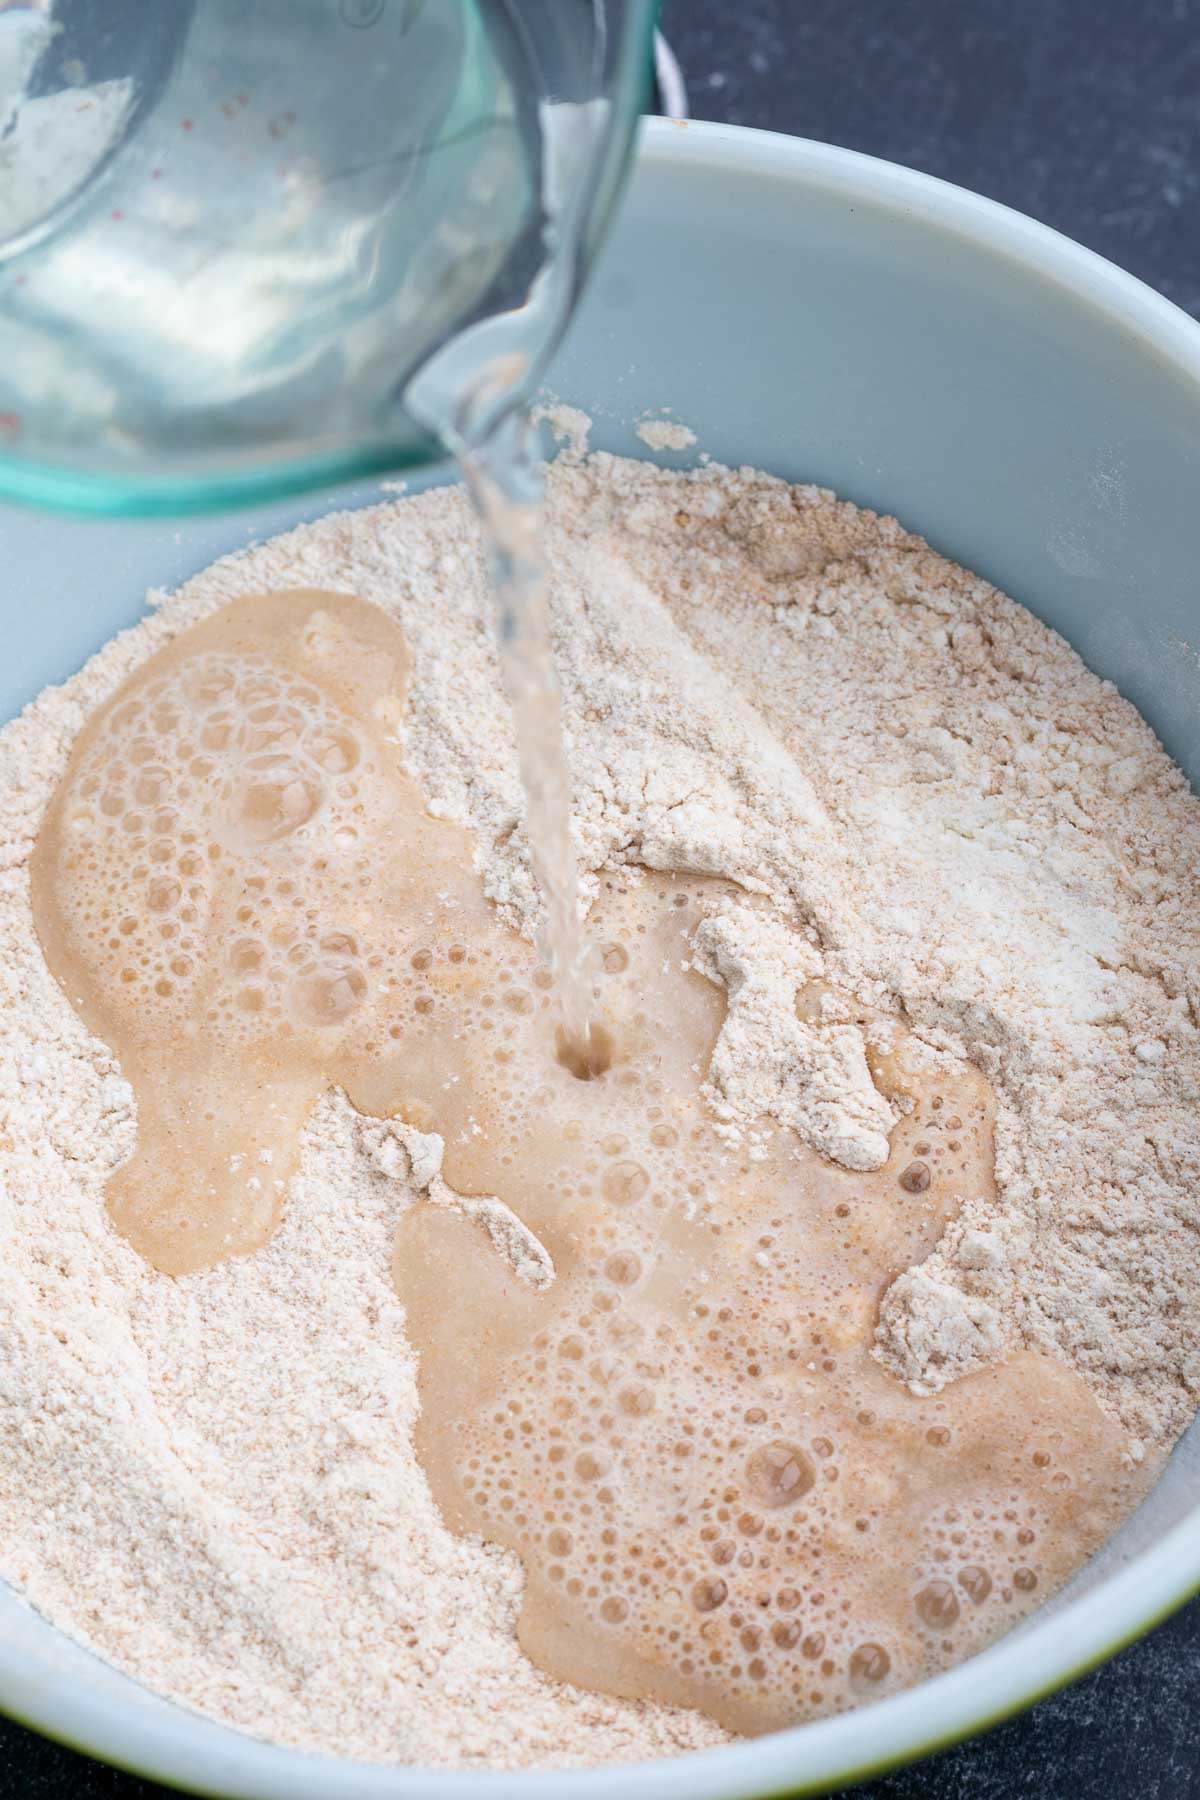
How to Autolyse
Performing autolyse is very simple.
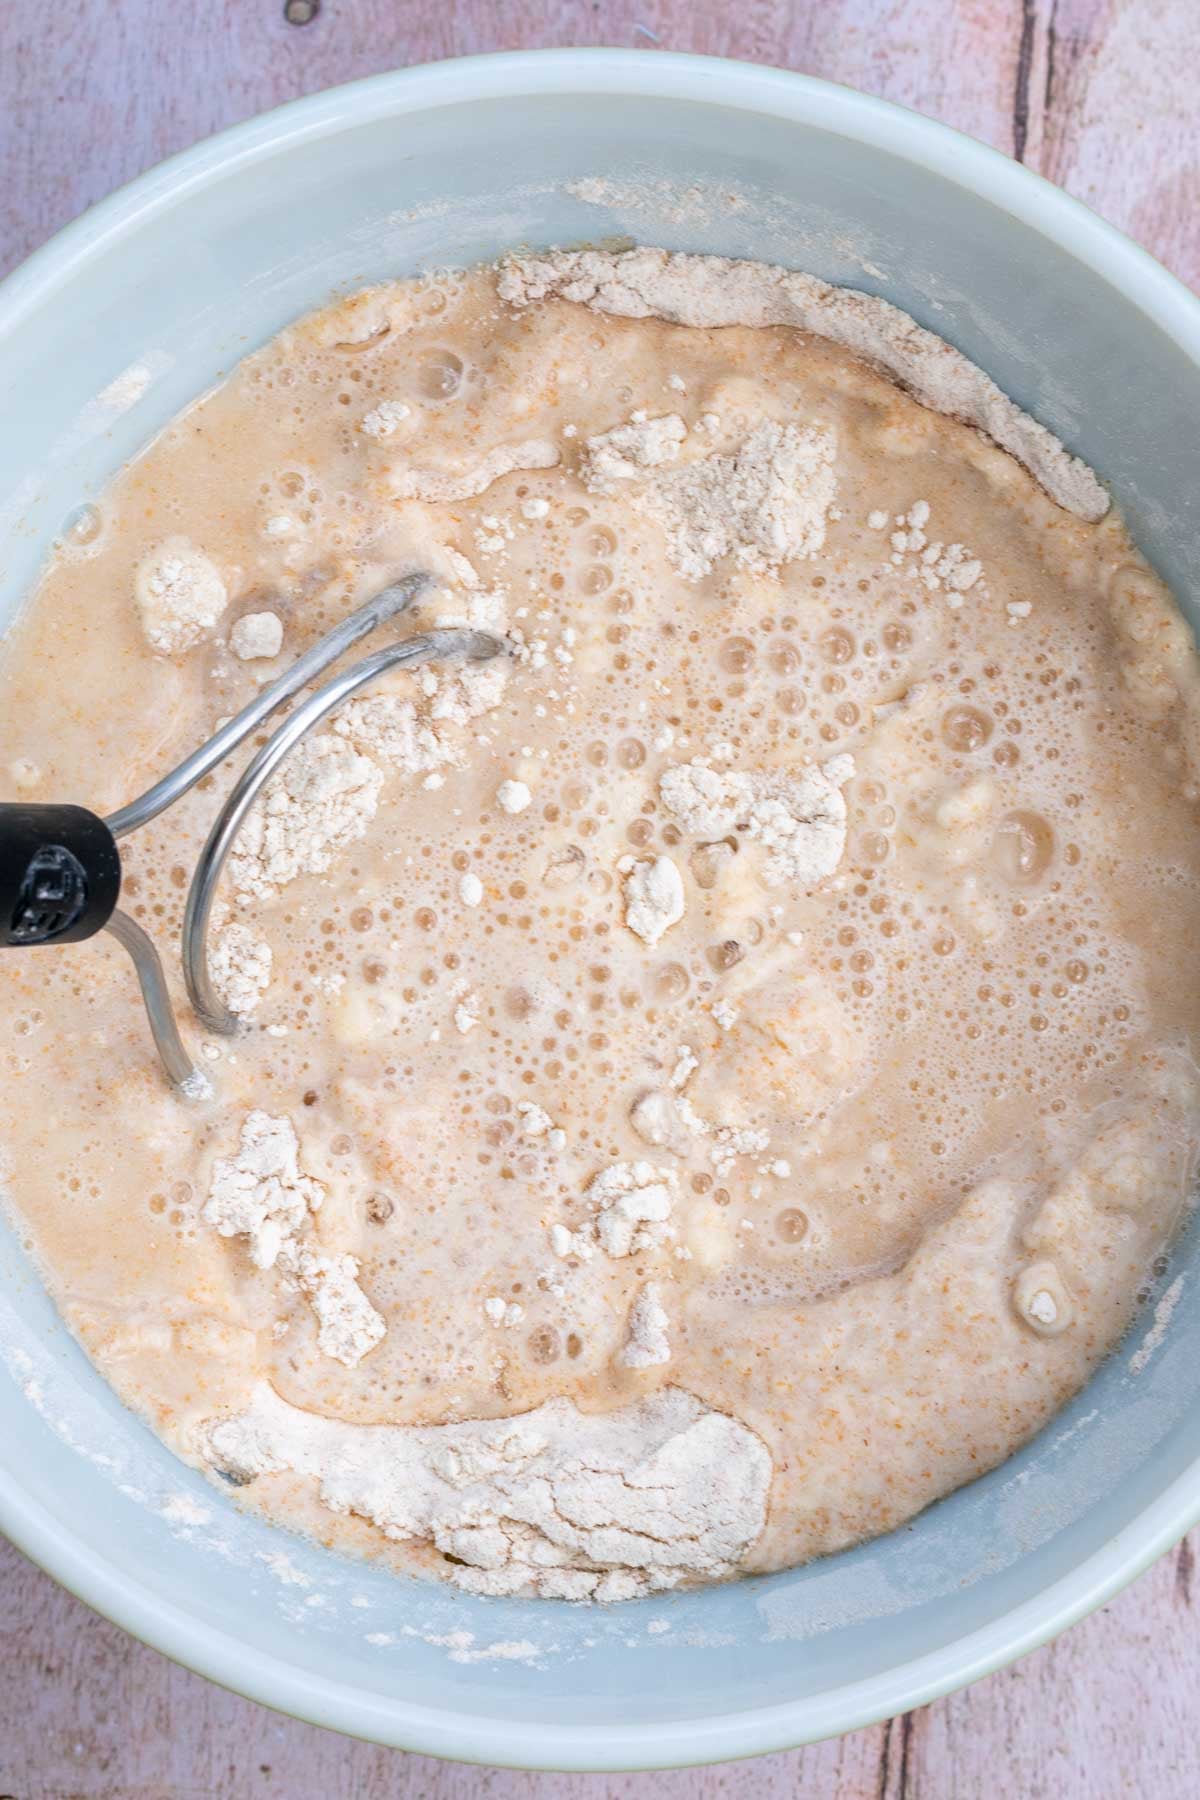
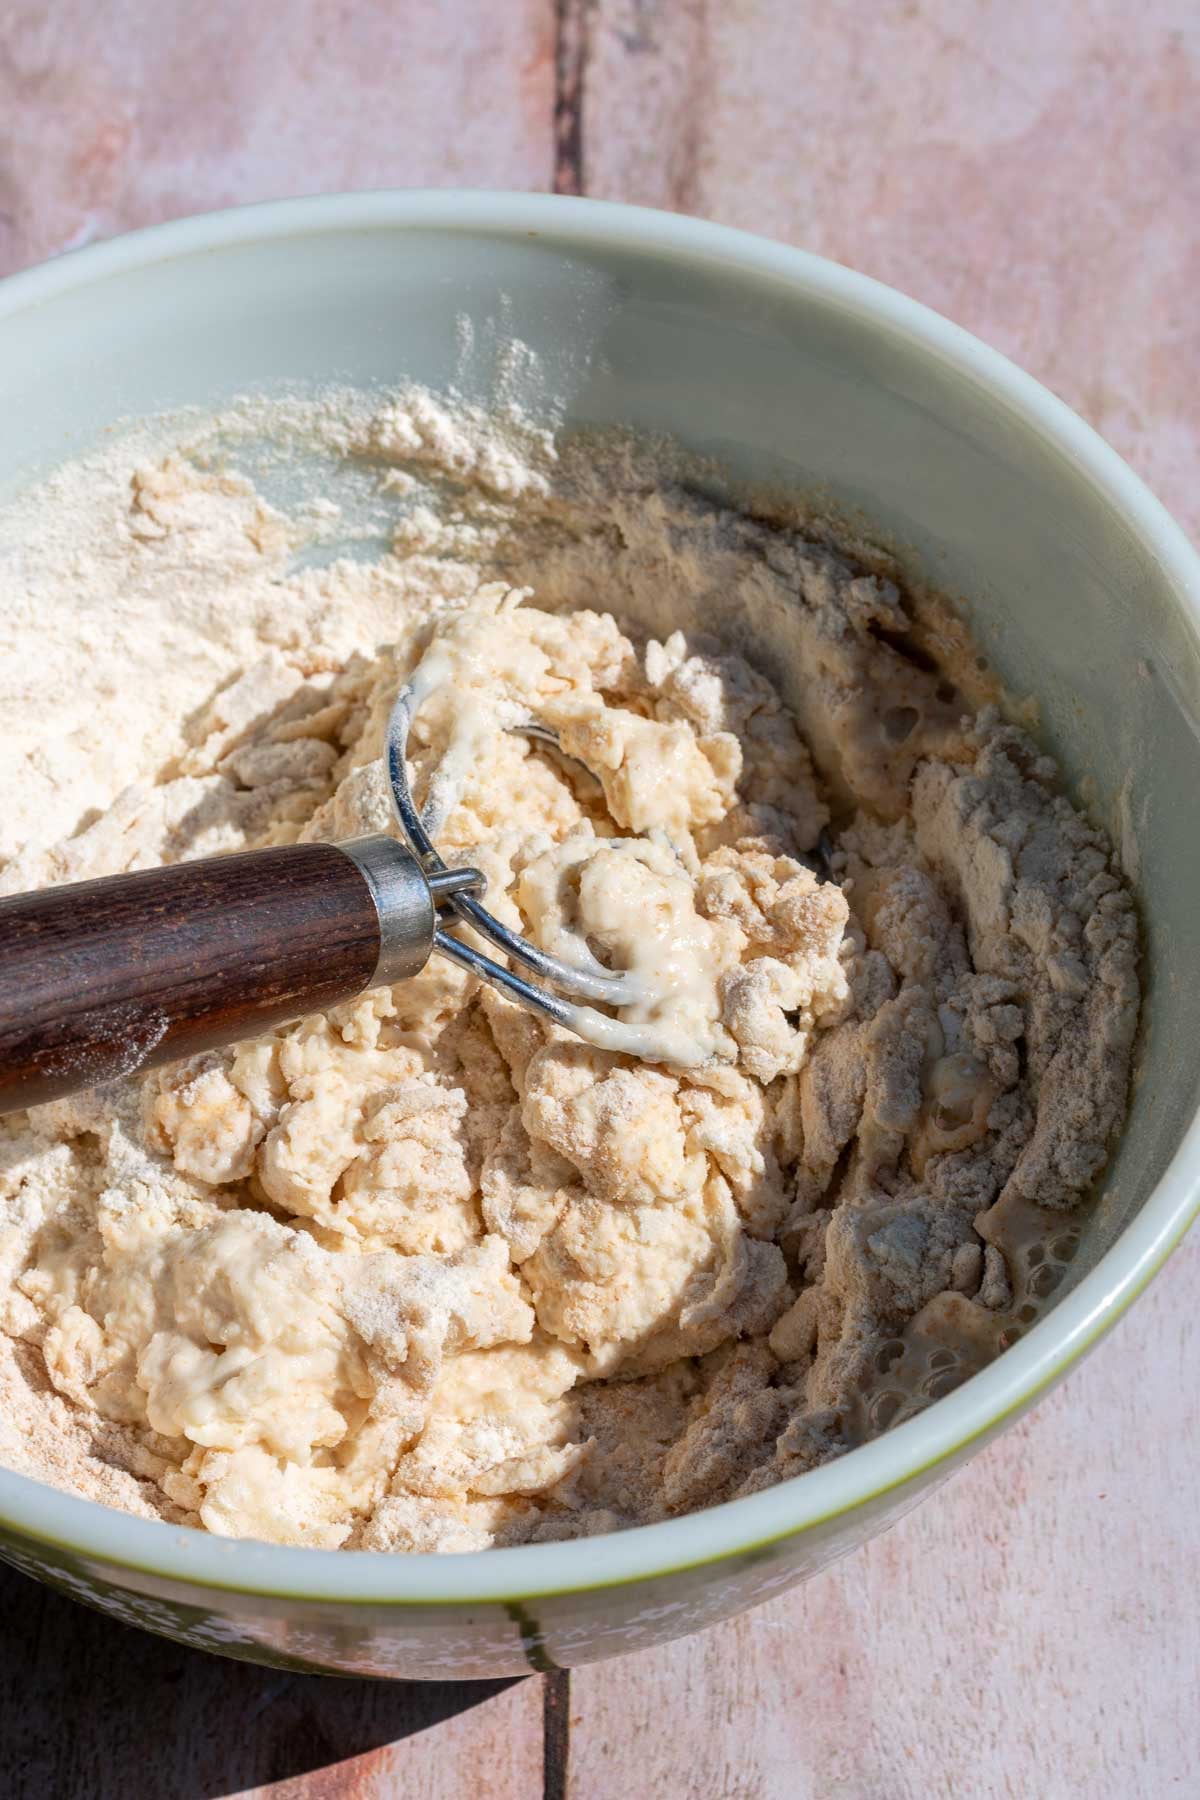
Add the flour(s) to a large mixing bowl for sourdough and most other breads.
Then, pour in the water and use your hands, a spatula, or a dough whisk to mix the flour and water together until the flour hydrates and little to no dry spots remain.
Cover and rest for typically at least 30 minutes and up to 12 hours, depending on your recipe and schedule. That’s it!
I recommend mixing room temperature or warm water instead of cold water. Your dough will be warm when you add your starter/levain and help jump-start fermentation.
I like using this Brød and Taylor Danish Dough Whisk for mixing in autolyse. It makes mixing so much easier for high-hydration breads like my 100% hydration Sourdough Pan de Cristal and batters! Plus, it’s dishwasher safe and you can use it to mix polenta, grits, or porridge to remove lumps.
How Long Should Autolyse Last?
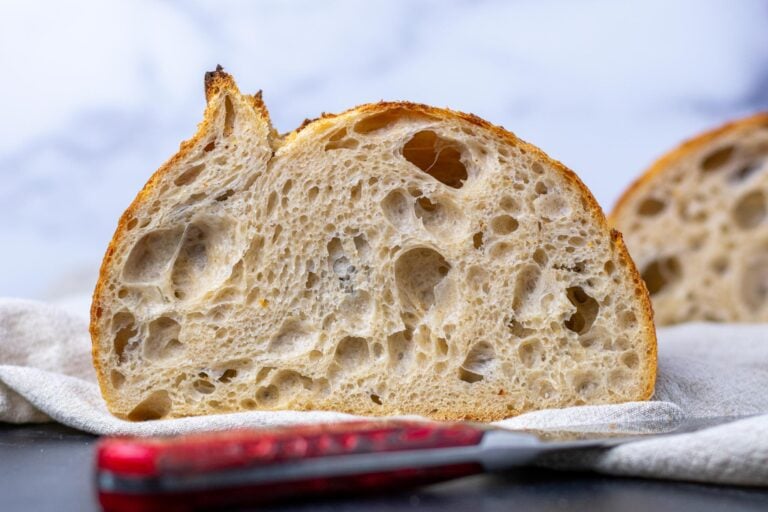
Most bread recipes call for at least a 30-minute autolyse and up to a couple of hours. I perform a one hour autolyse for most of my sourdough breads like My Everyday Sourdough Bread Recipe or this Chocolate Coffee Sourdough Bread.
The exact length of autolyse in a recipe depends on many factors, such as: the flour used, its gluten/protein content, if the flour is freshly milled or not, if you’re hand mixing or not, and one’s personal schedule.
In general though, autolyse is a flexible step that you can adjust to fit your schedule. 20-30 minutes is considered a minimum amount of time.
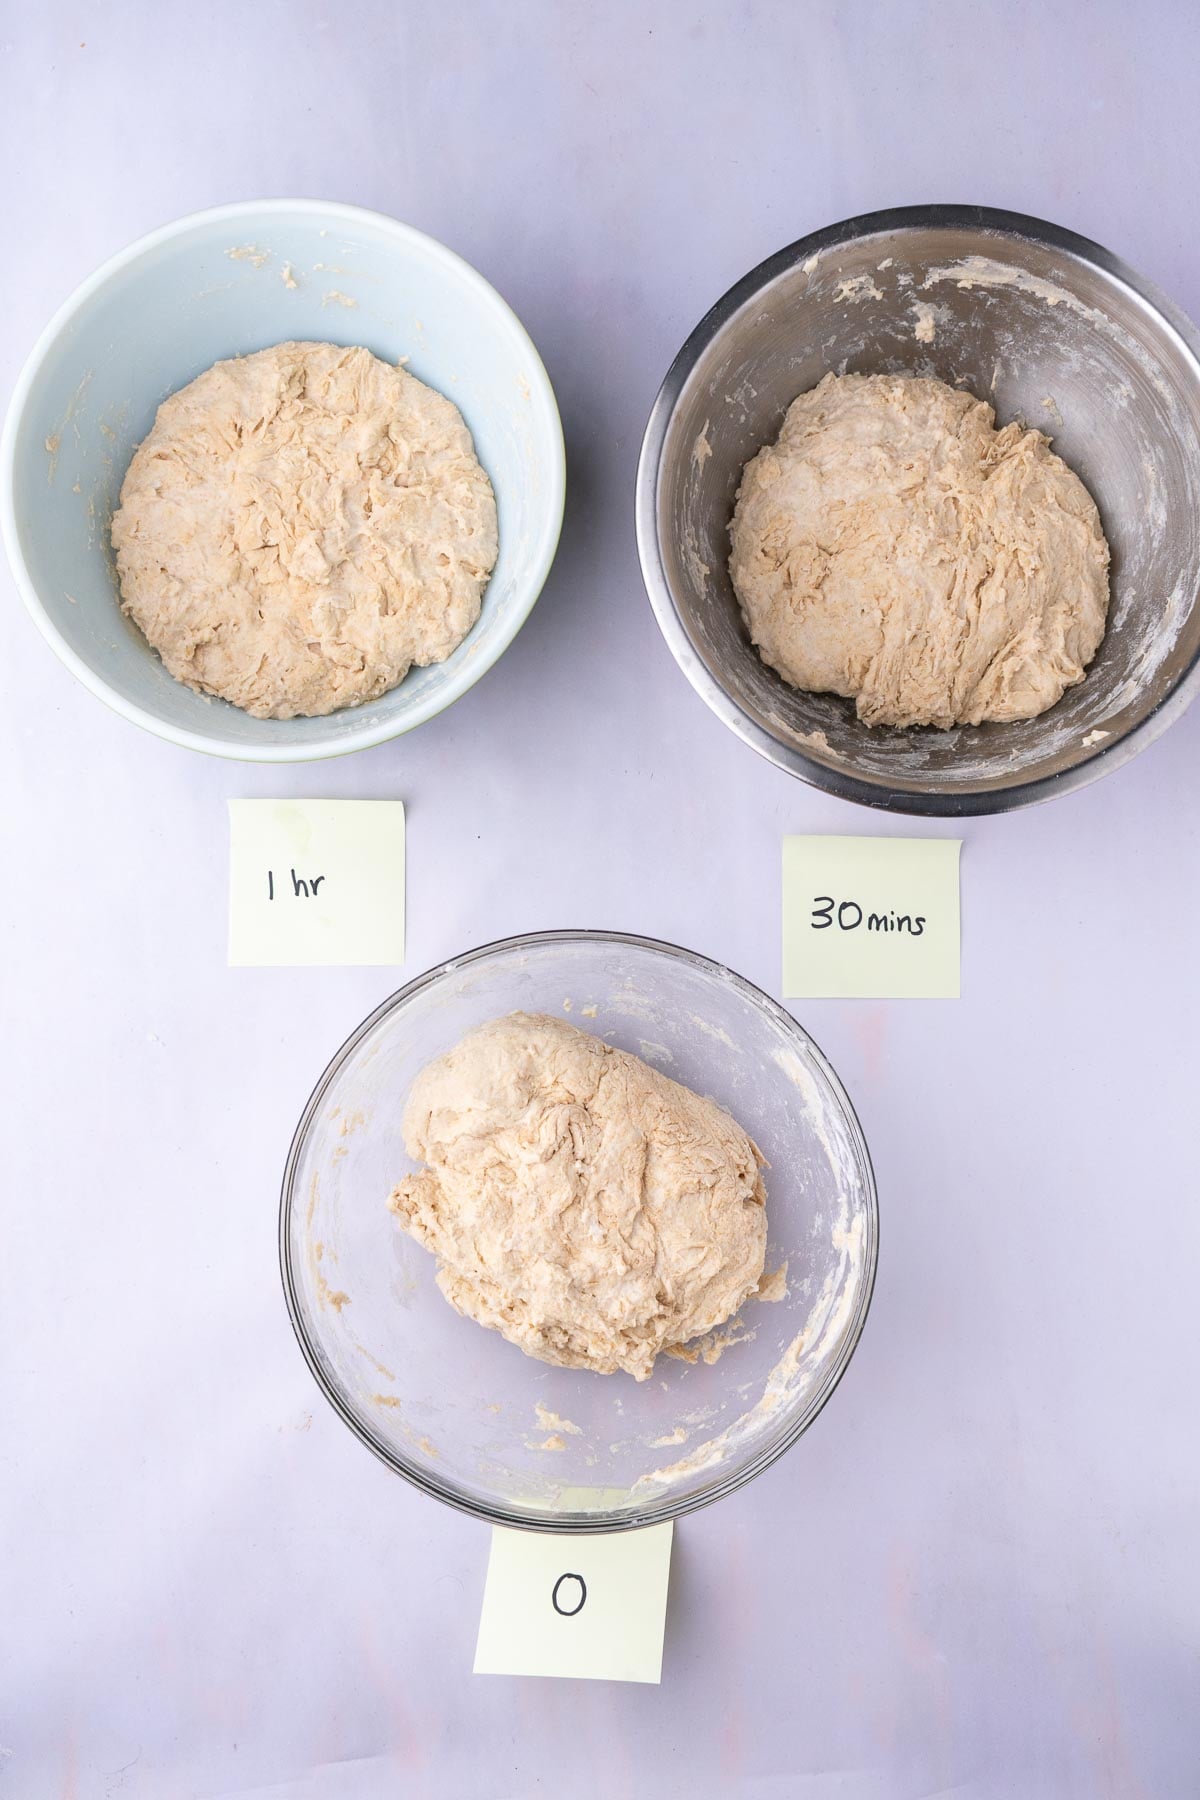
To demonstrate differences, I compared three doughs, all with the exact same formula using My Everyday Sourdough Bread Recipe, but with three different autolyse times.
In these tests below, I exhibit how time affects the autolyse method in sourdough bread dough using a one-hour autolyse, 30-minute autolyse, and none at all.
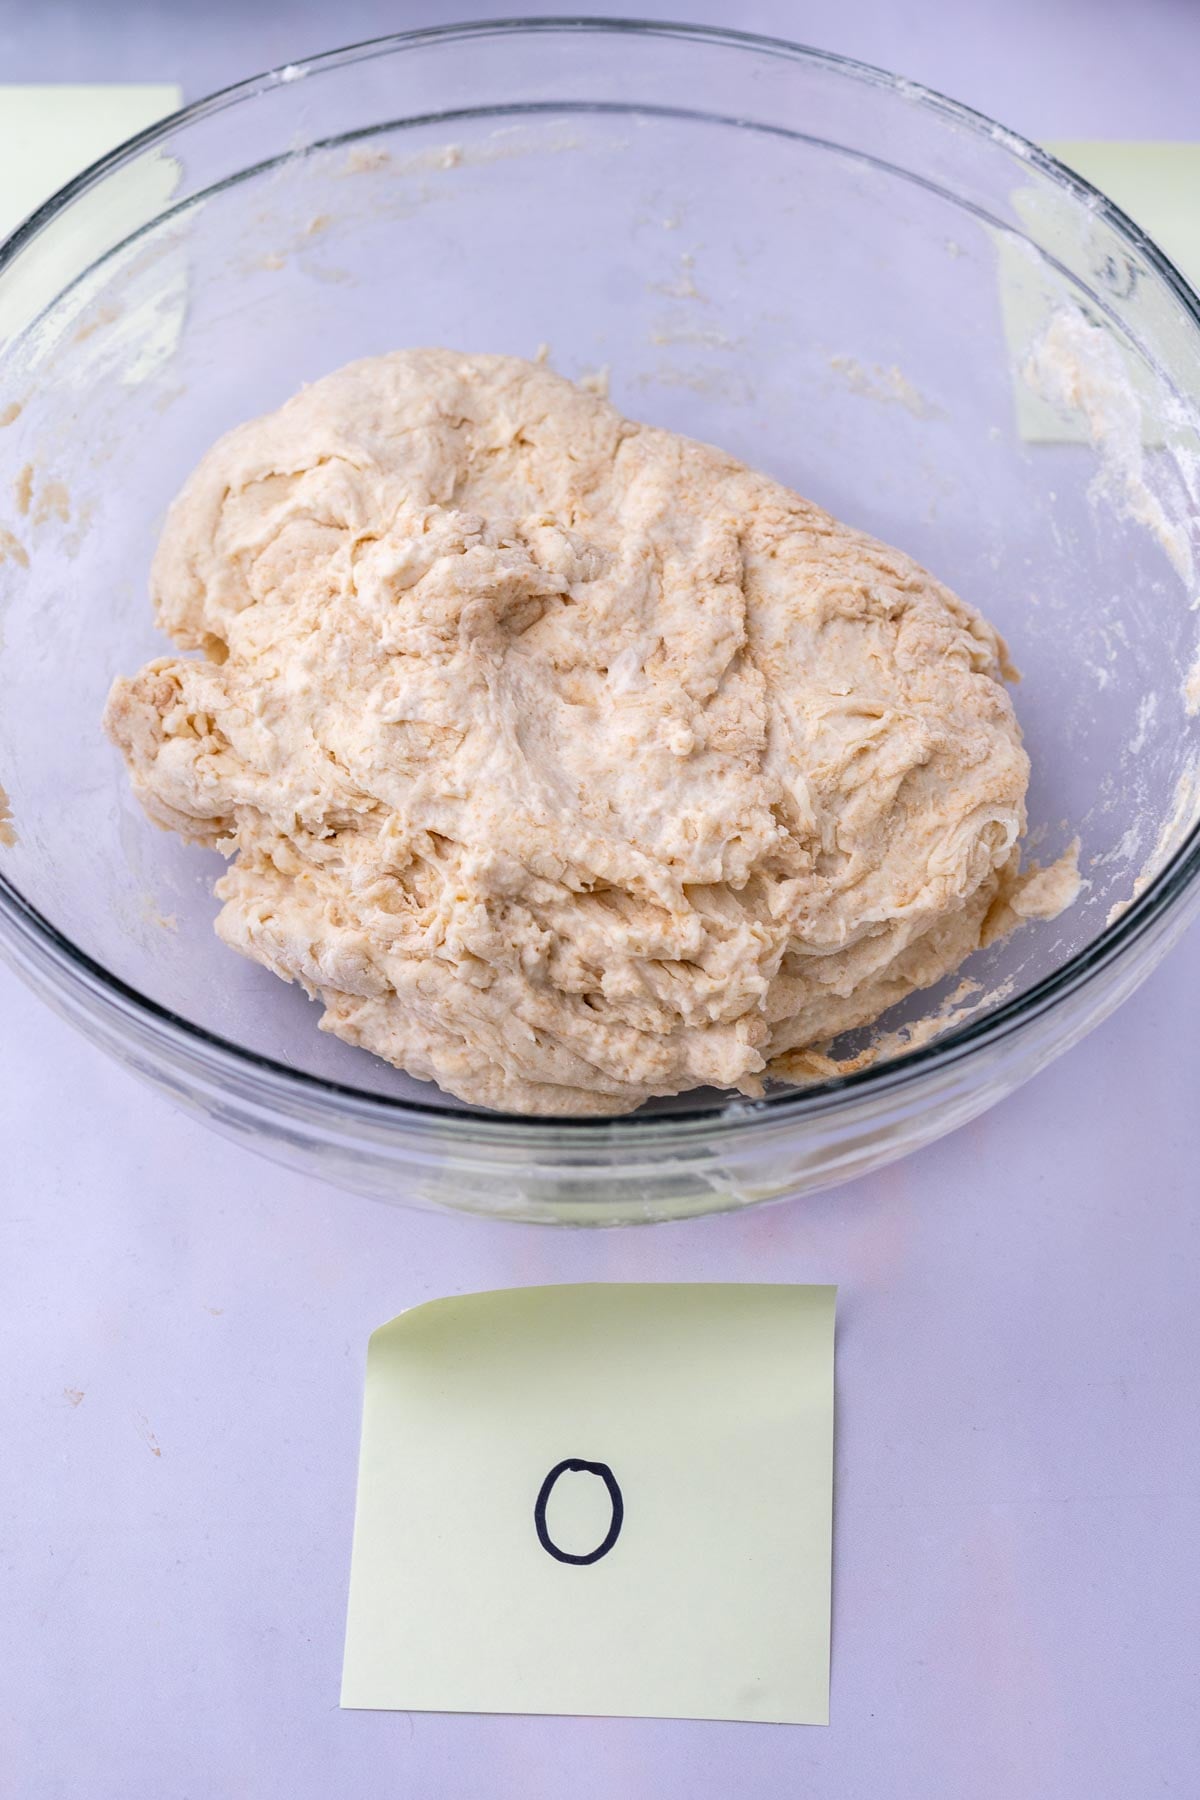
No Autolyse Test
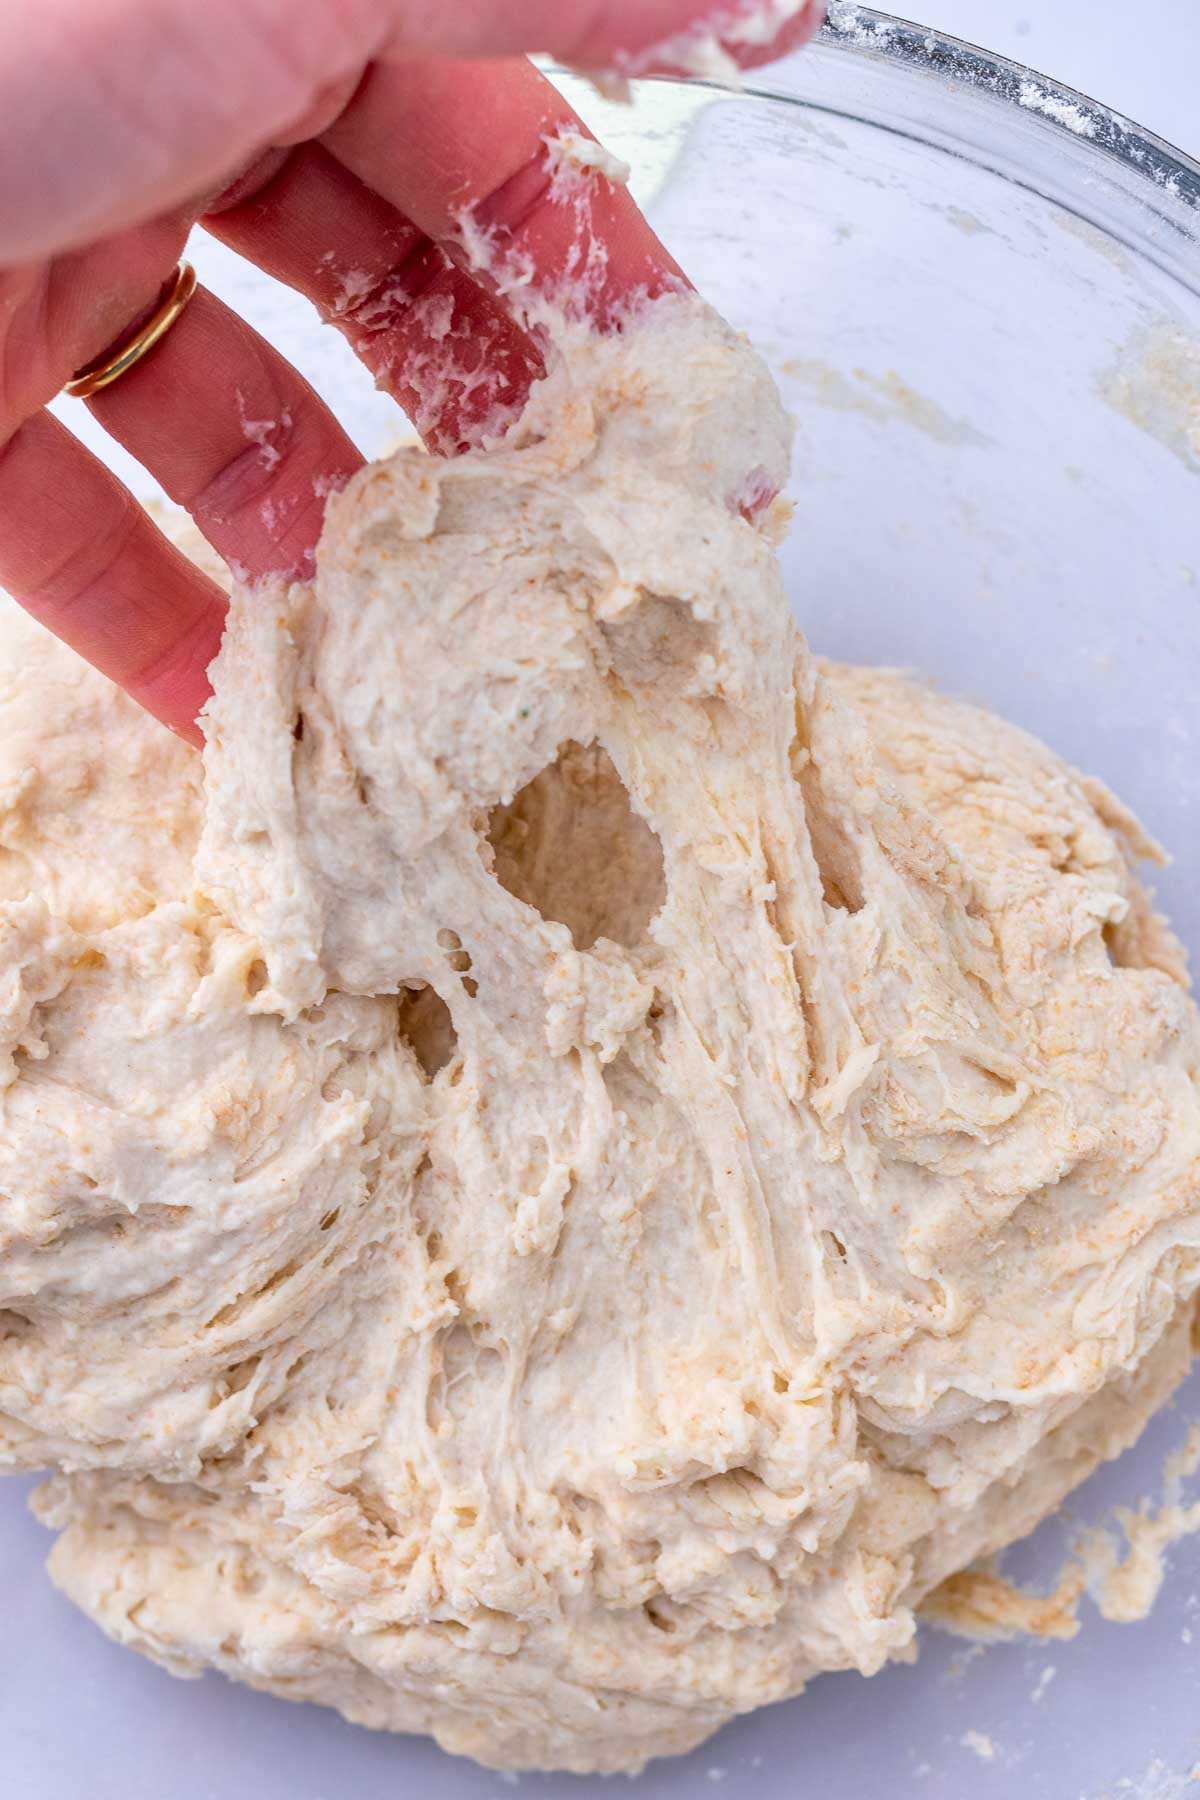
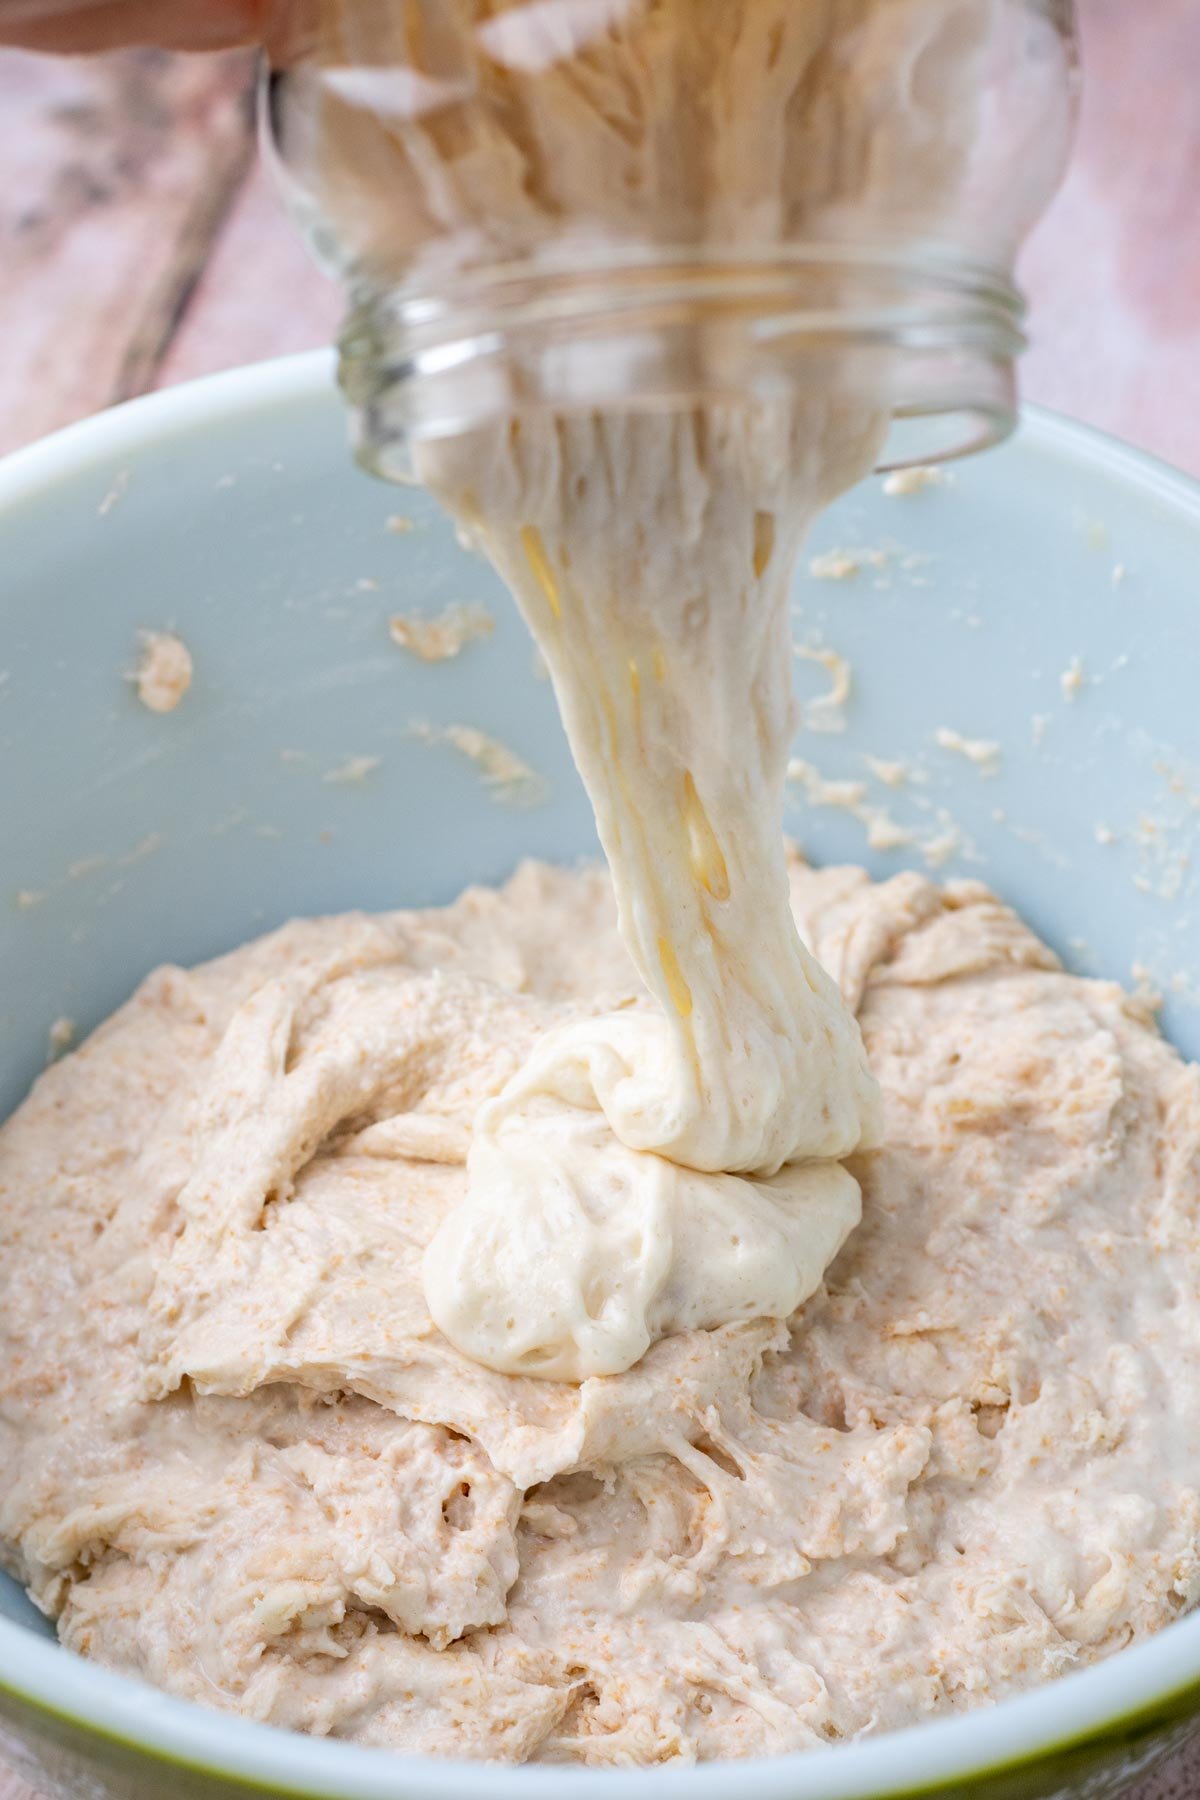
In this test with no autolyse, I mixed the flour and water together, immediately followed by the salt and levain (starter).
The dough was extremely sticky and shaggy, and little gluten developed after the initial mix.
When I lifted the dough with my hands, it tore apart immediately.
Adding the salt and levain in the next mixing step required longer hand mixing (about 7 minutes) to be strong and extensible enough to begin Sourdough Bulk Fermentation.
The dough may require an extra fold or two during fermentation to add strength with no gluten development. It may also require a slightly longer fermentation due to less enzymatic activity and breakdown of sugars.
A pro of skipping the autolyse step is that it may save you time in your schedule by mixing all of your dough ingredients together.
Finally, in a large commercial environment, or even for some cottage or residential bakers, skipping autolyse may be preferred especially if you are using a mechnical mixer and mixing large batches of dough at a time.
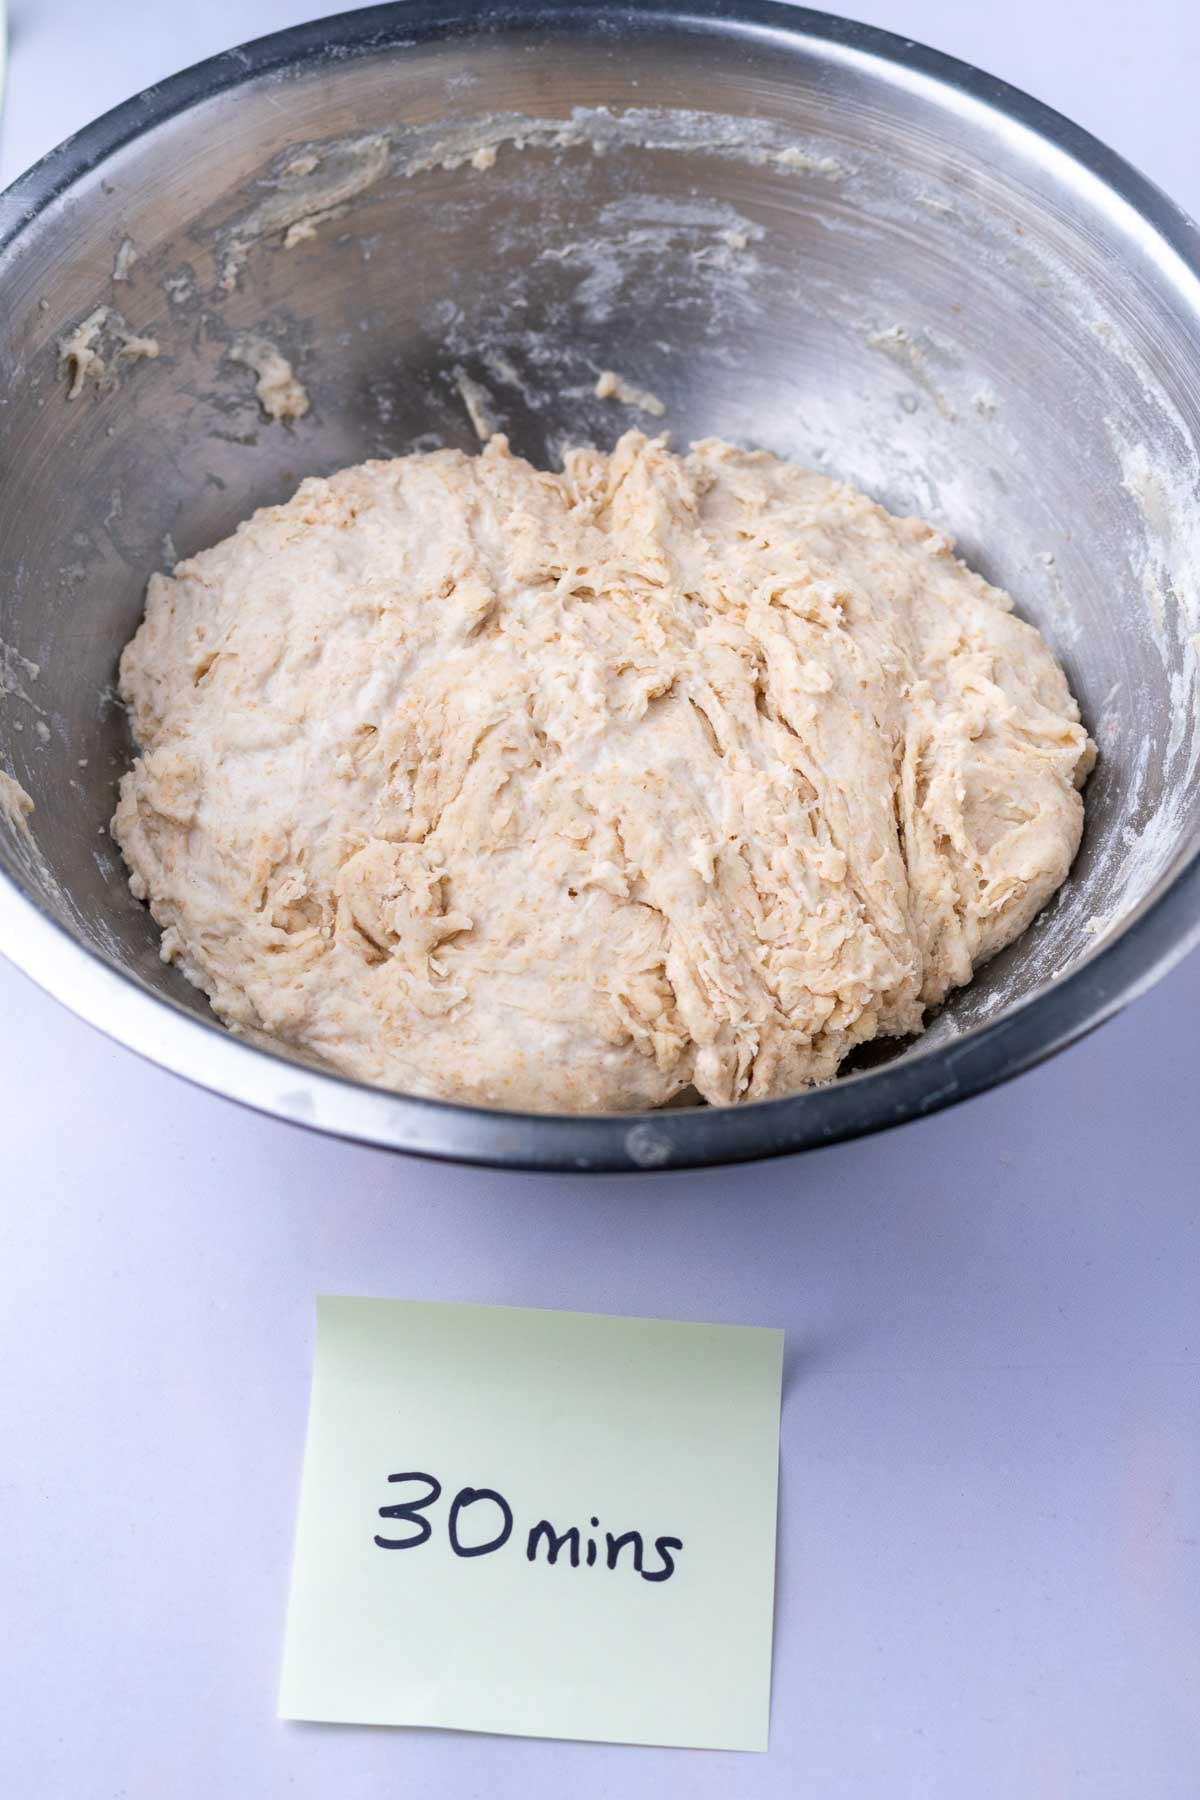
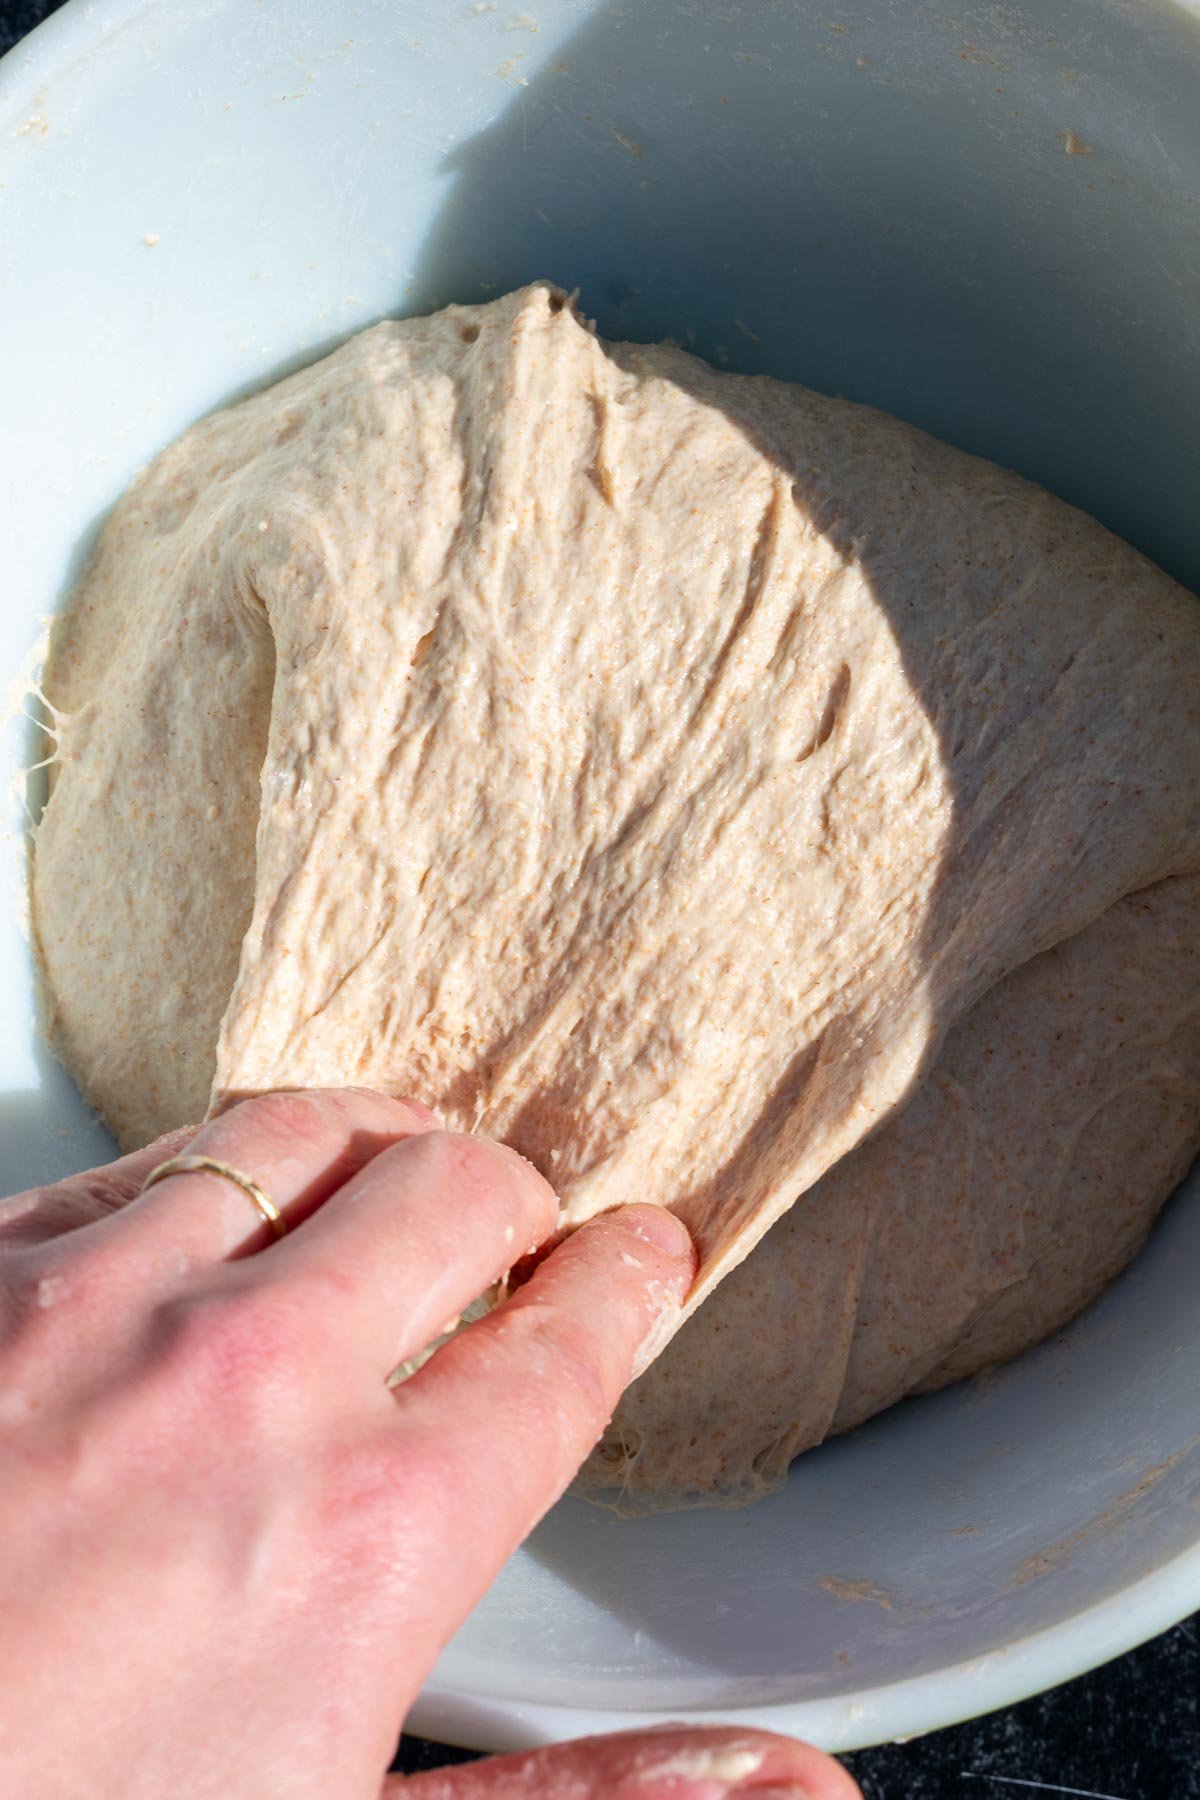
30-Minute Autolyse Test
In as short as a 30-minute autolyse, the bread dough showed significant signs of gluten development.
There were fewer dry spots as the flour had longer to hydrate. Plus, I could stretch the dough between my fingers. It wasn’t quite strong enough yet to pass the windowpane test, but the dough was much more elastic than doing no autolyse.
When I did mix in the salt and levain, I only needed to hand mix a few minutes before it was a taut ball and strong enough to move into bulk fermentation.
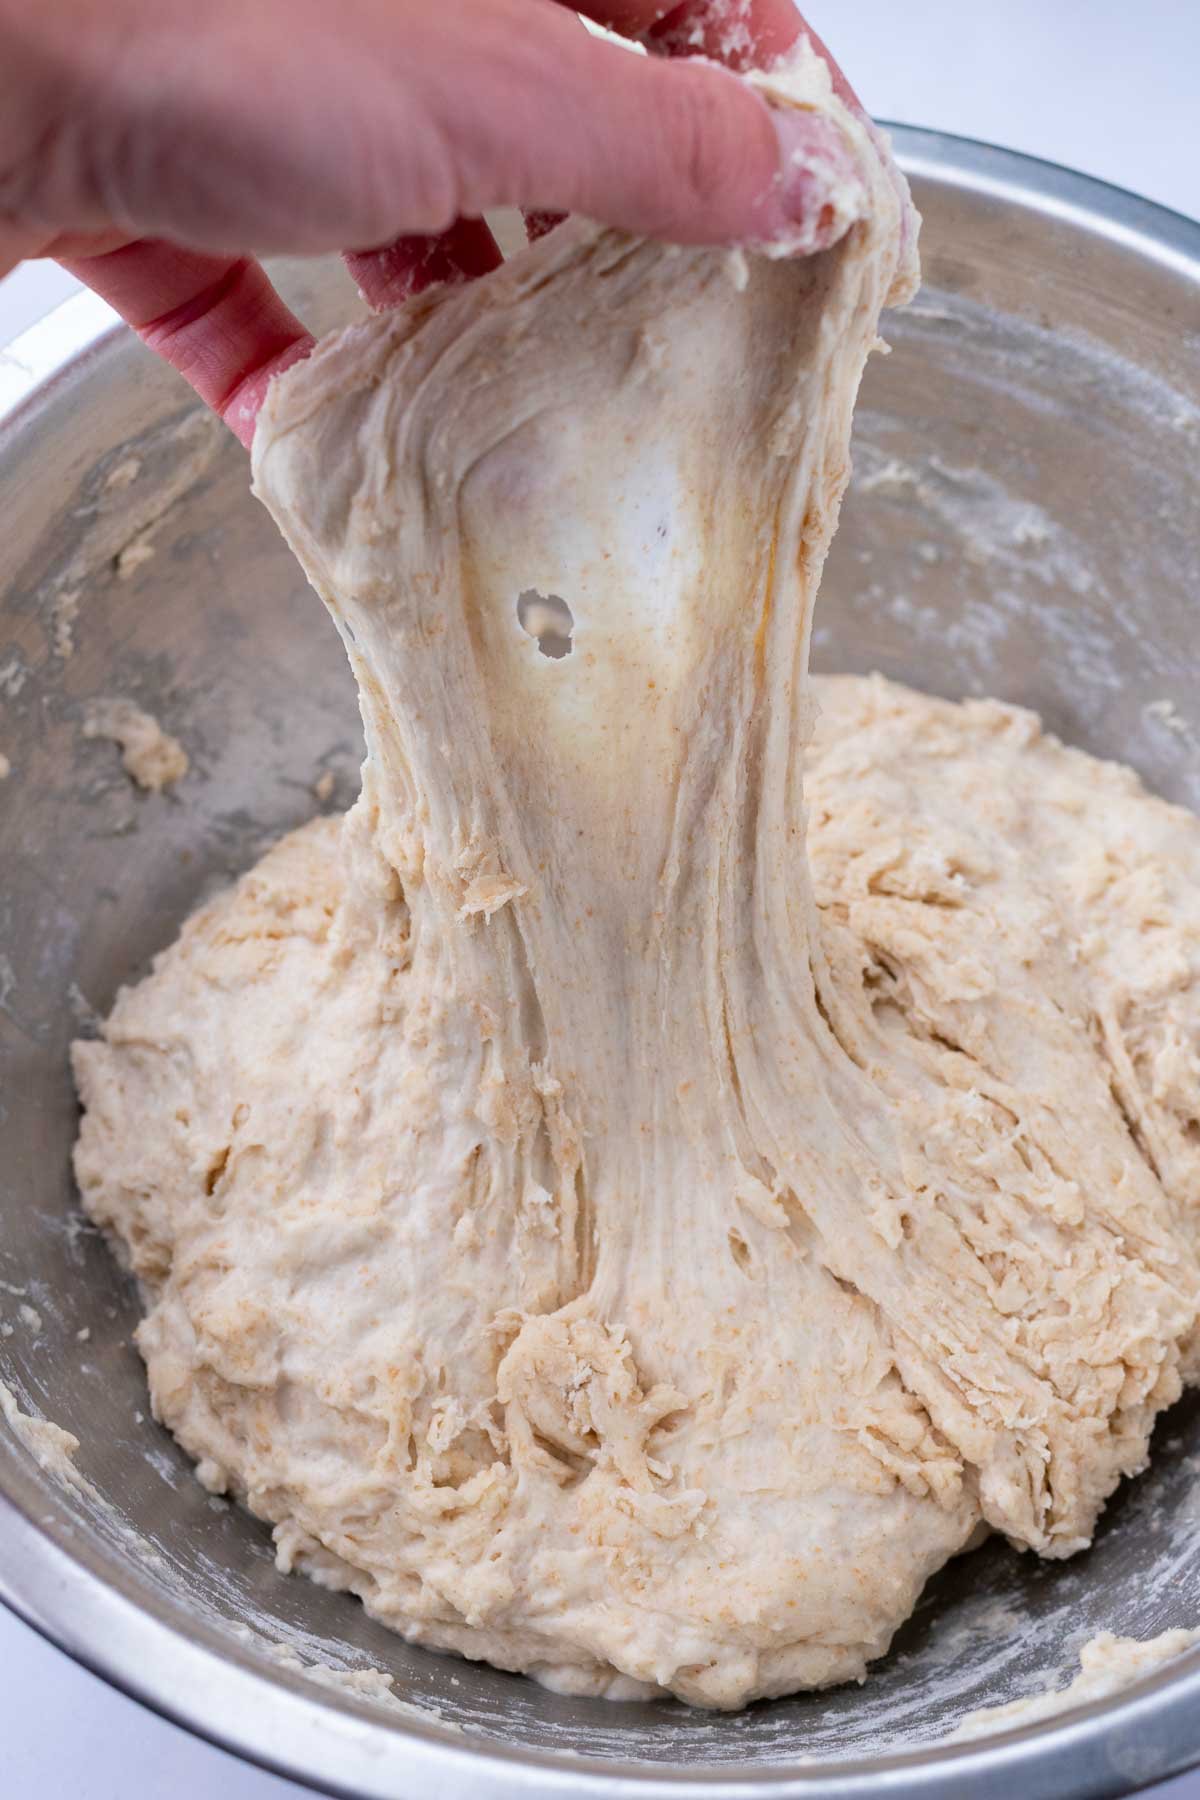
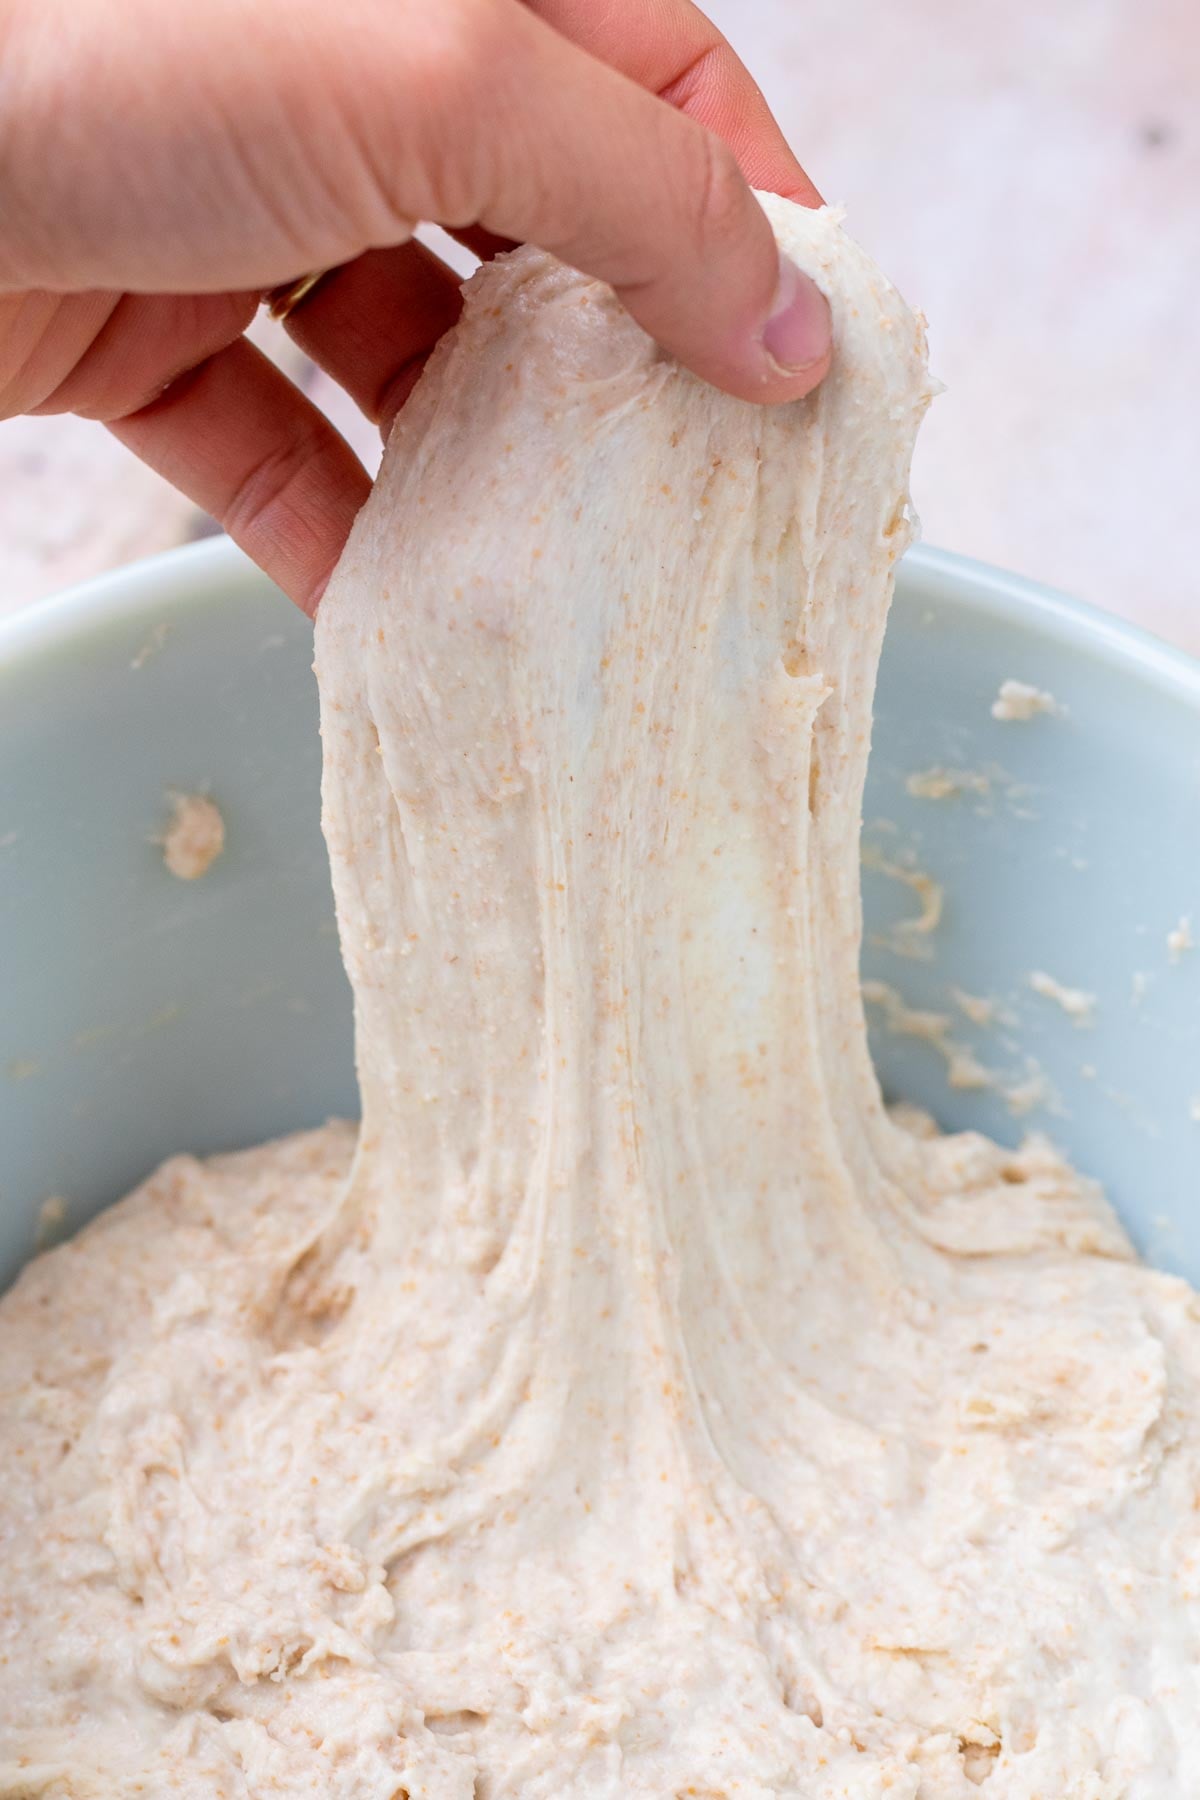
1 Hour Autolyse Test
By far, the 1-hour autolyse required the least amount of mixing and showed the most extensibility (or stretchiness).
The hydrated dough could be lifted about 5 inches before tearing. It required only a few minutes of hand mixing.
Since the dough was smoother and stronger, it didn’t require as many folds during fermentation as the dough without an autolyse. It also proofed slightly faster than the other doughs.

When to Skip Autolyse
Autolyse is not necessary to make good bread.
You can skip or minimize autolyse if your flour is already very extensible, such as in Spelt Sourdough Bread, this Emmer Sourdough Bread, or my Beginner’s Einkorn Sourdough Bread recipes where I only call for a 30-minute autolyse.
It’s also common to skip autolyse in rye breads like my Soft Sourdough Rye Sandwich Bread since rye ferments faster and doesn’t have as much gluten.
While buckwheat flour is gluten-free and may not benefit from autolyse, I still do an autolyse in my Buckwheat Sourdough Bread recipe because it’s only made with a small percentage of buckwheat flour.
If you have a limited schedule and want to have a less complicated baking timetable, you can also choose to skip autolyse.
This is the same idea why Jim Lahey’s “no-knead” bread method is so popular- because time does the work with minimal hands on the dough.
Some also skip autolyse if using freshly milled flour because it already has higher enzymatic activity and can become sticky and difficult to work with if rested for too long.
Either way, you can bake excellent bread with or without autolyse. In fact, if there’s one step you can skip in the sourdough bread-making process, it would be autolyse.
How Does Whole Wheat Flour Affect Autolyse?
Whole wheat flour contains more protein from the bran and germ that are still intact.
Recipes with a large percentage of whole wheat flour may benefit from a longer autolyse to make it more extensible and less “tight.”
That’s because the sharp bran and germ proteins essentially cut the gluten as it’s being stretched and formed, so whole wheat breads don’t have as open of an interior or crumb as loafs made with sifted or bolted flours.
For best results, a 100% whole wheat bread may do well with a 2-hour or longer autolyse.
The Difference Between Autolyse and Fermentolyse
Fermentolyse is a resting dough stage with the levain/starter mixed with flour and water. Autolyse excludes the starter.
A fermentolyse kickstarts the fermentation process before salt is mixed in.
However, the acidity of the starter can interfere with enzymatic activity and I find it less helpful than autolyse. At that point, you may as well mix in your salt and continue with the recipe.
For consistency, I only use autolyse and not fermentolyse in my sourdough bread recipes.
Can You Do an Overnight Autolyse?
If it fits your schedule better, you can do an overnight or 12-hour autolyse. You’ll have a very extensible, hydrated, and smooth dough in the morning that is easy to mix.
If you do an overnight autolyse, ensure it’s at a cool temperature to slow down enzymatic activity. You can keep at a cool room temperature or even in your refrigerator.


I loved your guides and clear directions. Unfortunately I am medically gluten free and am wondering if you offer any suggestions, pointers, replacements for the gf baker??
Hi Lorelie, I have some gluten-free recipes such as my Sourdough Buckwheat Pancakes, Sourdough Buckwheat Chocolate Chip Cookies, and many other discard recipes that you can make gluten-free with a gluten-free starter and substitute with gluten-free flour. However, gluten-free breads are not my specialty. I would recommend checking out some websites or books that are focused specifically on gluten-free sourdough bread baking as there are many resources out there now!
I have learnt a lot after reading your articles.
Starting this new adventure in making sourdough bread is very exciting.
I will keep on reading and testing my skills as i learn.
I have never heard of autolyse this way and I’m so thankful for the clear explanation!! Thanks so much.
I’m glad it was helpful!