Sourdough Baguettes
This post may contain affiliate links for products and ingredients I use and recommend. For more information, see my affiliate disclosures.
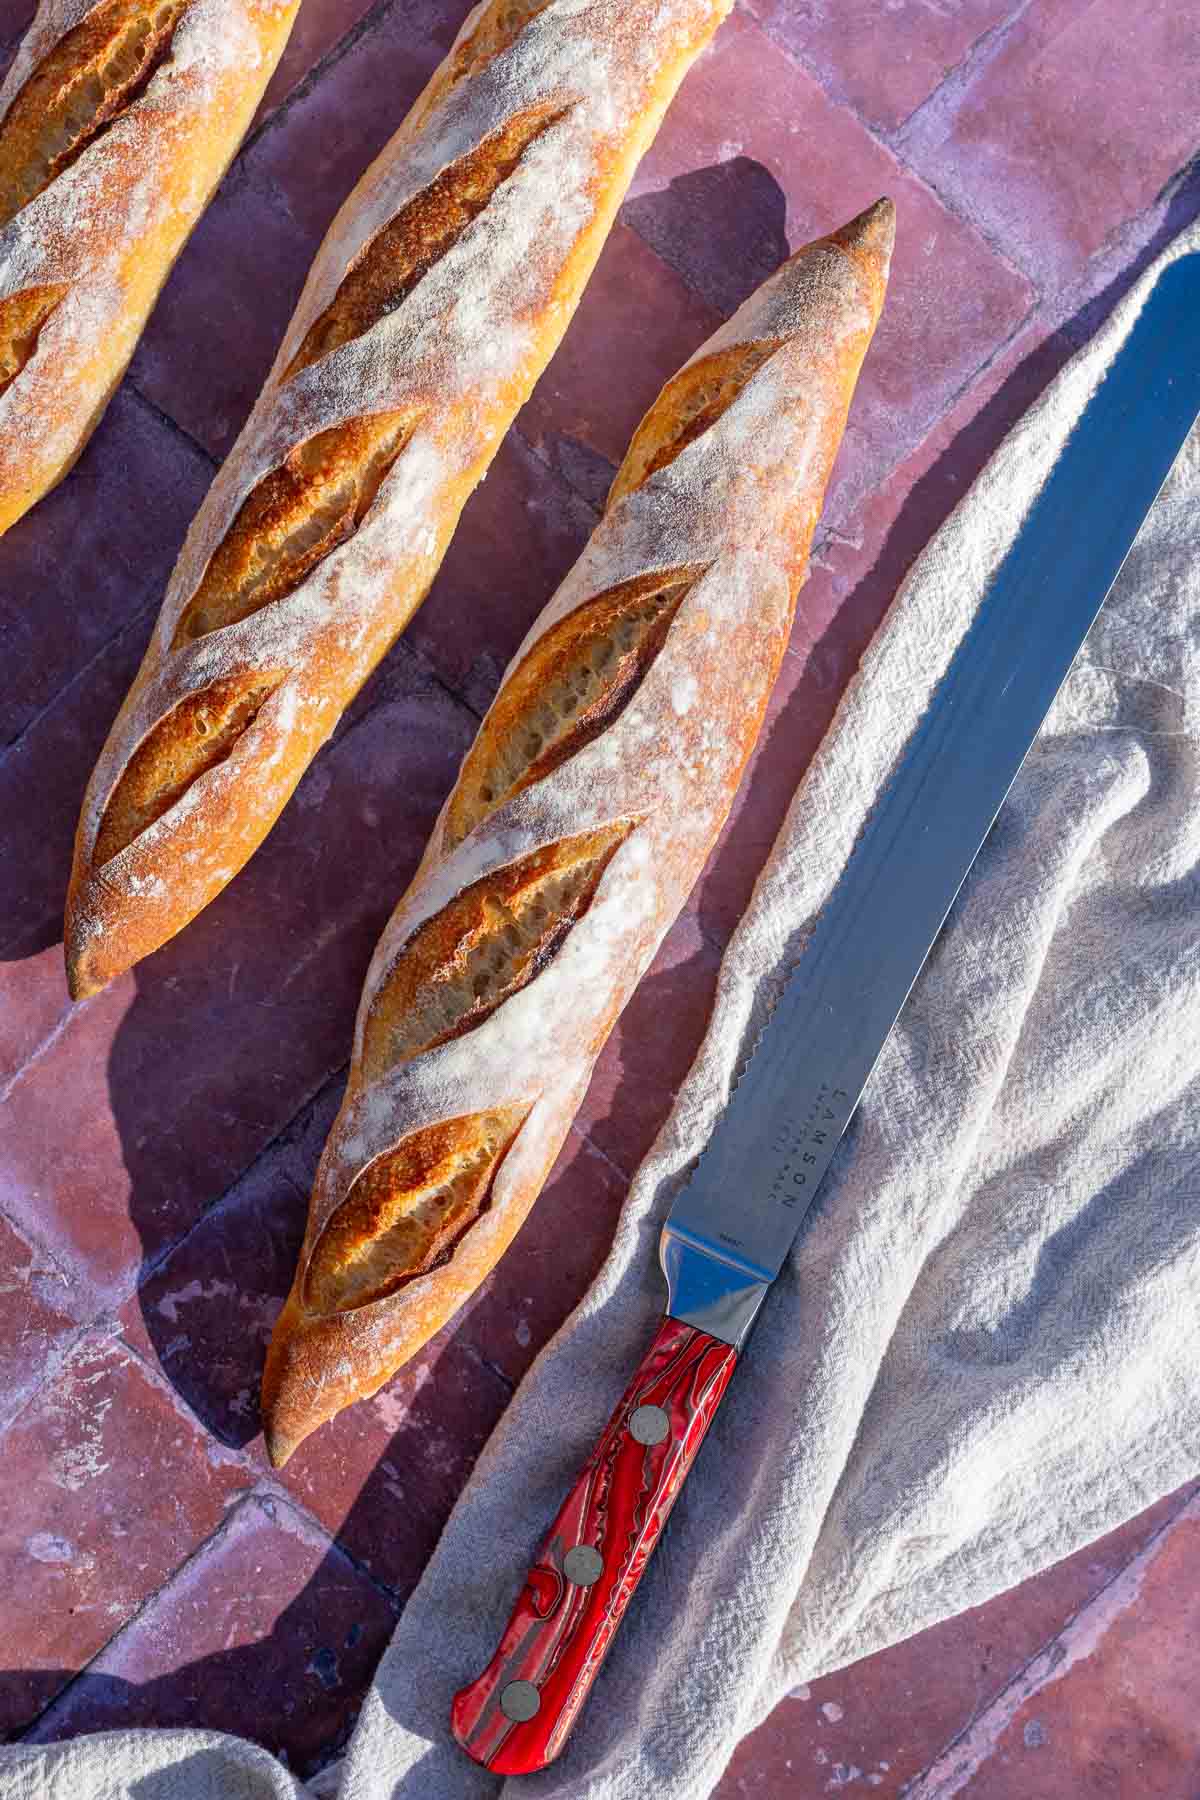
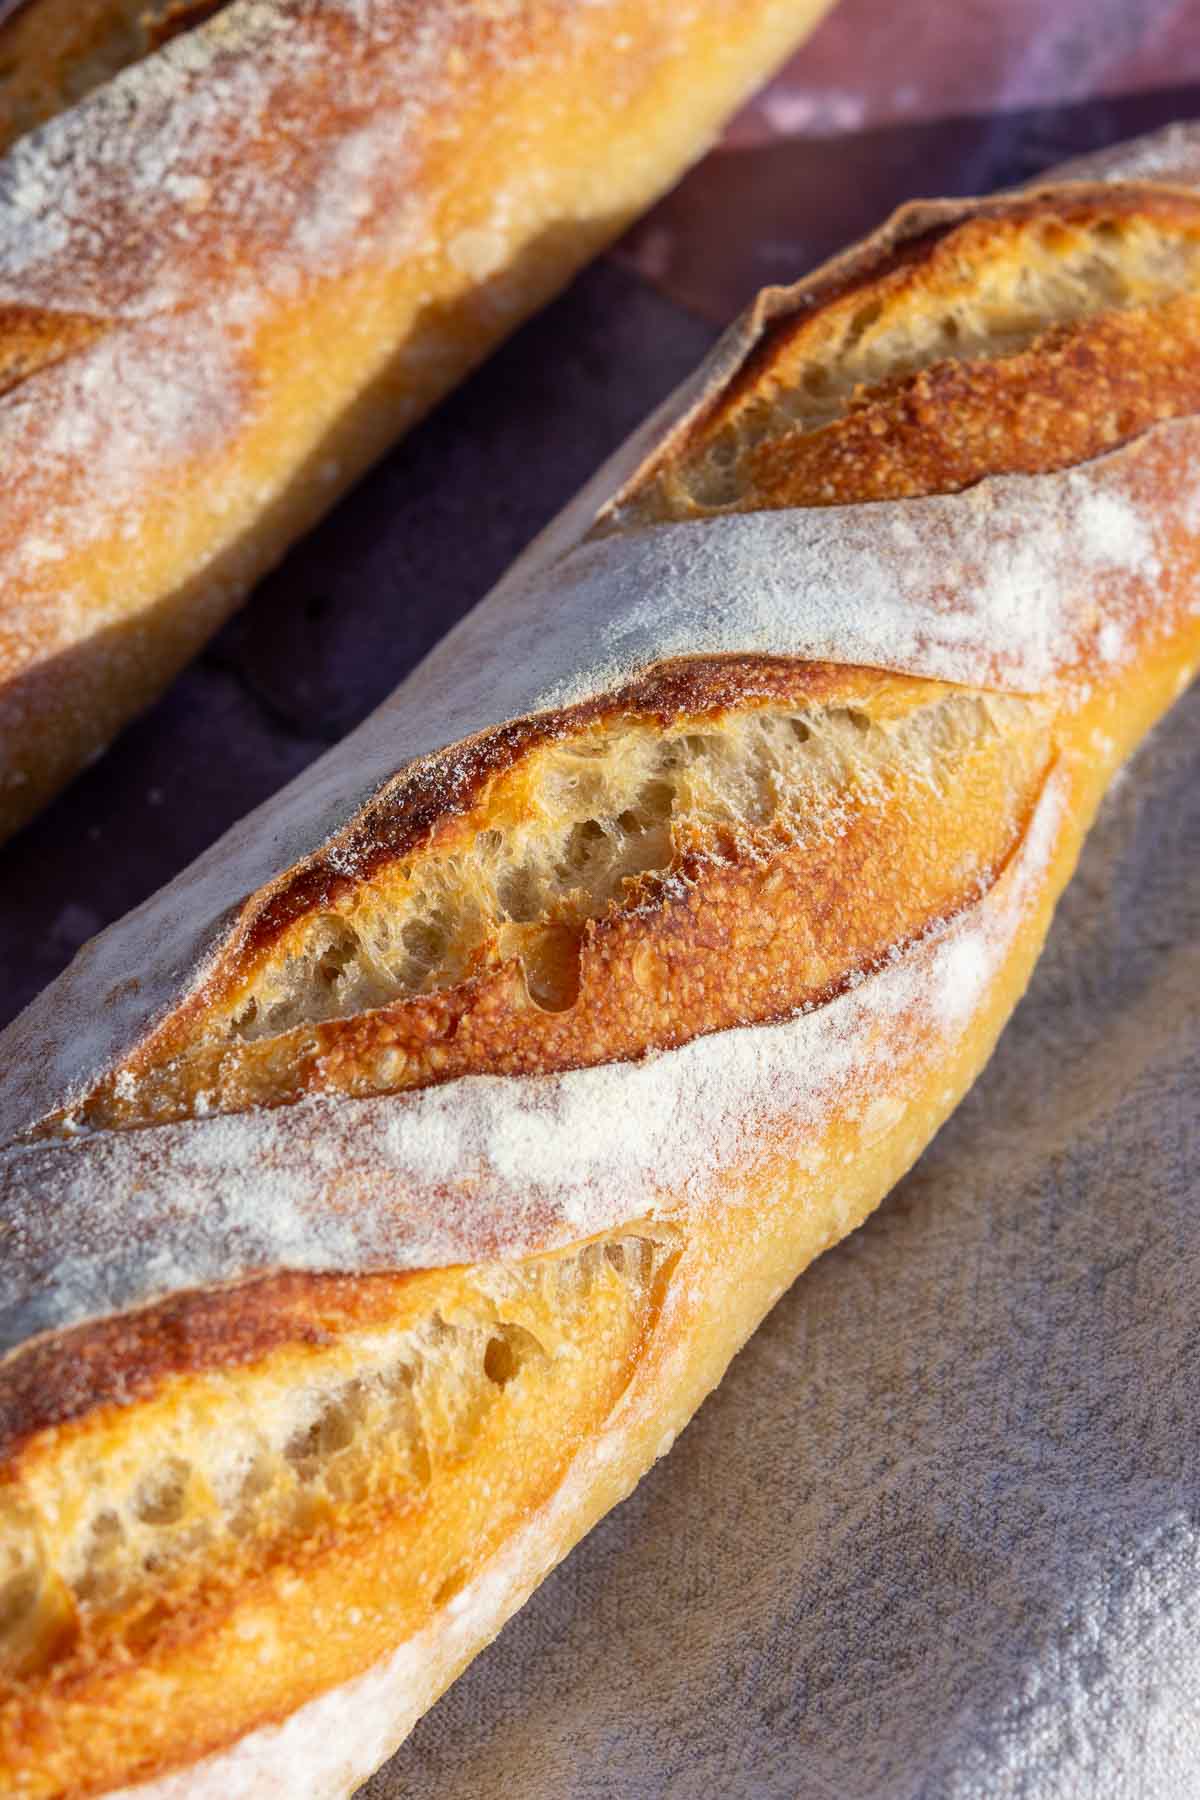
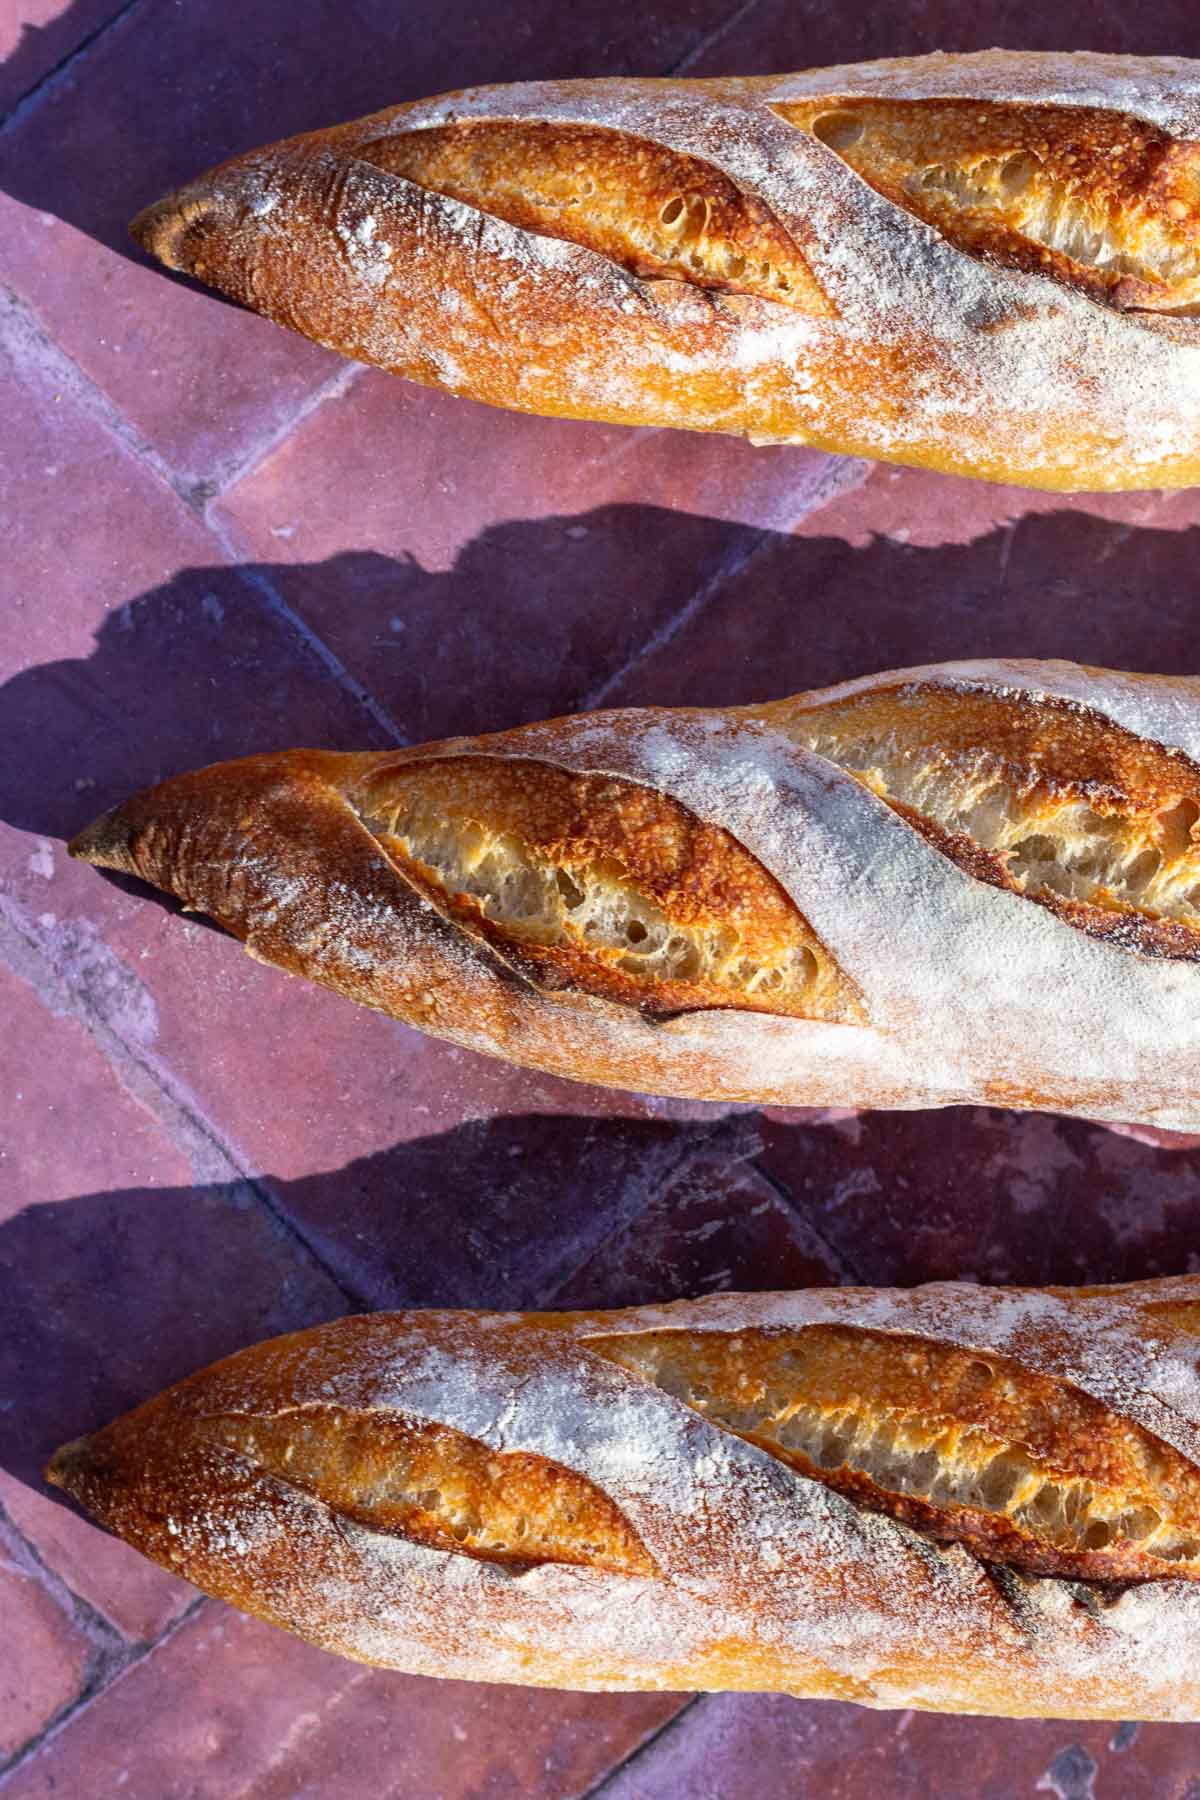
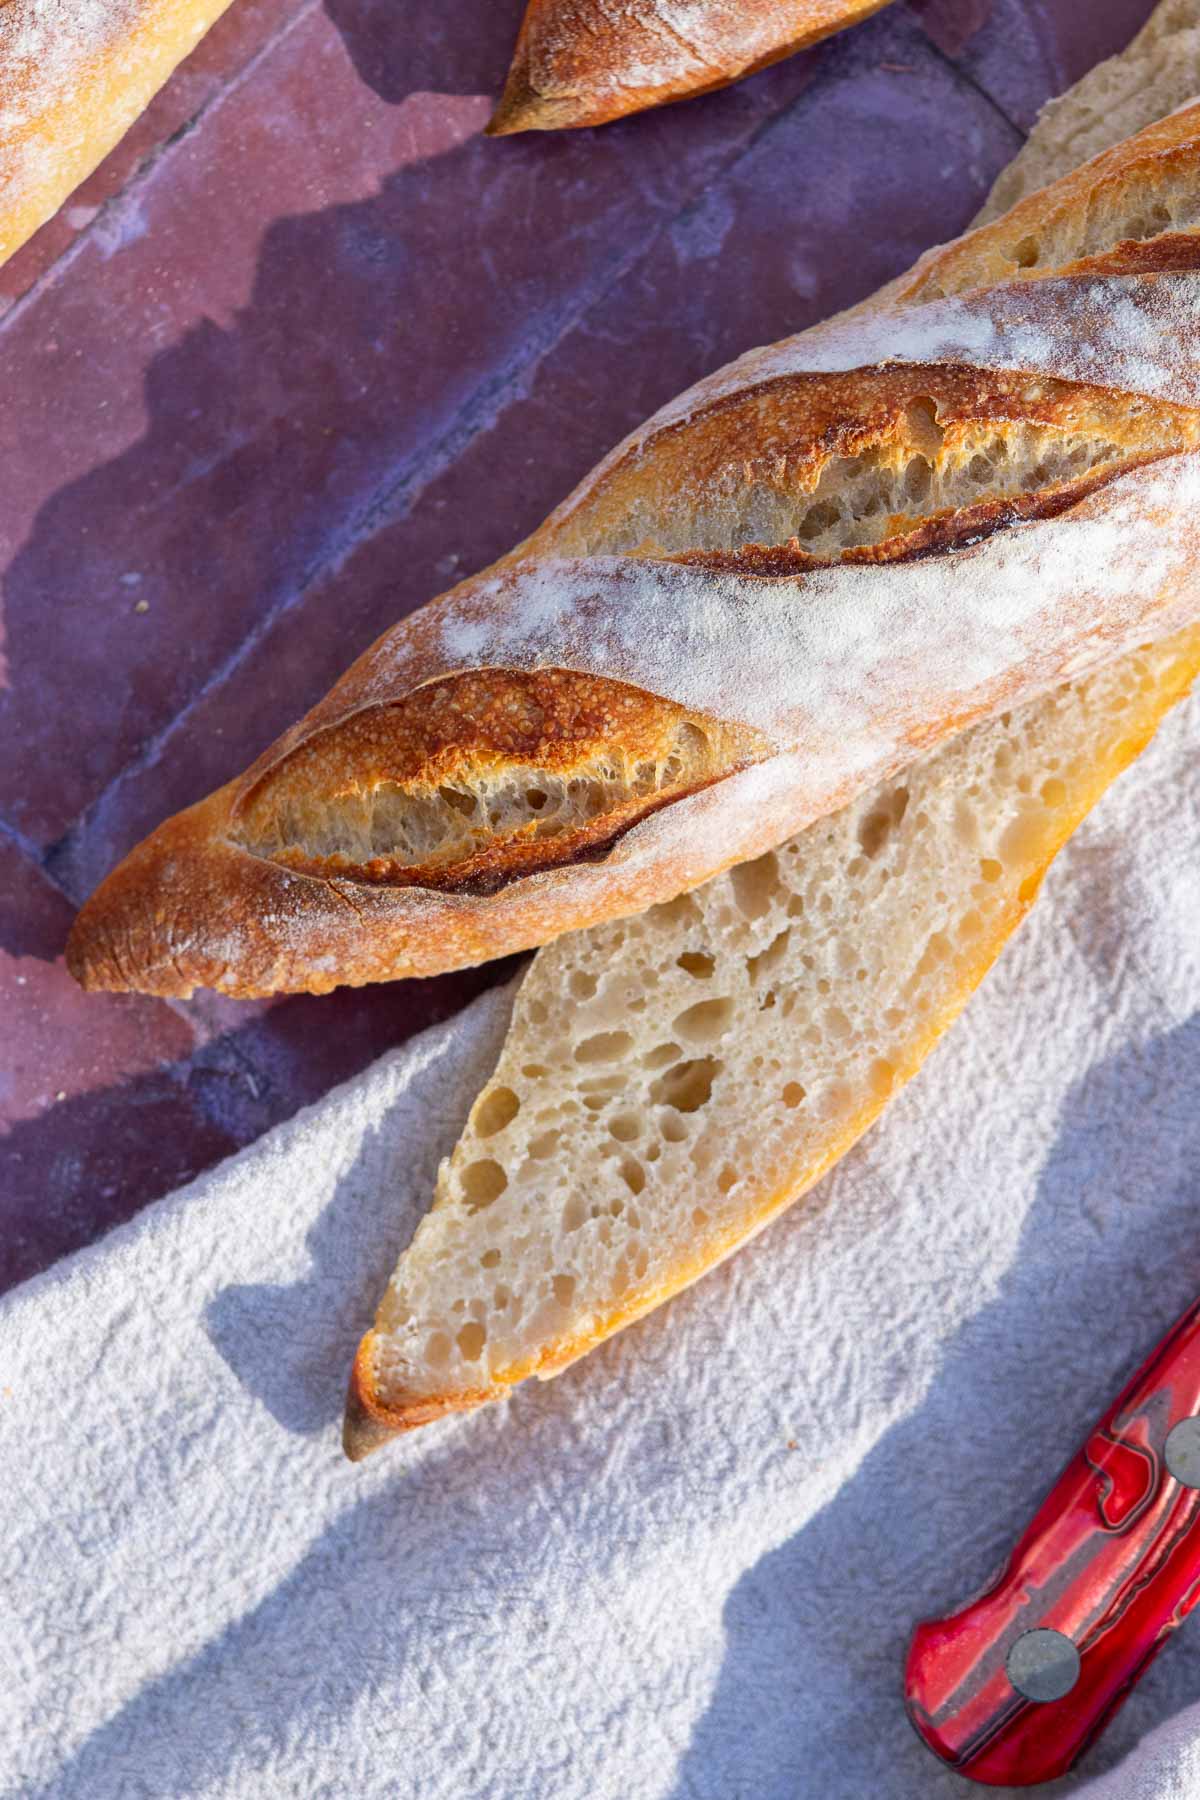
In my opinion, homemade Sourdough Baguettes are one of the pinnacles of bread baking! The crust-to-crumb ratio is ideal, with a crispy, thin exterior and a chewy and airy crumb.
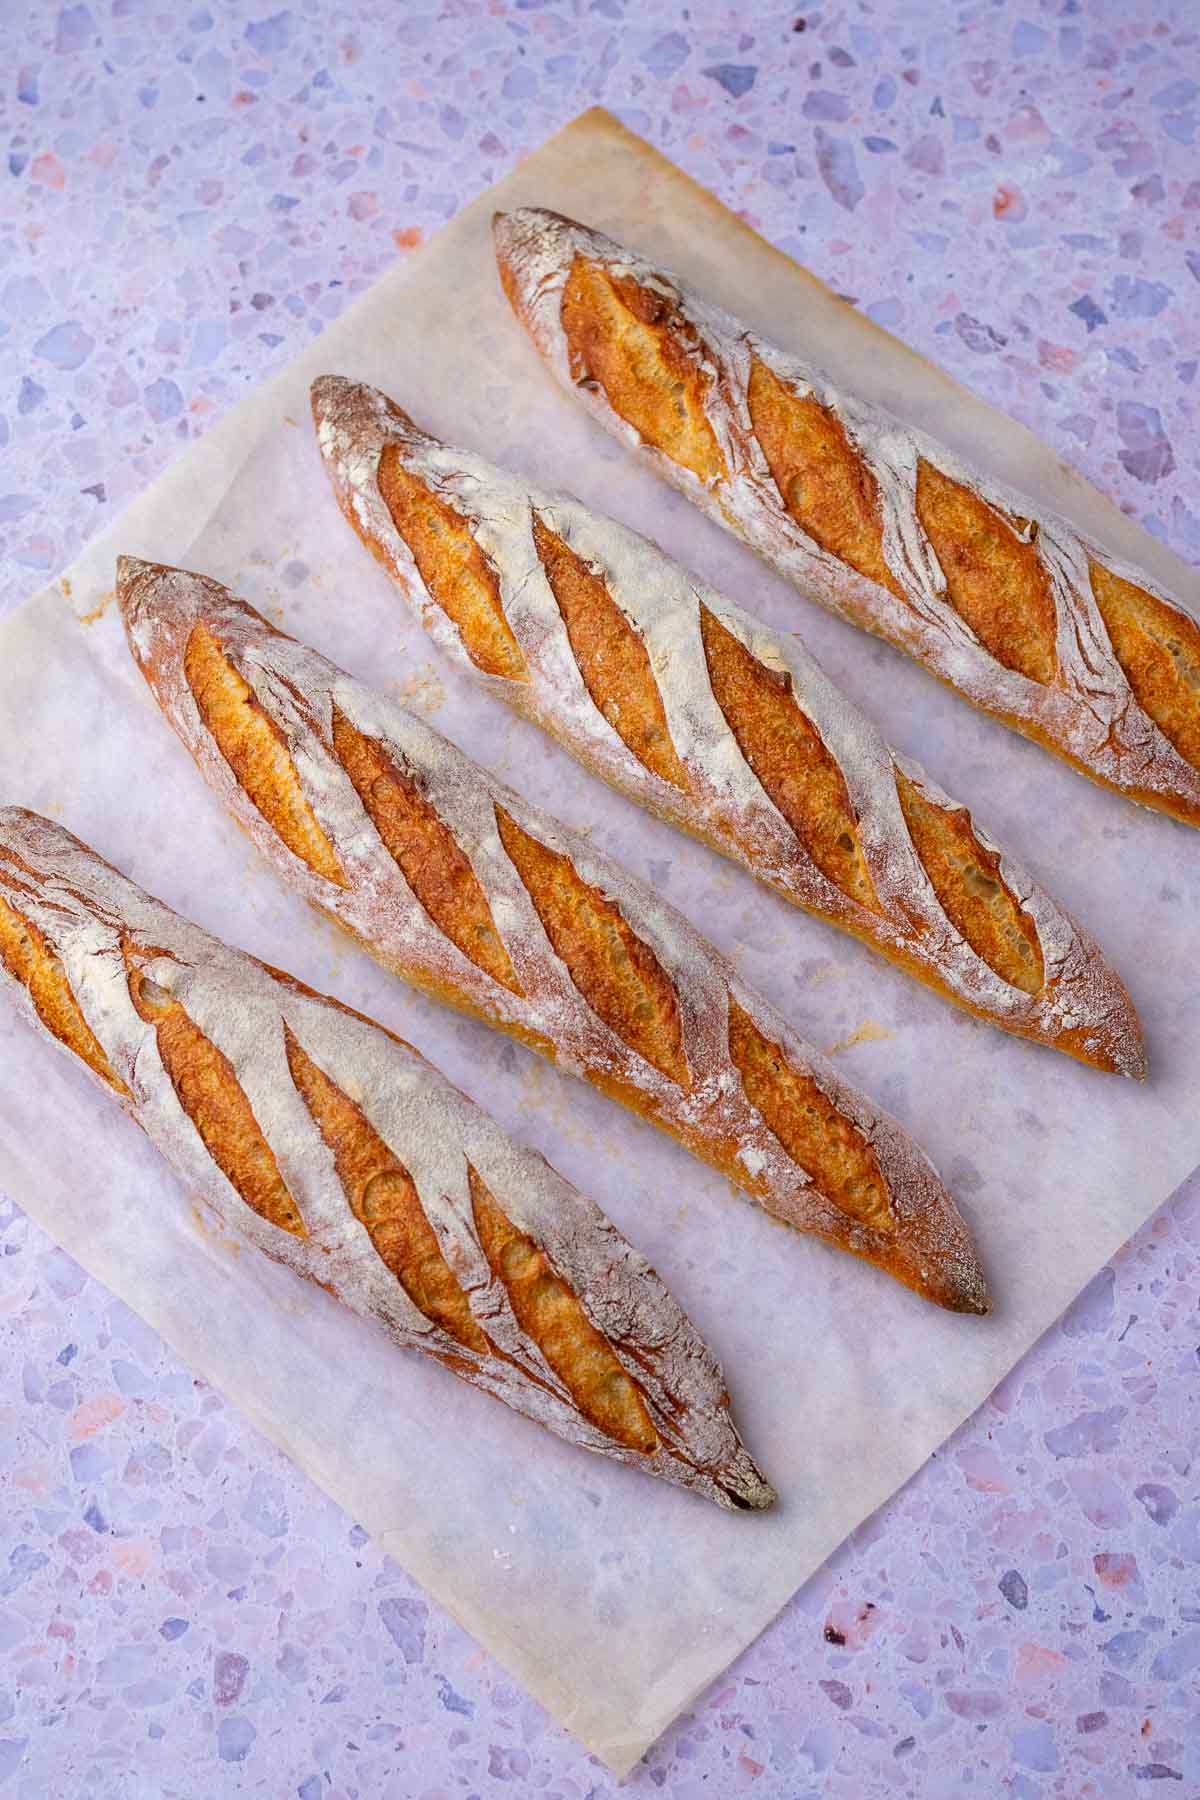
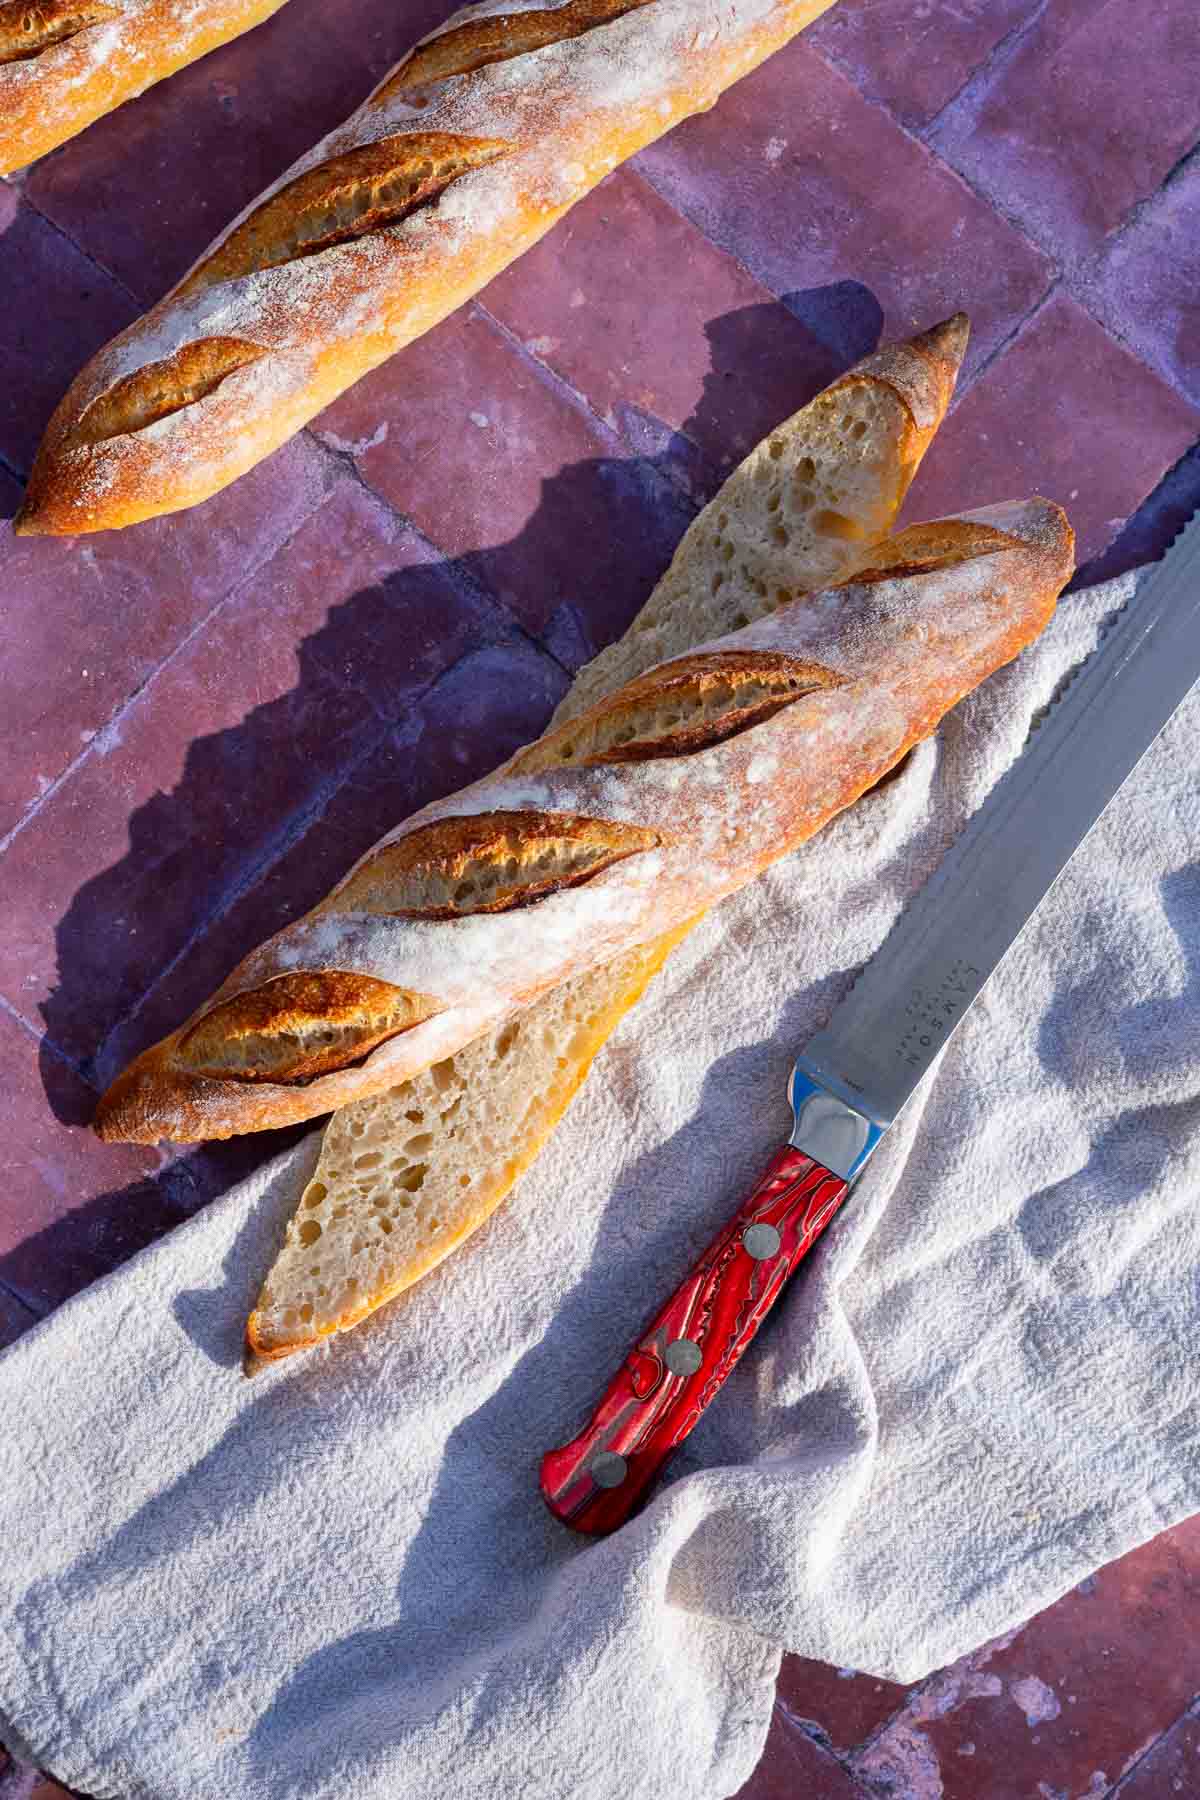
Since most home ovens are not large enough for full-sized baguettes, this recipe makes four sourdough demi-baguettes (about 14 inches long).
Making sourdough baguettes can be a bit intimidating at first. But just like making Sourdough Croissants or great sourdough bread, you will get better at baking baguettes with practice and some patience.
This detailed sourdough baguette recipe will walk through every step of the process and gives lots of tips and images so you can get the best result possible.
If you’re new to making baguettes, this relatively easy recipe is manageable and gives you great rustic French-style sourdough baguettes.
👉 For other favorite sourdough breads, see my recipes for:
👨🍳 Tips for Making Sourdough Baguettes
Baguettes have a bit of a reputation for being finicky and difficult to make.
Overall, I would say the biggest challenges with making baguettes are with shaping, steam, and consistency. I’m certainly no baguette master, but I’ve learned many tips from recipe testing and research that I think will help guide you.
- Baguettes need a lot of steam for a thin crust and to get enough oven spring (initial rise). Using a baking steel, I preheat a cast-iron skillet in the bottom of the oven and pour boiling water into it and immediately close the oven door. This creates a lot of steam.
- Follow my baguette shaping instructions in the recipe so that the seams seal correctly, there’s dough tension, and they have pointy ends.
- For consistency, weigh the divided dough to ensure they’re equal size. Then, roll them out to the same length. Bake them parallel to each other and score them similarly. Otherwise, they’ll all look different from each other.
- These baguettes are not as high-hydration as some recipes, so they should be a little easier to shape. It results in a slightly less open crumb, but still delicious!
🛠 Tools Needed
See below for my favorite baguette tool recommendations and substitutions.
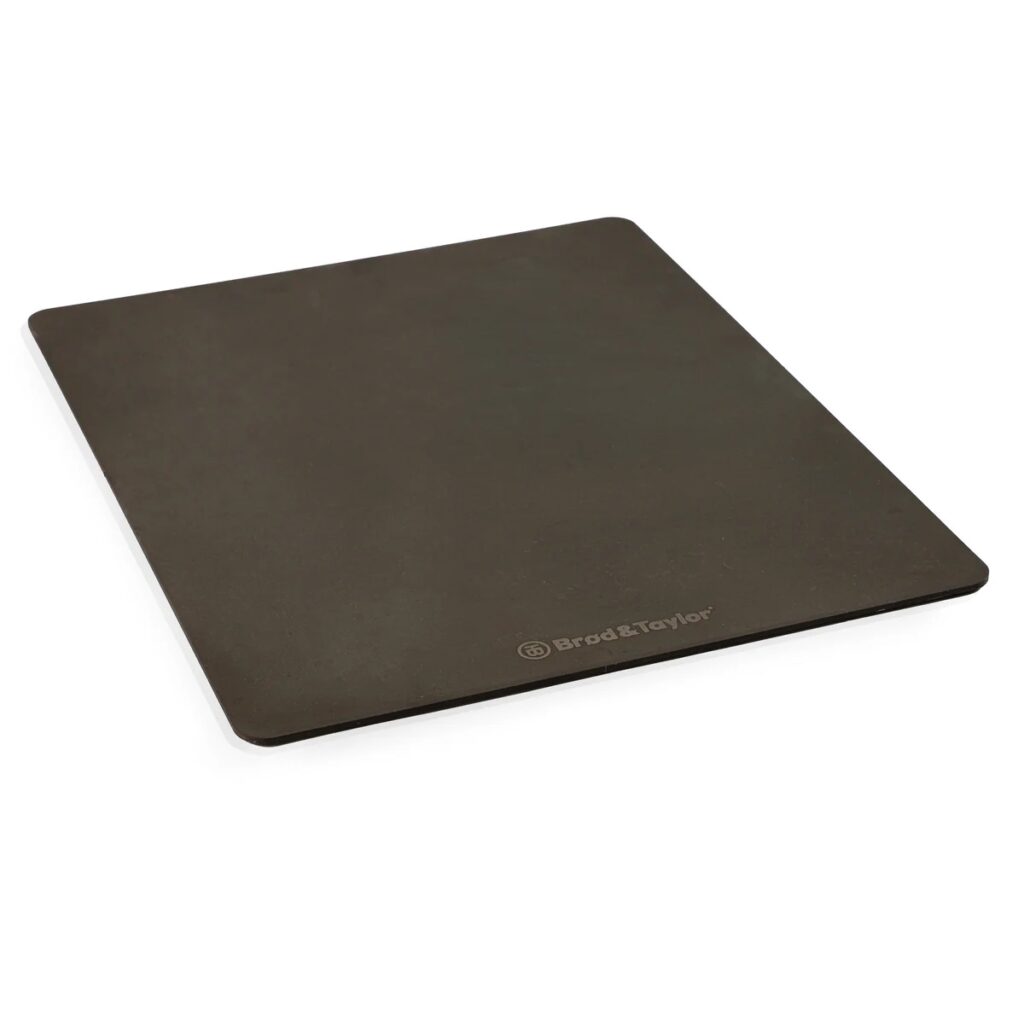
- Bread or Baking Steel
- I bake four baguettes at a time on my Brød and Taylor bread steel. It’s light-weight, doesn’t require pre-heating, 14″x14″, and you can use to make great sourdough bread as well.
- You can also use a pizza stone or other baking steel. Since those require preheating, you will need a baker’s peel to transfer and slide the baguettes off onto the hot stone.
- If you have a Challenger Bread Pan, you can fit two demi-baguettes in it at a time too.
- Finally, if you have a baguette pan, you can use that as well.
- Baking Scale
- Measuring your ingredients by weight instead of volume is essential so you get a more consistent and accurate bake.
- Bread Lame
- Can use a sharp razor blade or sharp knife.
- Baker’s Couche
- Traditionally, a baker’s couche is used to proof baguettes so they keep their long shape. A couche is a stiff linen cloth that can support the dough.
- Use a floured tea or kitchen towel if you don’t have a couche.
- Transfer Peel
- To transfer the individual baguettes from their baker’s couche after proofing to the bread steel or baker’s peel, you’ll need to use a transfer peel, side of a lightweight cutting board, or even a piece of wood or cardboard to transfer the baguettes.
- Optional: Brød and Taylor Folding Bread Proofer
- This folding proofing box by Brød & Taylor is a game changer to keep your sourdough starter and doughs at the perfect temperature while proofing.
- The proofer folds up easily, includes a humidity tray, is multifunctional, and can even be a slow cooker.
🛒 Ingredients Needed
Like sourdough bread, you only need four ingredients to make this sourdough baguette recipe! See below for more information, variations, and possible substitutes.
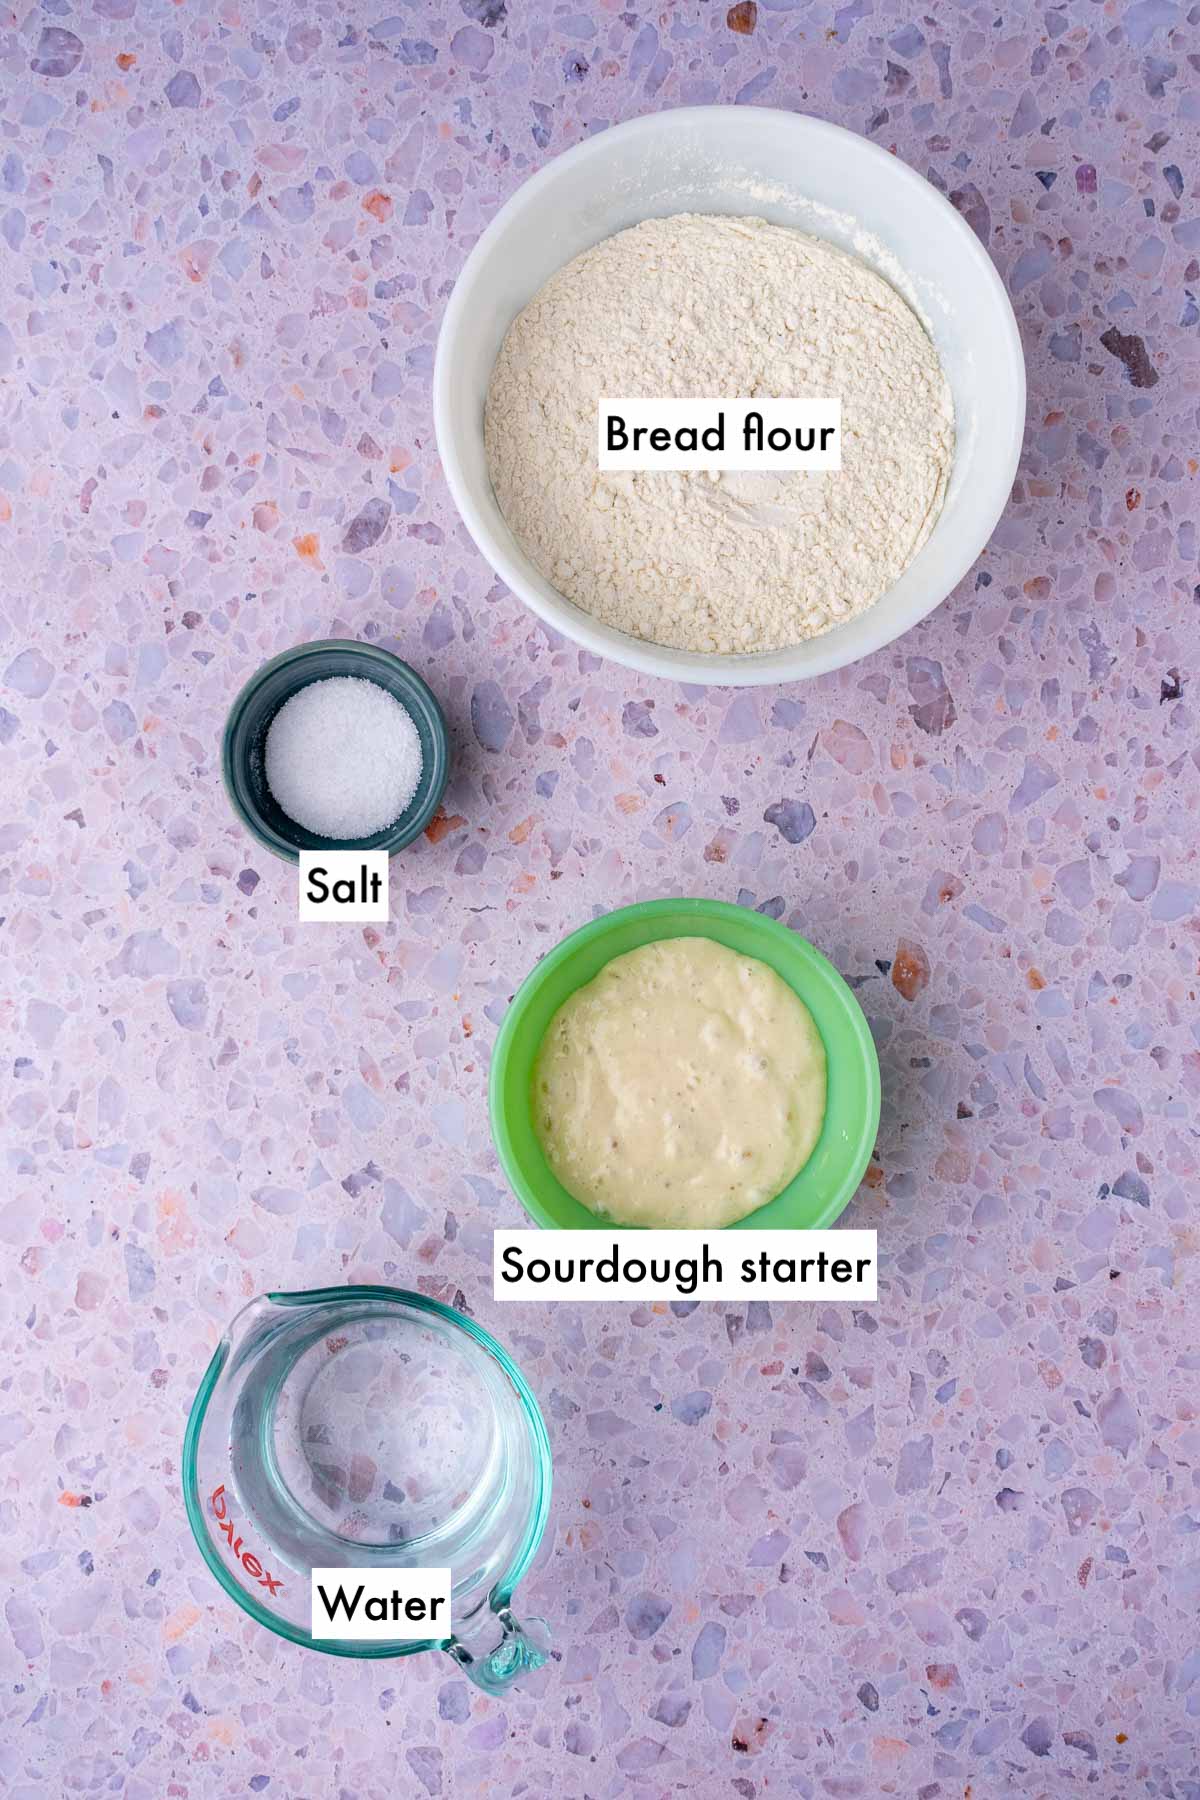
- Bread Flour
- For recipe testing, I used King Arthur Bread Flour at 12.7% protein. The higher gluten content helps give baguettes their distinctive chewy texture. However, you can use a high-quality all-purpose flour as well.
- To make the dough even more extensible, you could add 10-20% spelt flour.
- Use 20% whole wheat flour to make a slightly more hearty baguette.
- Sourdough Starter
- Use active sourdough starter and not sourdough discard for this bread.
- Don’t have a sourdough starter? Learn How to Make a Sourdough Starter and make a stronger sourdough starter with my top sourdough starter tips and why I maintain a small sourdough starter.
- Salt
- Not only for flavor, salt helps tighten the gluten strands during mixing and helps control fermentation.
- Water
- I typically use warm water for autolyse so the dough is still warm when I add my levain.
Note: If you need to expedite the baking process and want to make same-day sourdough baguettes, add a teaspoon of instant yeast to the dough.
⏰ Sample Baking Schedule
This is a simple overnight schedule to make the sourdough baguette recipe. It works well for a weekend bake, but many steps are flexible, depending on your own day-to-day schedule.
For example, you can make the levain the night before (use 10g of starter and 40g of flour and 40g of water). You can also proof the dough overnight in the refrigerator for up to a day to bake on your own time.
- Make Levain: 9am
- Autolyse: 1-2pm
- Add Levain & rest: 2-2:30pm
- Add Salt & Mix: 2:30pm
- Bulk Fermentation and Folds: 2:30-7:30pm
- Overnight Cold Proof
- Shape & Final Proof: Next day, 9am-10:30am
- Score and Bake: 10:30am
🥖 How to Make Sourdough Baguettes
Follow this visual and step-by-step guide to help make these delicious sourdough baguettes.
This sourdough baguette recipe makes four demi-baguettes.
1. Make the Levain
Mix 30 grams of ripe sourdough starter, 30 grams of bread flour, and 30 grams of water in an empty jar.
Cover and set it in a warm location (between 75-80ºF) for about 4-5 hours until it’s bubbly and ripe. The levain should at least double in size during this time.
Note: Alternatively, skip this step and use 90 grams of an active sourdough starter in the recipe.
To make a sourdough starter from scratch, follow my day-by-day Sourdough Starter recipe guide.
Learn more about the difference between a starter and levain.
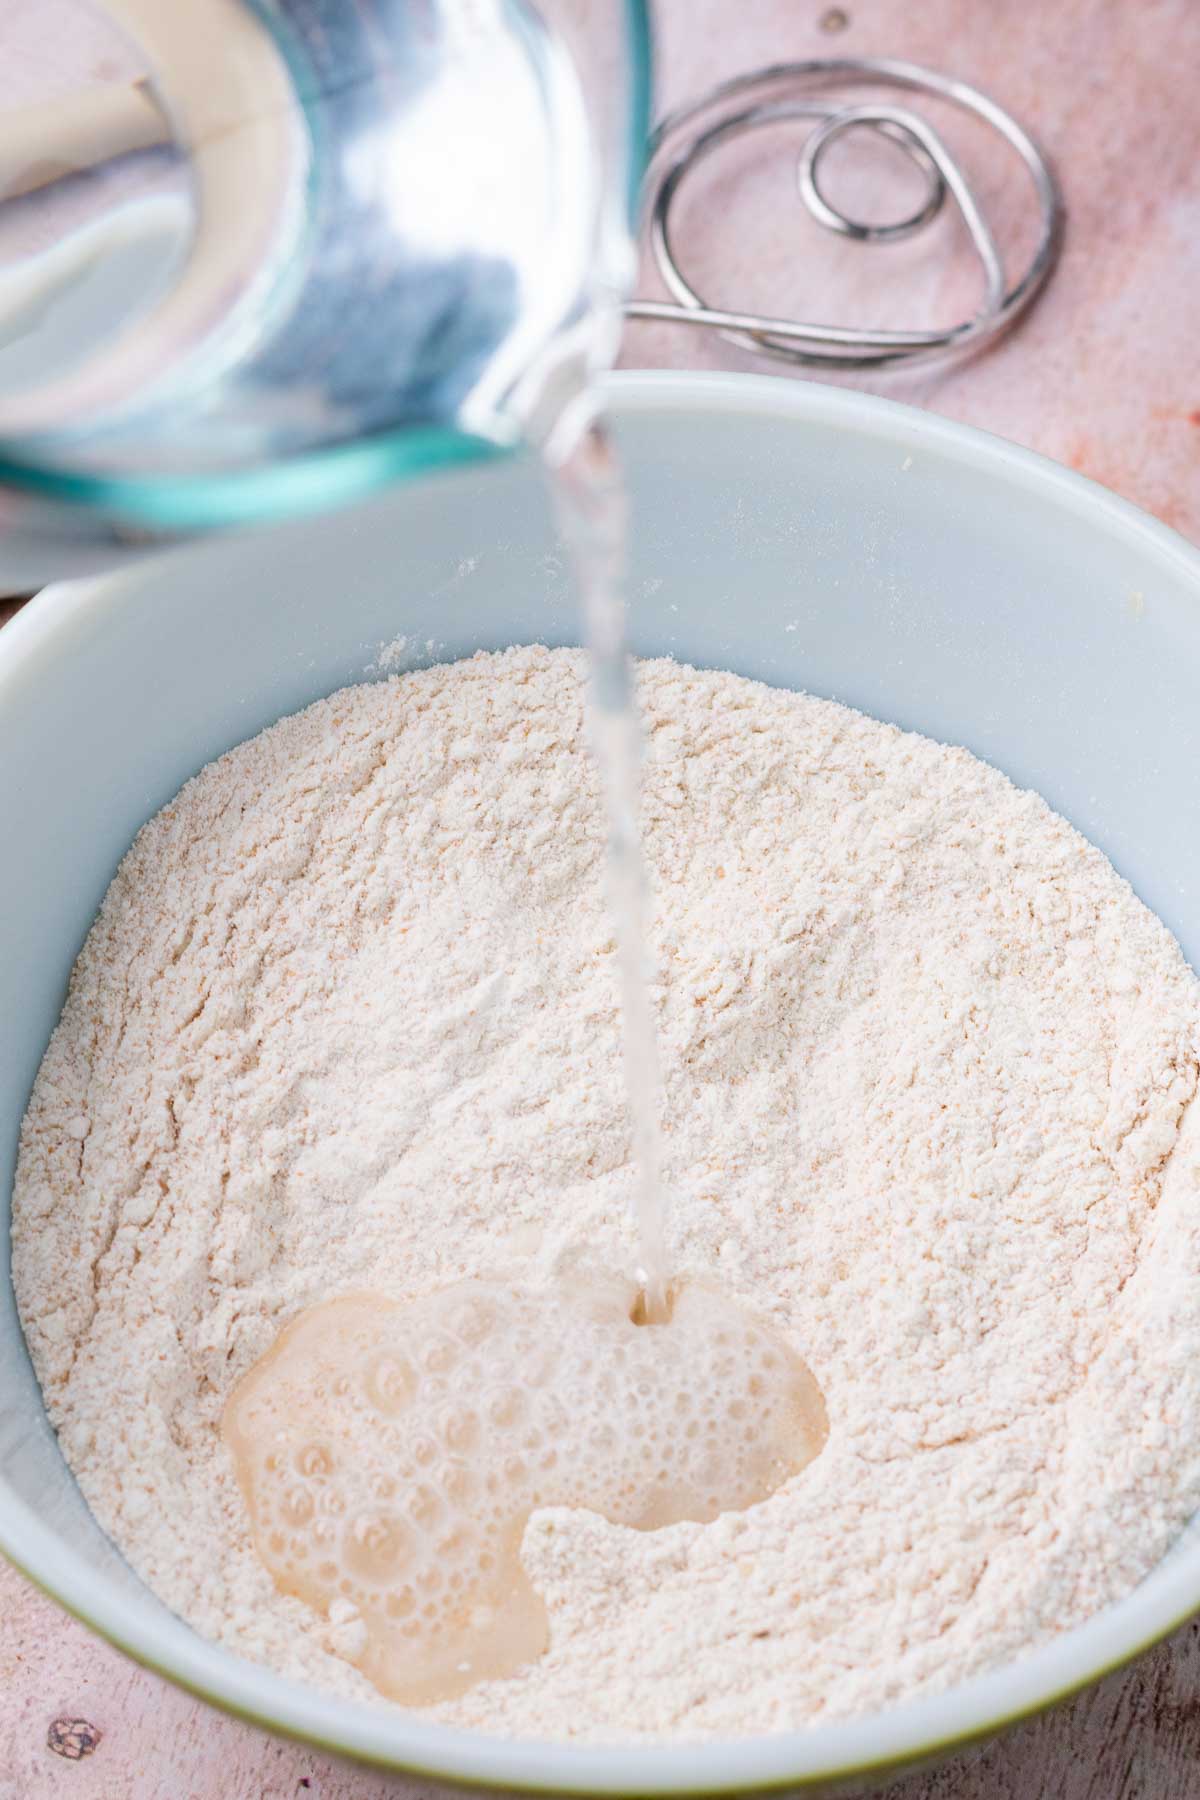
2. Autolyse
About an hour before the levain is ready, add the flour to a large mixing bowl and pour in the warm water.
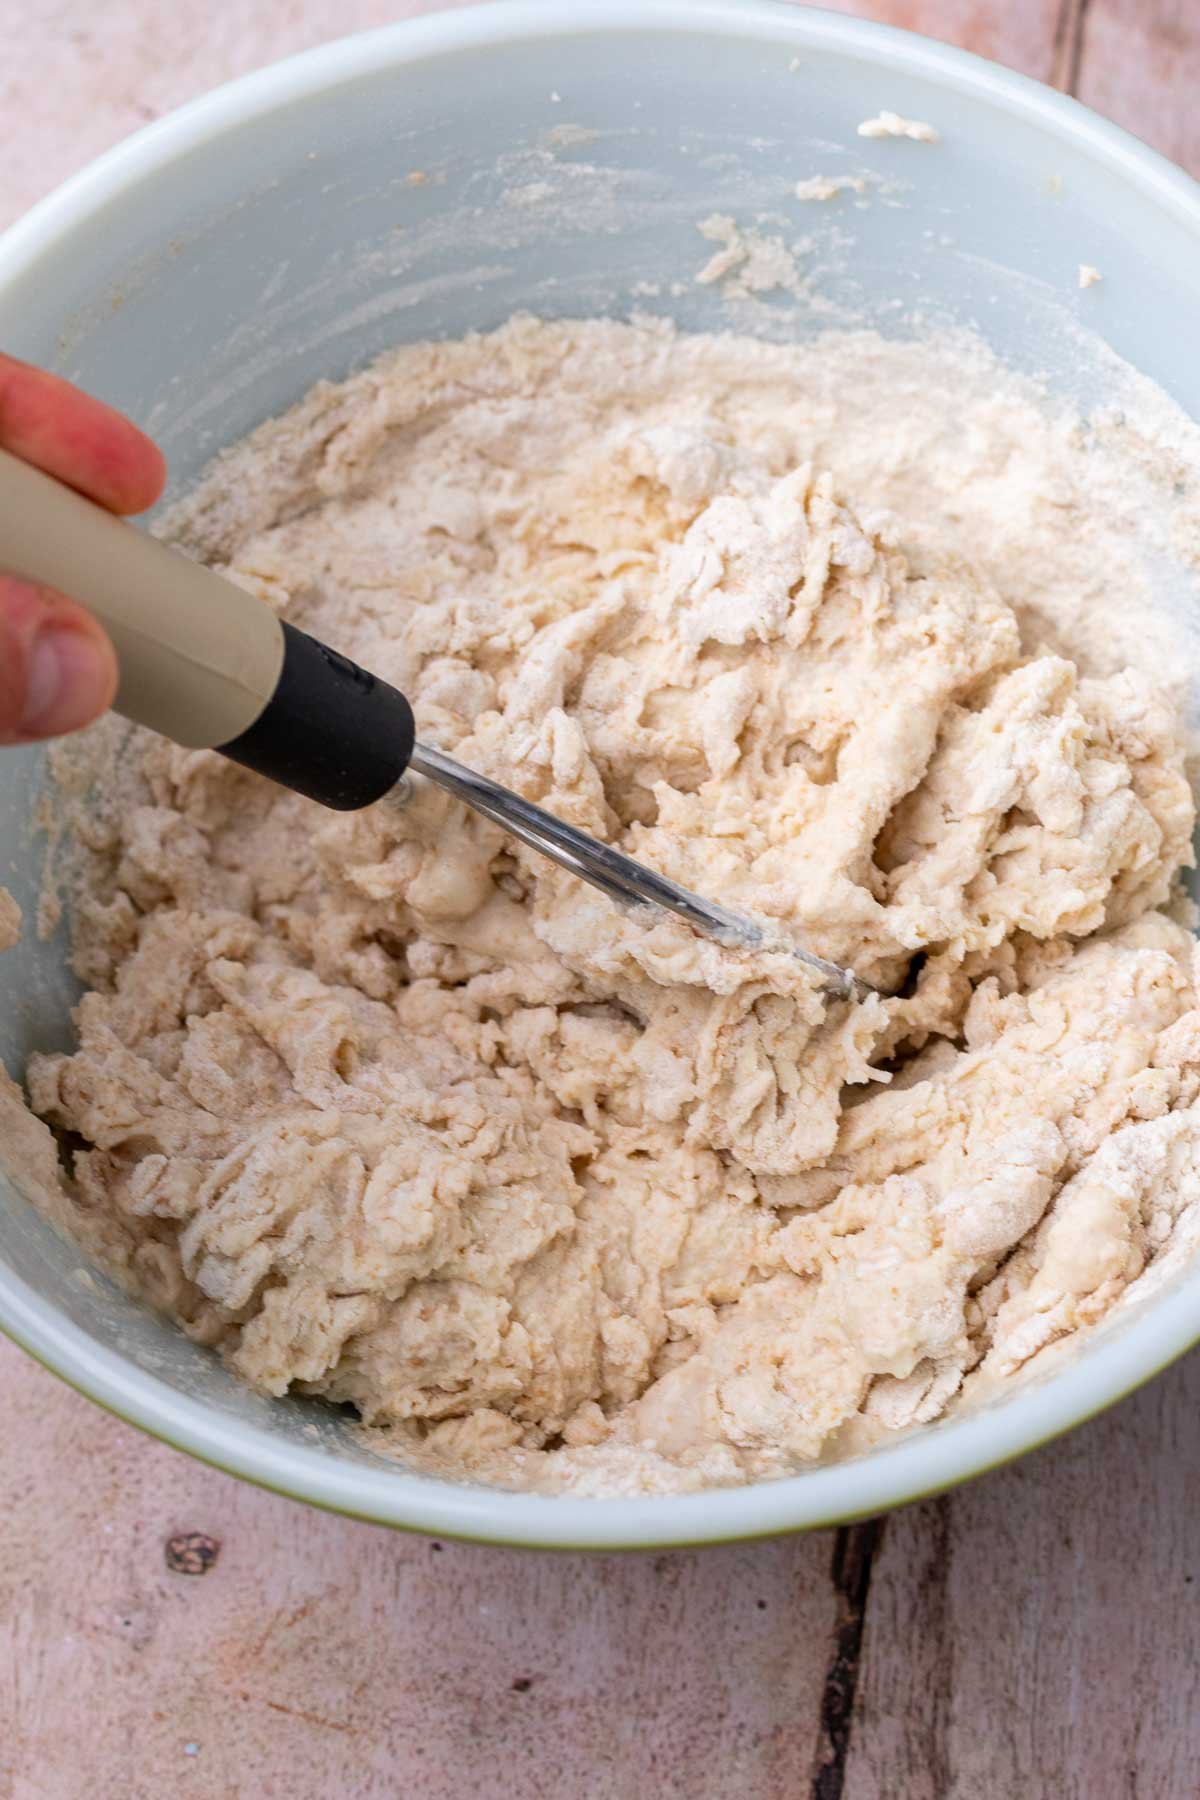
Use your hands or a Danish dough whisk to mix the flours and water. It’s okay if some scraggly bits of flour remain, but you want most of it to be hydrated.
Cover the bowl and set it aside to autolyse for an hour.
Note: For more information about autolyse, read my detailed sourdough Autolyse guide that details what autolyse is, when you can skip it, and more information.
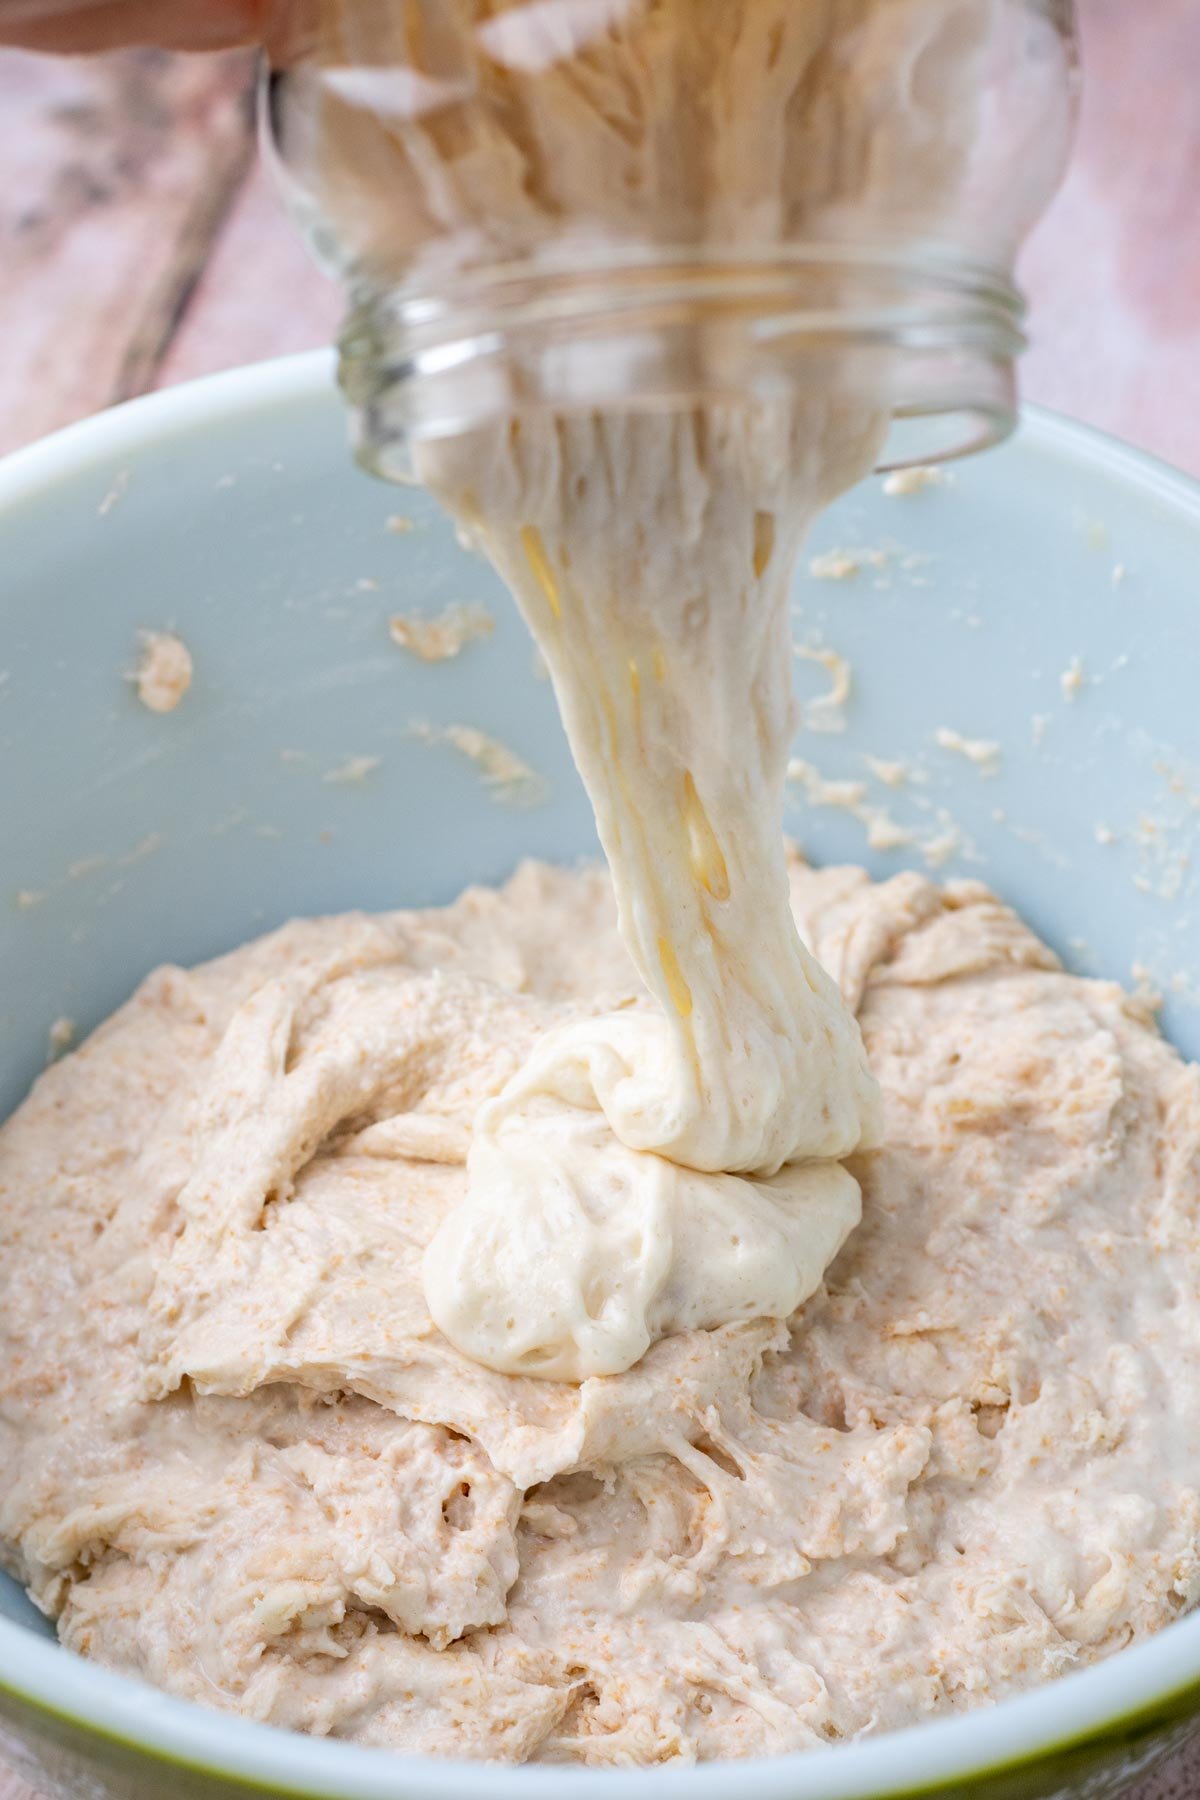
3. Add the Levain and Rest
When the levain is bubbly and doubled in size, pour it onto the dough.
Use your hands to dimple the levain into the dough. Then, stretch and fold the dough onto itself for a few minutes until you thoroughly incorporate the levain into the dough.
You’ll do more mixing later when you add in the salt, but you want to make sure the levain is evenly distributed throughout the dough.
To stretch and fold:
- Use your hand as pincers to pull up a portion of the dough.
- Lift the dough to stretch it, then fold it down in the middle of the bowl.
- Rotate the bowl and repeat this motion.
Cover the bowl and rest it in a warm location for 30 minutes.
4. Add Salt & Mix
After 30 minutes, sprinkle the salt onto the dough.
Dimple in the salt with your fingers and begin mixing. Stretch and fold the dough for about 5 minutes until it’s smoother, mostly holds its shape, and the ingredients are distributed throughout.
If the dough is sticking to your hands too much during mixing, mist them with water so your hands are damp.
Cover the bowl and rest for 30 minutes.
5. Bulk Fermentation and Folds
After mixing in the salt, bulk fermentation will take about 5 hours at 78ºF.
If your dough and environment are colder, bulk fermentation will take longer. Conversely, in warmer conditions, the dough will ferment faster.
Tip: An instant-read thermometer like the Thermapen is a great tool to check your dough temperature throughout bulk fermentation.
Perform at least four sets of stretch and folds, separated by 30-45 minutes each. If you notice that the dough is still very slack after a few folds, you may want to add more folds in.
The dough rests for the remainder of time until shaping.
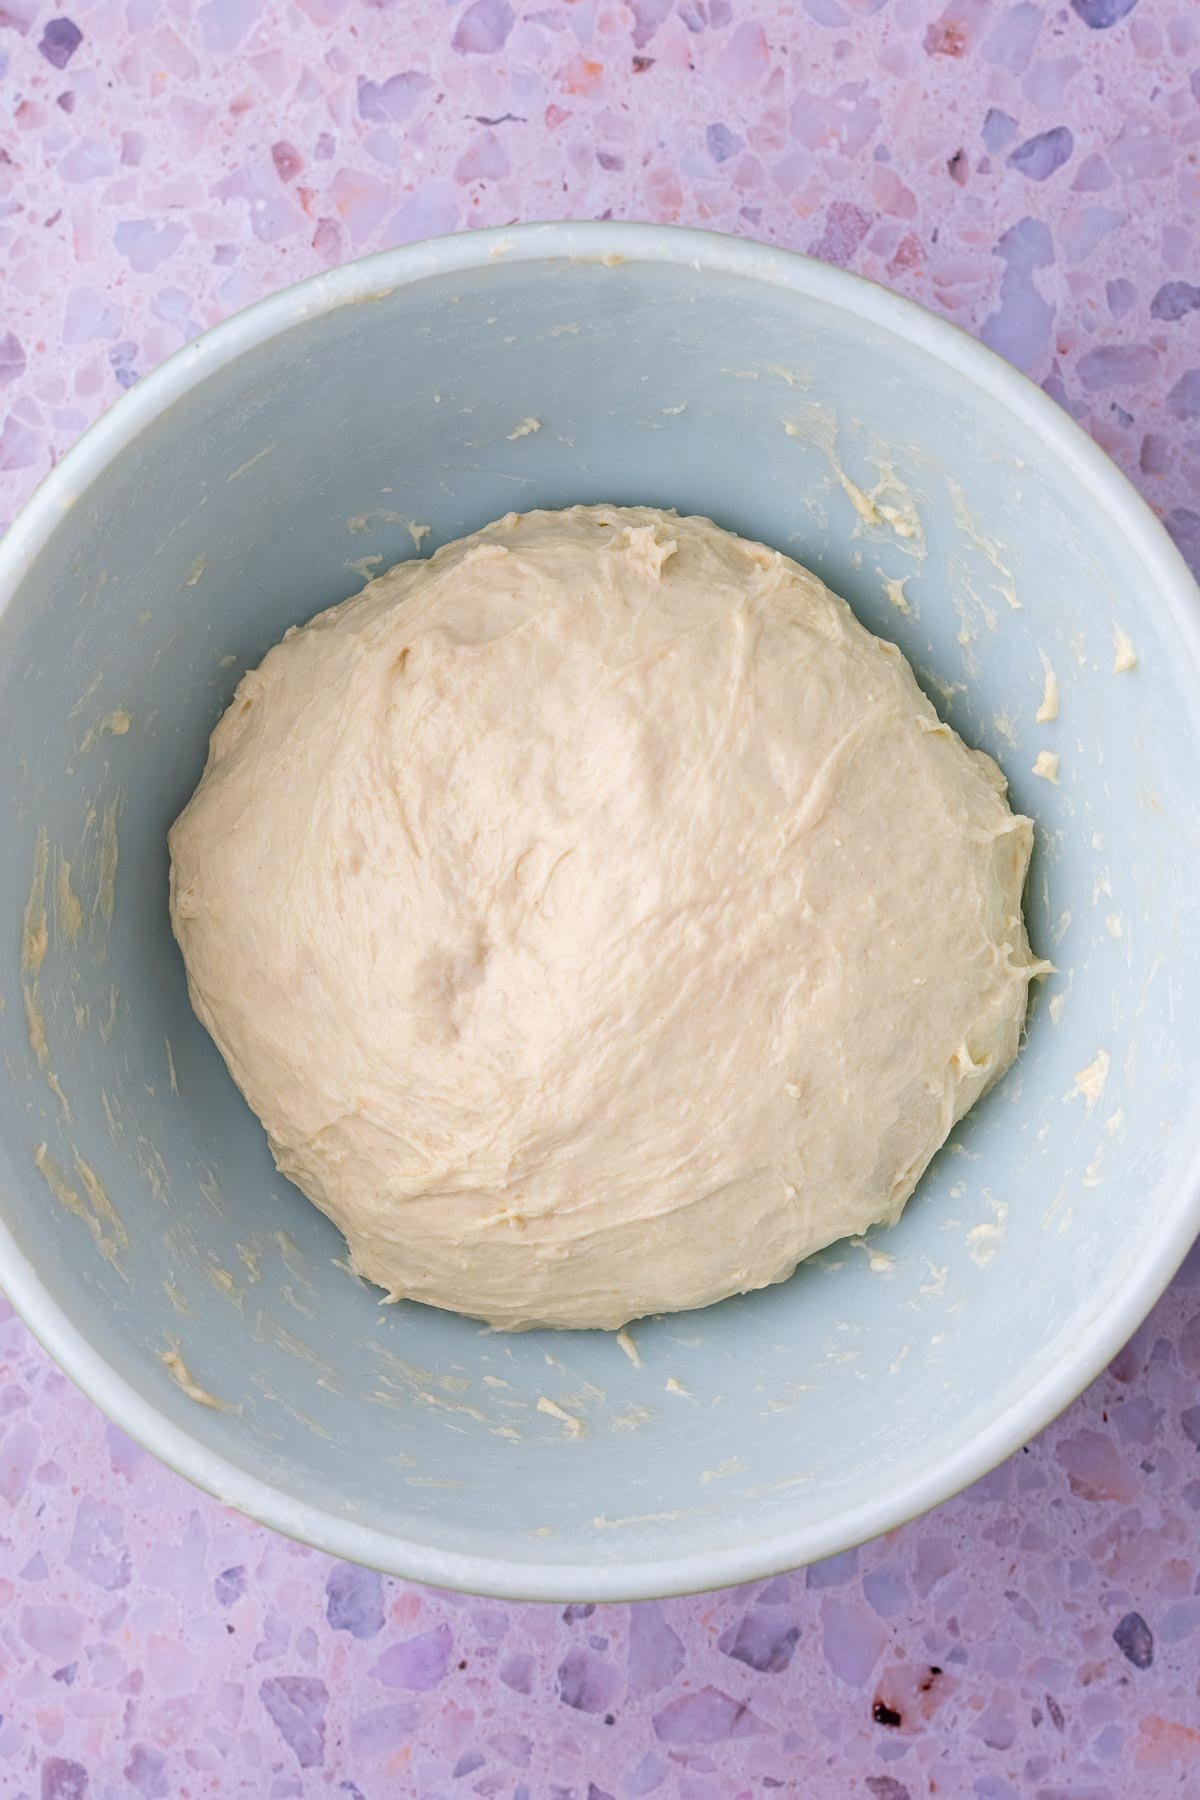
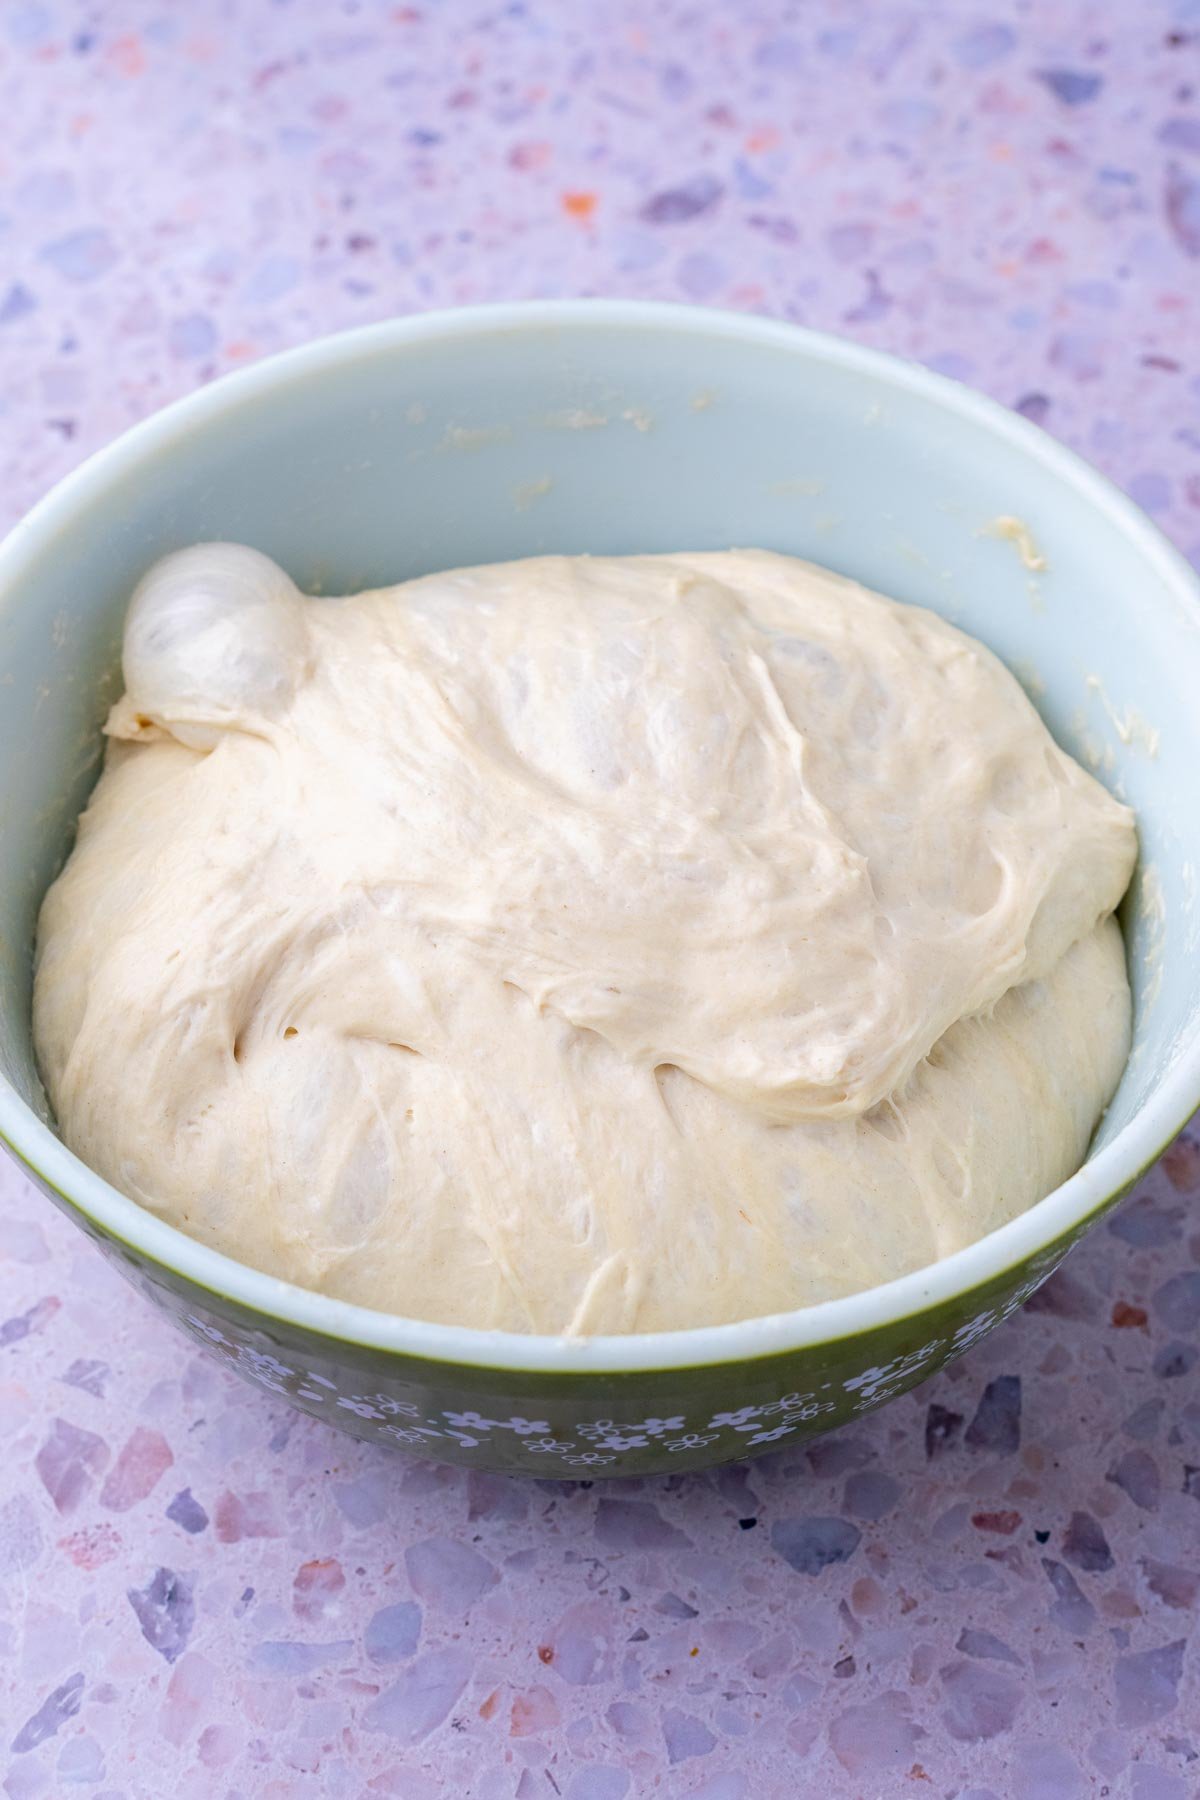
Bulk fermentation is complete when this dough has about doubled in size, feels full of air, is smoother, and has some visible bubbles on top of and around it.
6. Overnight Proof
Cover the banneton and place it in a cold refrigerator overnight and up to 24 hours.
The overnight proof, or retard, will give additional flavor to the dough and slow down fermentation so you can bake it on your own schedule.
7. Pre-Shape & Shape
The next day, turn out the cold dough onto a lightly floured surface.
Divide the dough into four equal-sized pieces by weight. Mine are typically around 185g each.
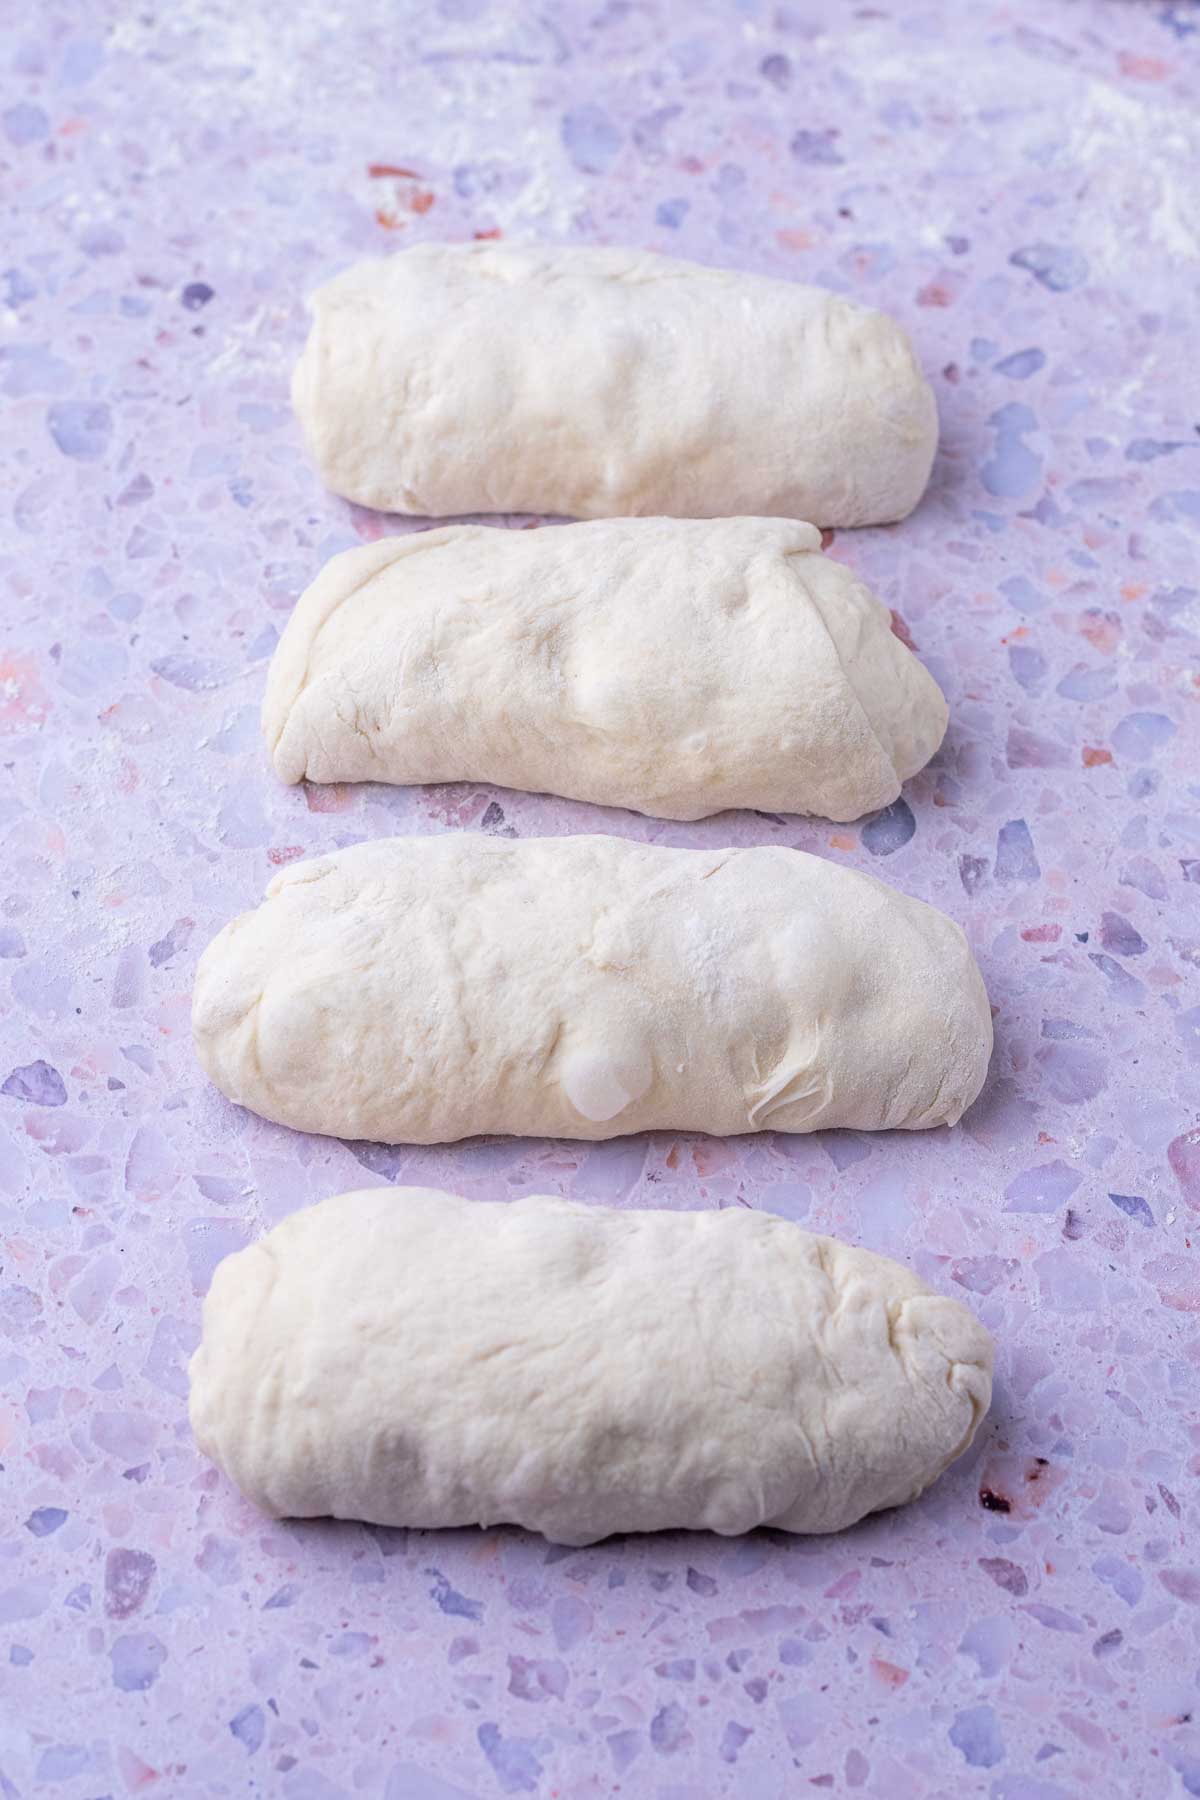
It’s important to preshape the baguette dough into cylindars before shaping so the gluten can relax and make shaping easier and smoother.
To preshape, press each piece of dough into a square. Then, roll it up into a cylinder.
Cover with a tea towel and rest the preshaped dough seam-side down for 30 minutes.
How to Shape Sourdough Baguettes
Shaping baguettes can be a little challenging at first, but the more you make them, the more consistent they’ll become. Essentially, we want to create taut, cylindrical logs that are tapered at the ends.
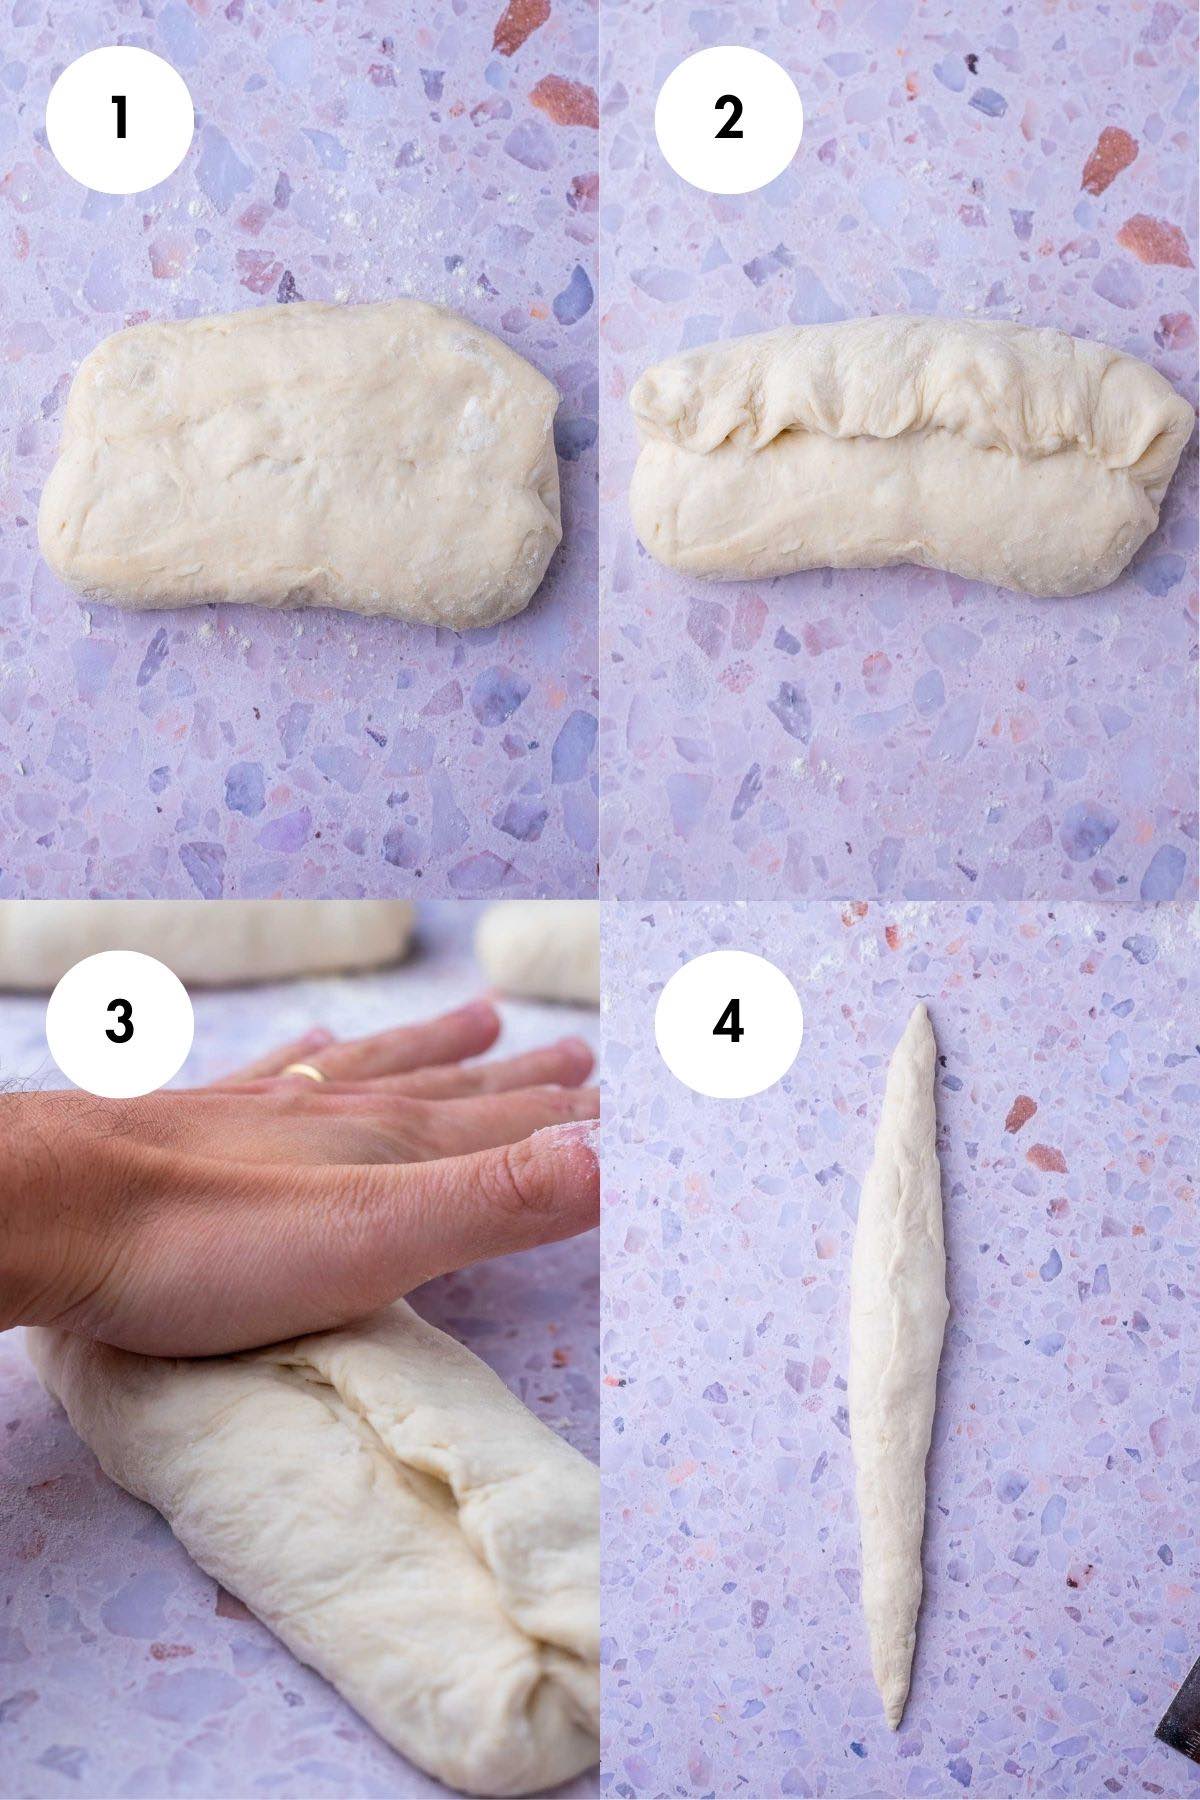
To shape, turn the pre-shaped dough over (seam-side up) and pat into a rectangle (Image 1). Only lightly flour a surface and your hands to prevent sticking.
Fold the top half of the dough to the center (Image 2).
Rotate the dough 180º and repeat on the other side to create a seam. This time, however, use the palm of your hand to pat down the seam of the dough. Pinch the seam together (Image 3).
Now we will roll out the dough into their final shapes. This process isn’t too different from making Sourdough Bagels, Sourdough Breadsticks, or the initial rolling out for Sourdough Pretzels or Sourdough Garlic Knots.
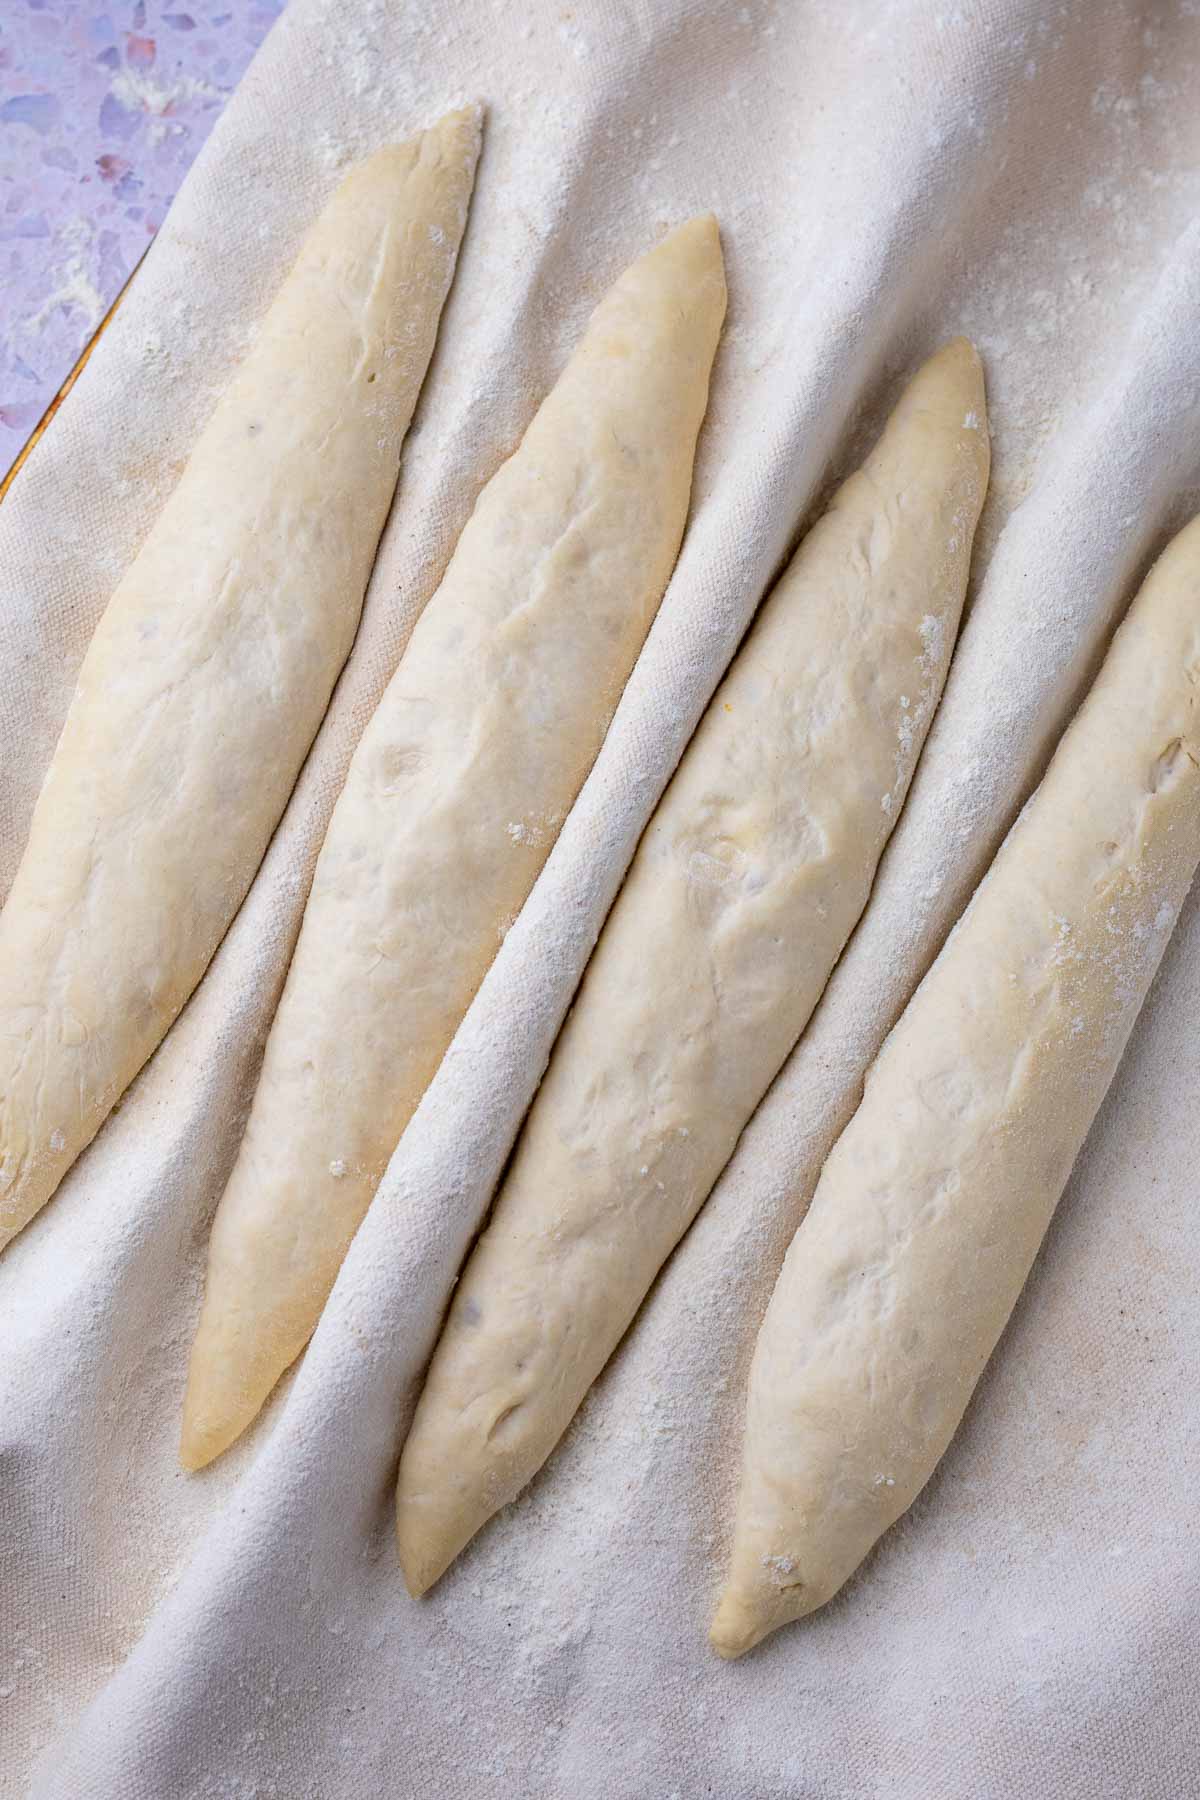
Starting with your hands in the middle of the dough, press gently and roll outwards to create a tapered shape with the ends thinner than the middle. It will bounce back some, so you may need to repeat a couple of times until they’re about 14″ (35.5 cm) long (Image 4).
I like more dramatic pointy ends to my baguettes (called le quignon or le croûton in France that you may eat from the bag on the way home). But you can shape your baguettes to have more rounded ends if you prefer that look as well.
8. Final Proof
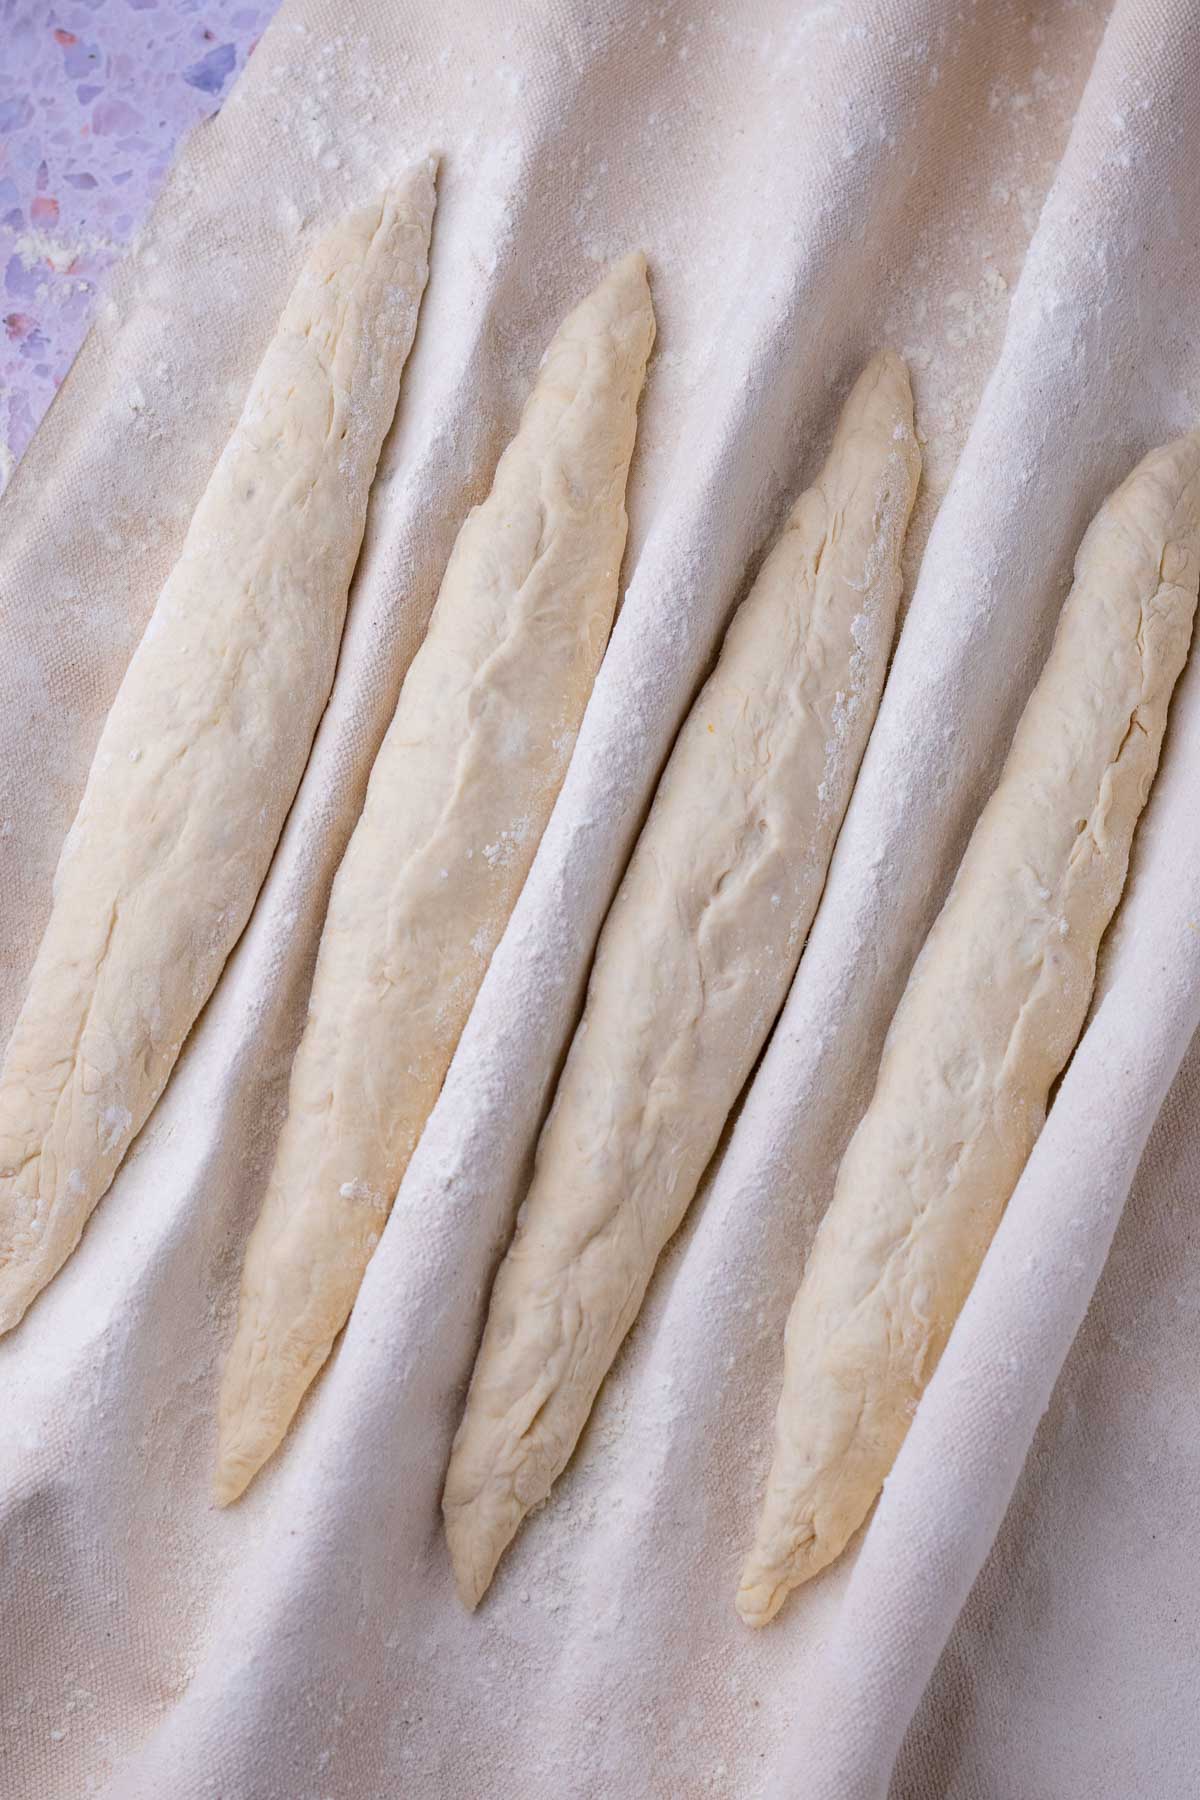
Lightly flour a baker’s couche or a couple of sturdy kitchen or tea towels. To make it easy to carry the proofing baguettes around, I usually lay the couche on an upside-down sheet pan.
Fold one side of the couche under to create a bumper and place a shaped baguette seam-side up beside of it. Fold a 1-inch tall pleat beside of the baguette to separate and hold the baguette. Then, repeat with the remaining baguettes and couche.
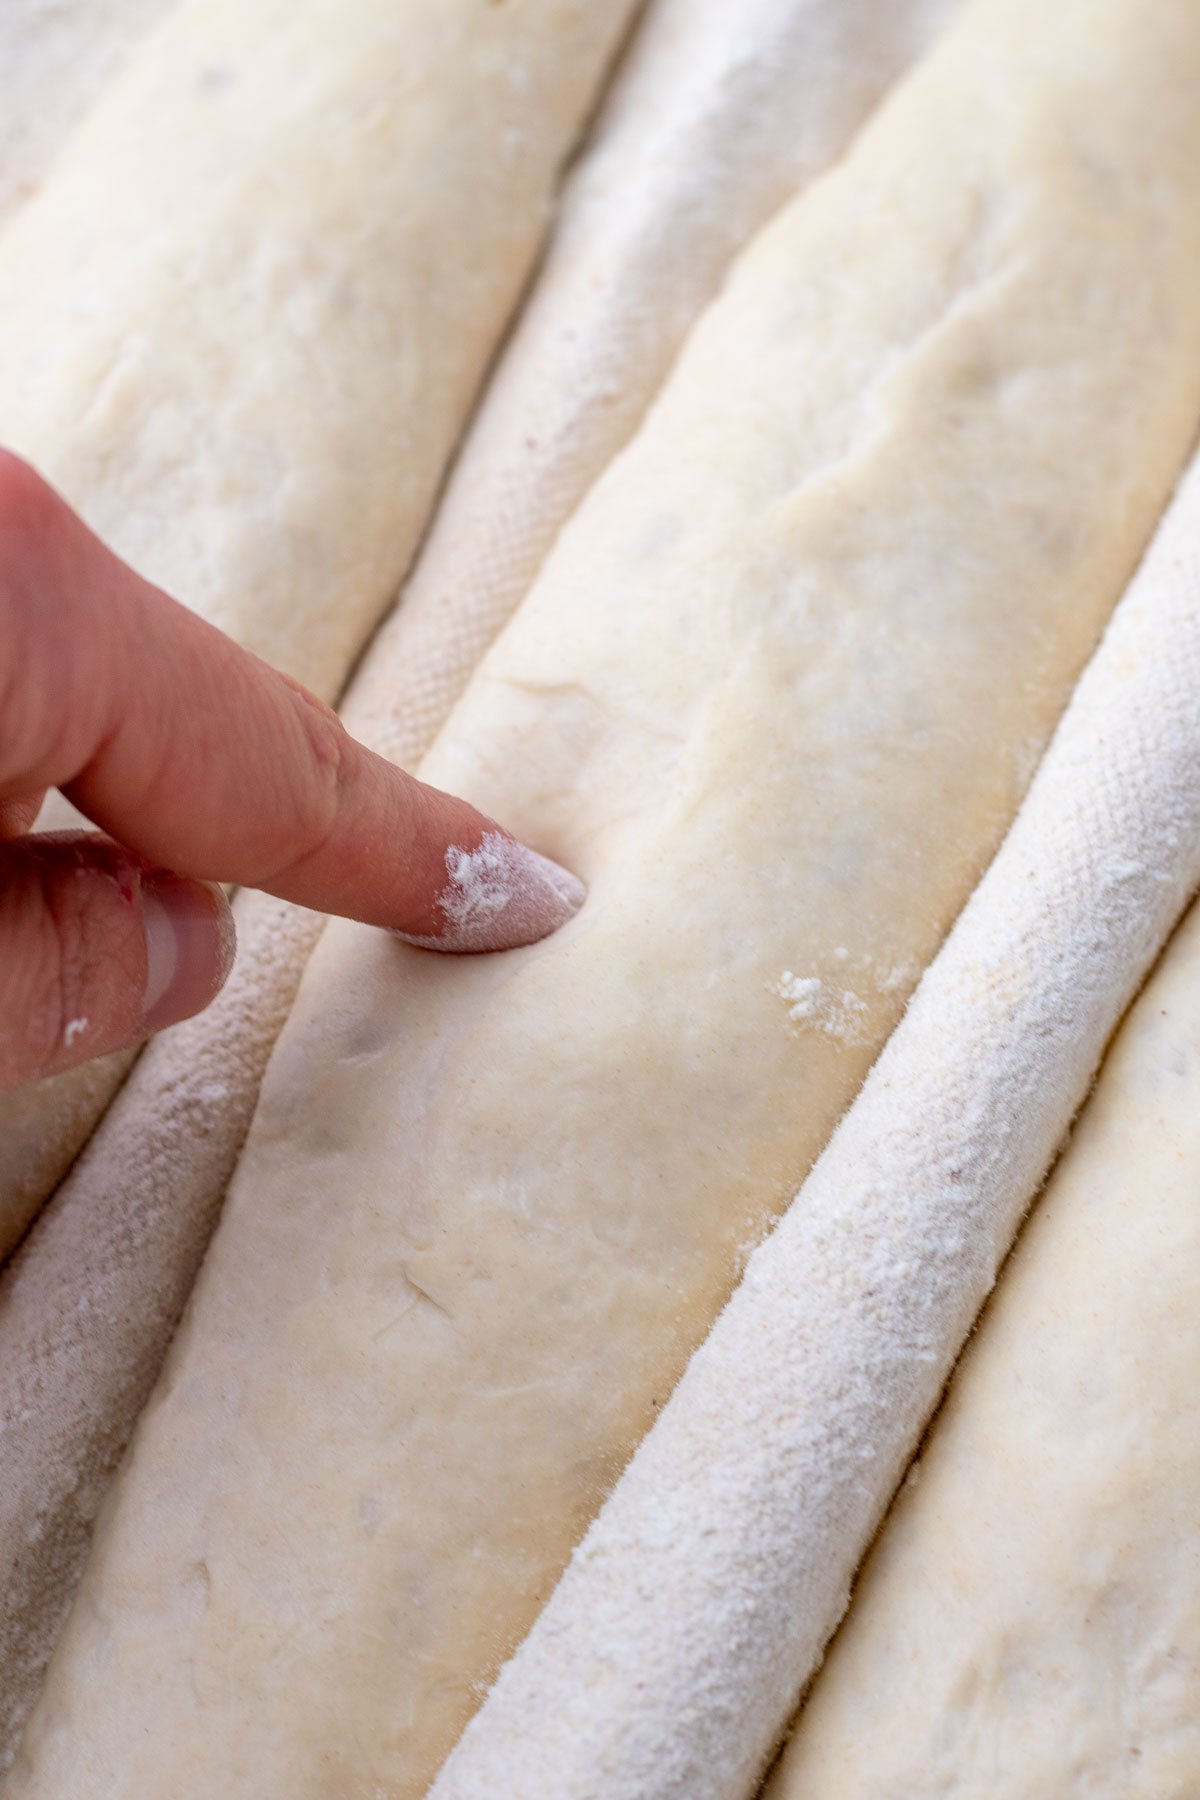
Cover with a tea towel and proof for 1 ½ to 2 hours or until the baguettes expand, feel puffy, and pass the finger poke test with a slight impression.
Note on Humidity: A light skin forming on the baguettes is normal during during the final proofing.
However, if your home is particularly dry, it can be helpful to proof them in the oven with the light on and keep skillet of hot water in the oven to increase humidity.
This is the method I use for Sourdough Challah Recipe and Sourdough Croissants during the winter.
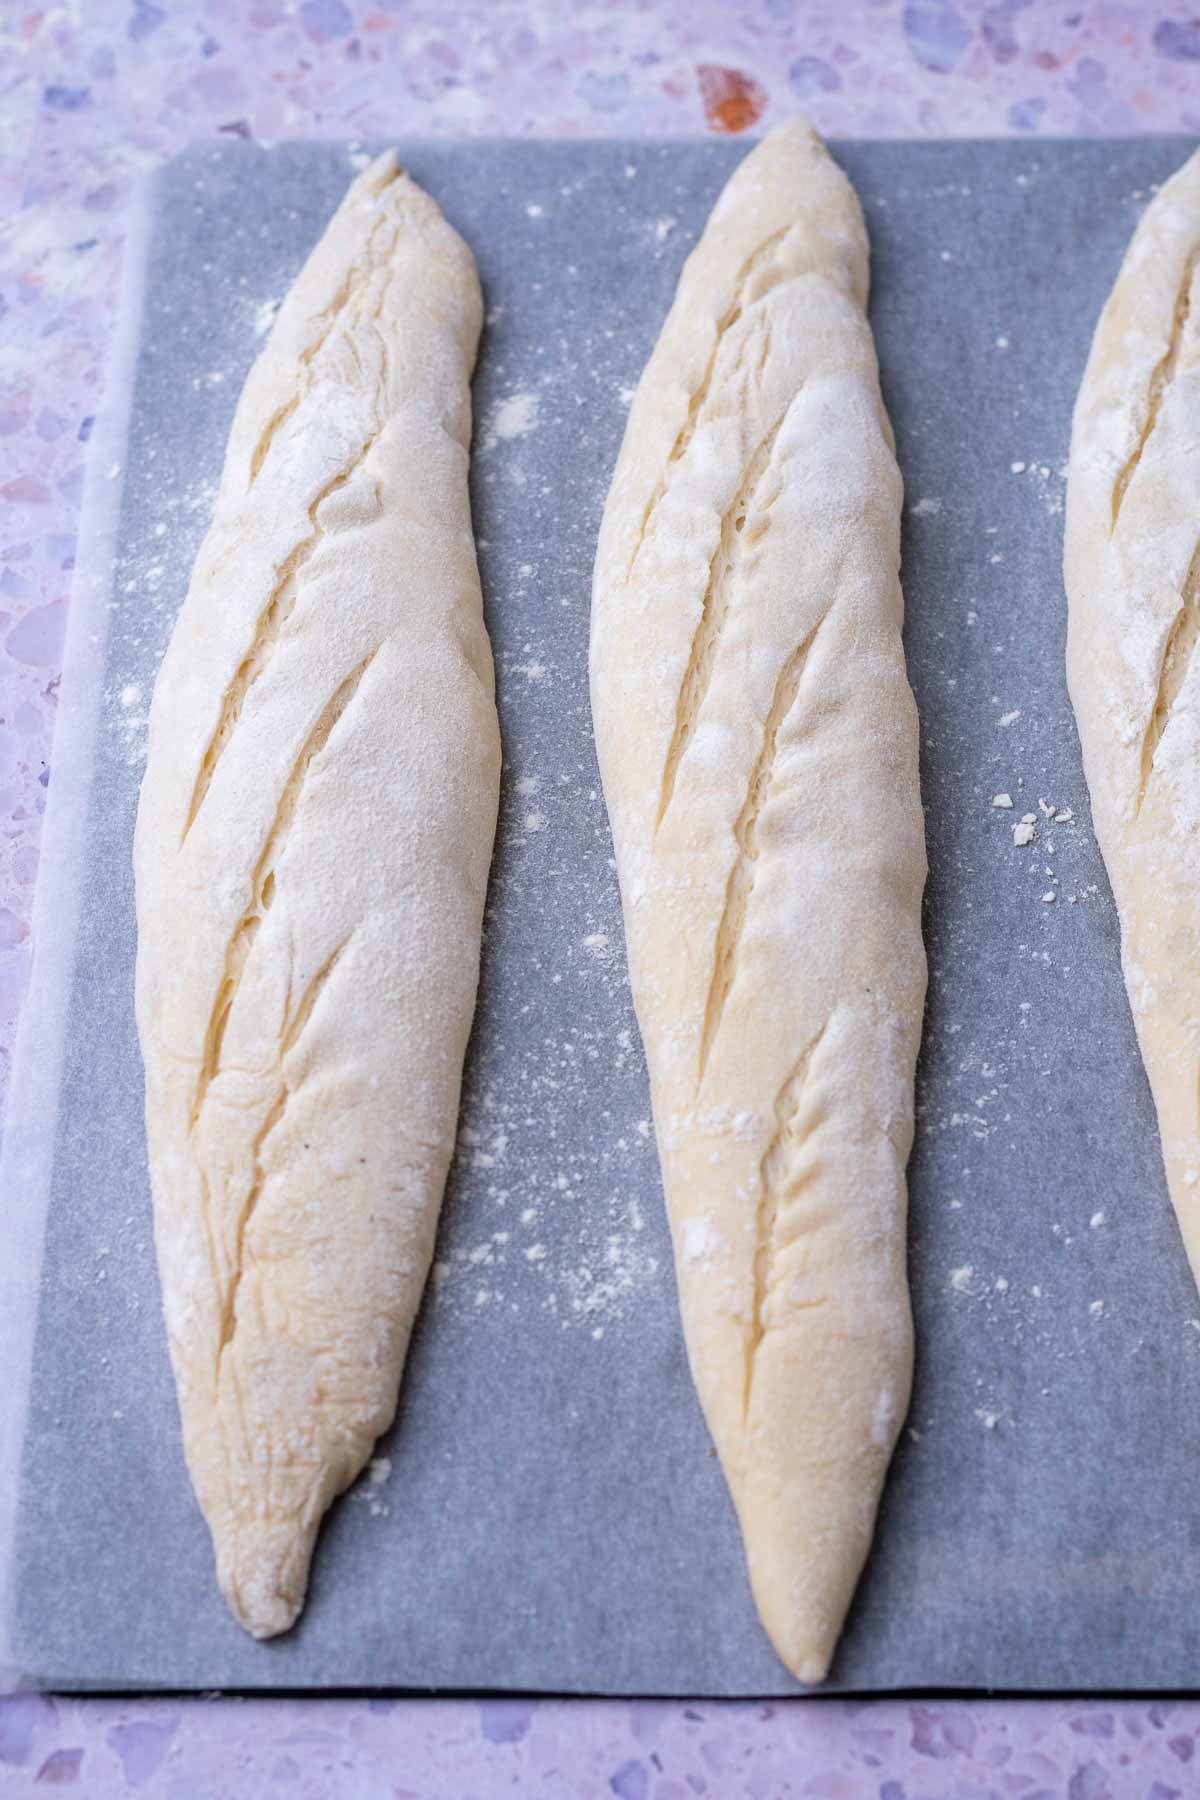
9. Score & Bake
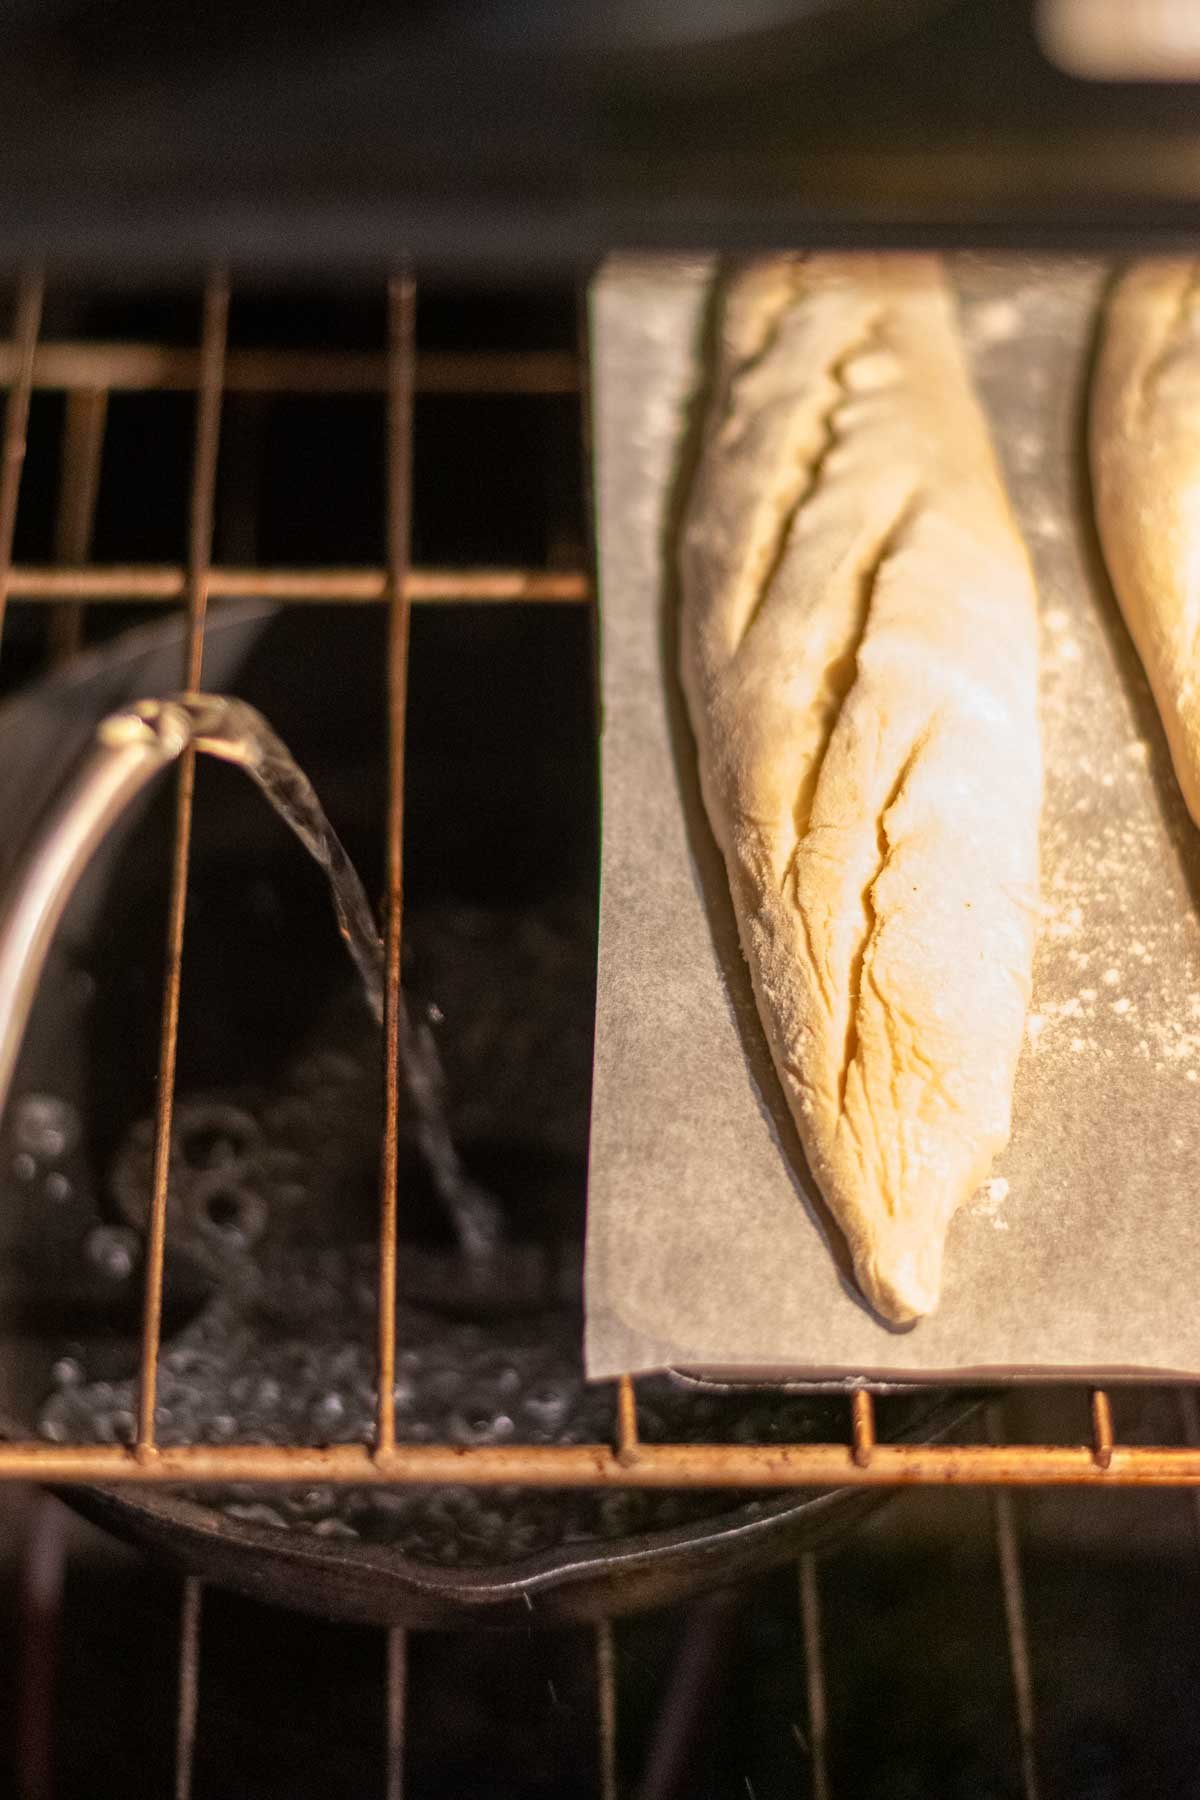
About 30 minutes before the end of proofing, place an empty cast-iron skillet on the bottom rack of your oven and preheat it to 450ºF (232ºC).
Boil a cup of water on a stovetop or tea kettle and keep it nearby before baking.
Note: I use the Brød and Taylor bread steel, which doesn’t require preheating. I cover it with a large piece of parchment paper before transferring the baguettes to it.
If you’re using another baking stone or cast-iron pan, you may need to preheat it and prepare a transfer peel or large cutting board with parchment paper to transfer your baguettes to the stone before baking.
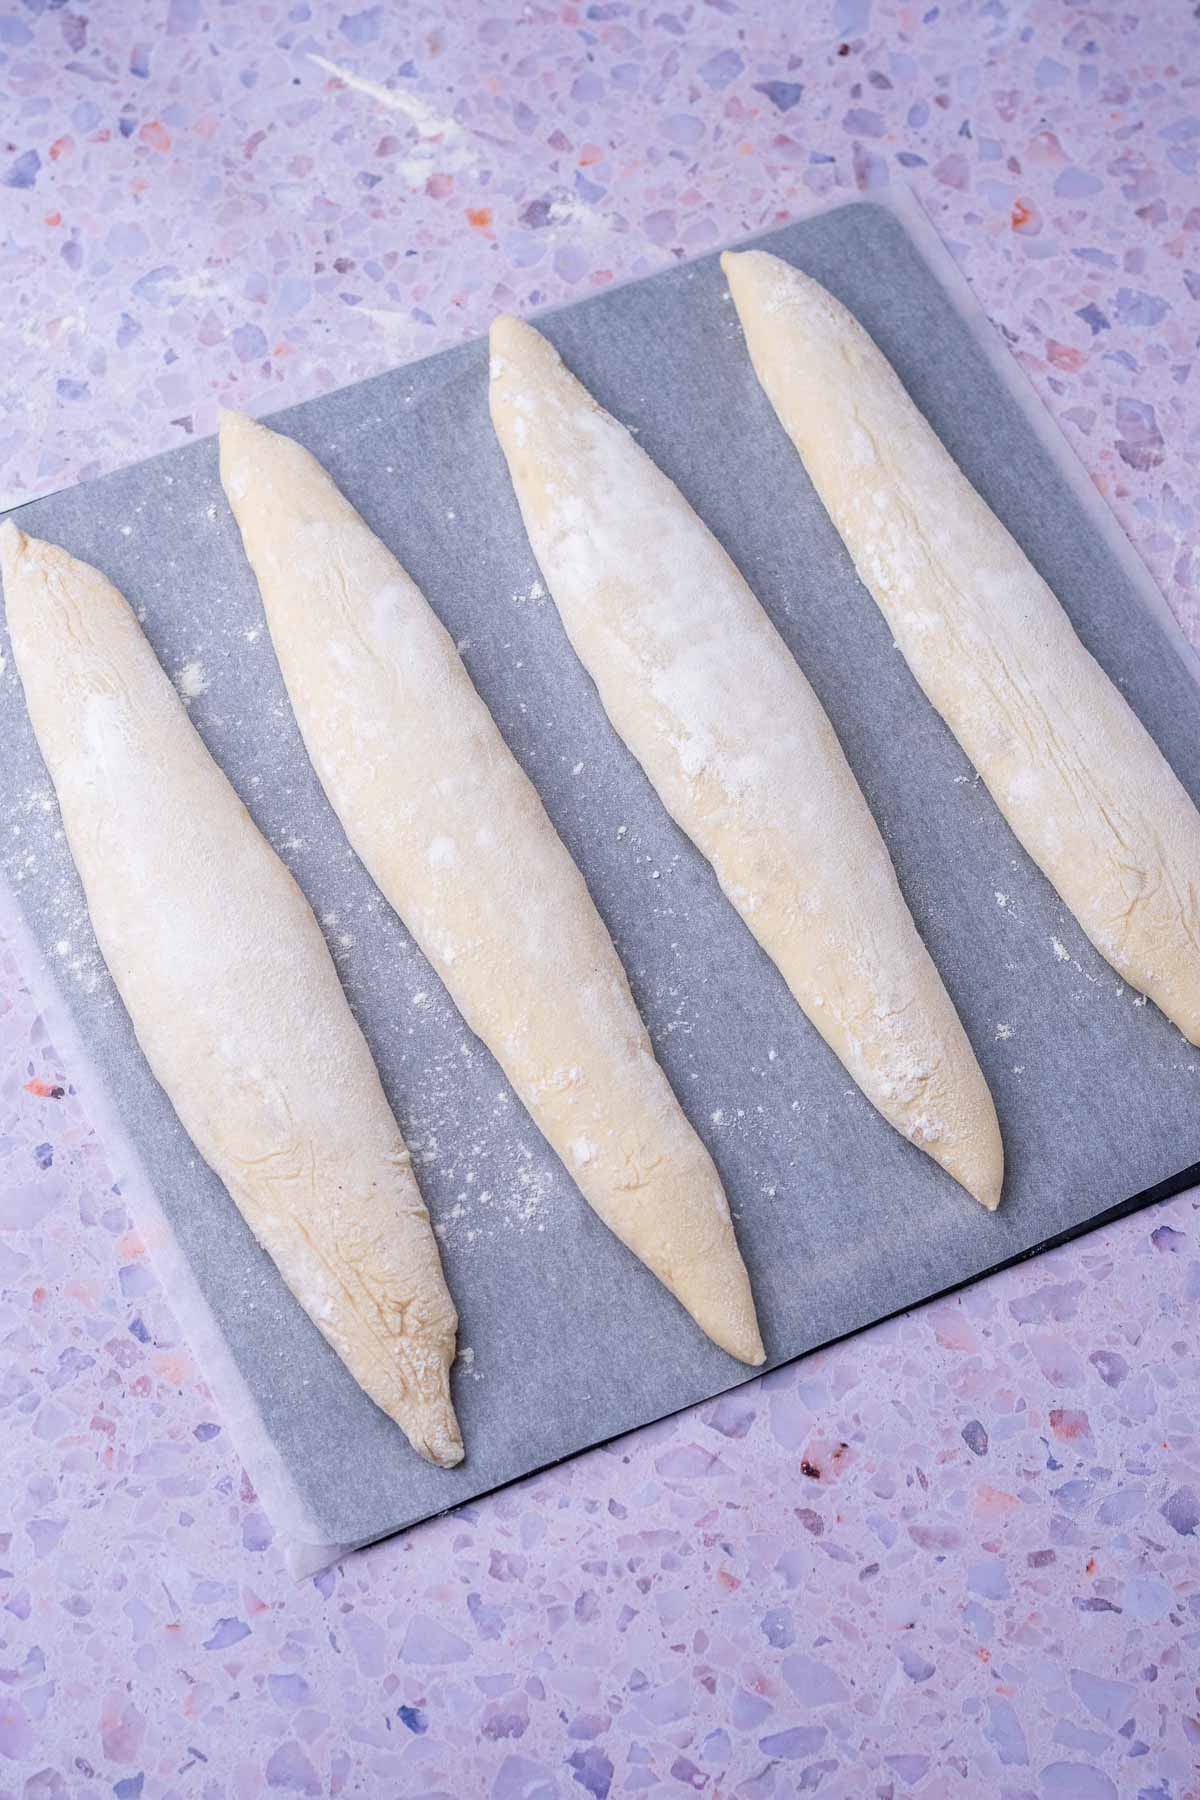
Use a lightly floured baguette transfer peel, a lightweight cutting board, or even a long piece of sturdy cardboard to gently flip one sourdough baguette at a time from the couche to the transfer peel (seam-side down now).
Then, slide the baguette off onto your bread steel or baker’s peel and repeat with the remaining baguettes so you have four on the bread steel.
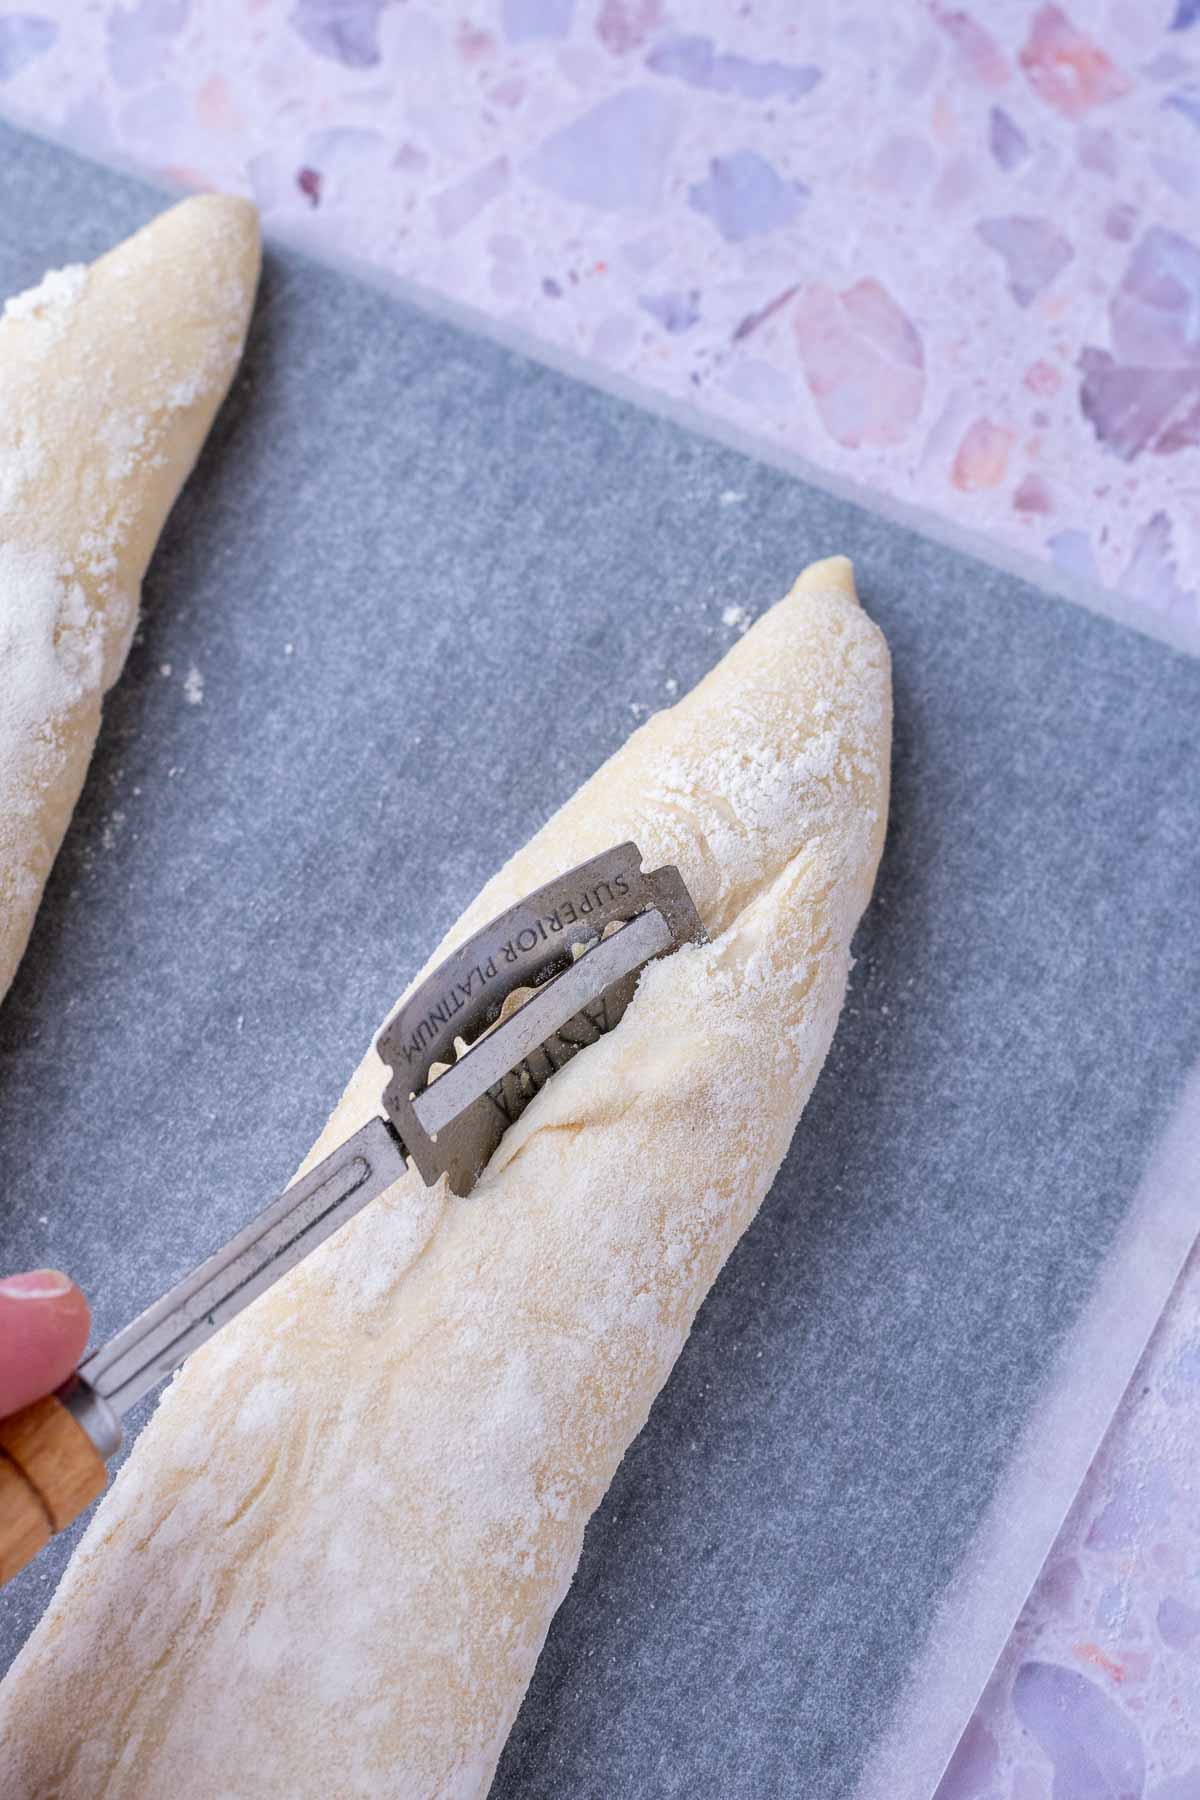
To score, use a curved bread lame to make four long cuts down the length of the baguette. They should overlap by about a third.
To help increase the chances of small sourdough ears, the score should be about ¼”-½” deep at a slight angle.
Bake
Place the bread steel with the sourdough baguettes into the oven (or slide off from the baker’s peel to your baking stone/steel).
Pour the cup of hot water set aside into your preheated cast-iron skillet to create lots of steam and immediately shut the door to trap in as much steam as possible.
Bake for about 25-30 minutes, or until the baguettes are deep golden brown. When done, the baguettes should feel light and sound hollow if tapped on the bottom.
Remove from the oven and cool completely on a wire rack. If you’re using a baking stone, remove the baguettes with tongs and allow the stone to cool in the oven so it doesn’t crack.
A Note on Steam: Steam is vital when making sourdough baguettes. It helps develop a thin, crackly crust and increases oven spring.
Unlike making sourdough breads with a Dutch oven that traps steam, we have to create extra steam in the oven during an open bake for baguettes. This somewhat replicates what a professional steam-injection bread oven can do, but isn’t perfect.
Unfortunately, home gas ovens release more steam, so it can be difficult to maintain steam in gas ovens as compared to electric ones.
There are many methods of steaming your oven, including using lava rocks in a cast-iron skillet, ice cubes, tea towels in pans, and my method above. Use what you’re comfortable with, but be careful to not get water onto your oven door as it can crack or break.
Always use heat-proof gloves to protect yourself.
How to Store & Serve
Sourdough baguettes are best in the first couple of days of baking. Once sliced, they will begin to lose moisture and dry out.
To keep longer, keep them in a brown paper bag, bread box, or freeze for long-term storage.
Freeze whole, wrap in aluminum foil or plastic wrap and freeze for up to three months. Thaw in the refrigerator and reheat in the oven.
Crusty sourdough baguettes are excellent as a dinner side for soups and stews, served with butter and jam (maybe my Concord Grape Jam with Vanilla or Apple Butter), or served with cheeses.
You can also use the baguettes to make lunch sandwiches, similar to ciabatta or Sourdough Pan de Cristal.
If the baguettes stale, use them for croutons in Sourdough Panzanella with Peaches & Burrata or even for this Sourdough Stuffing with Fennel.
❓FAQs
Can I use all-purpose flour?
You can use all-purpose flour instead of bread flour, but note that you may need to mix more or add a couple of extra folds to strengthen the dough.
Are sourdough baguettes vegan?
Yes!
What is the difference between a french baguette and a sourdough baguette?
Most French baguettes use instant yeast, whereas a sourdough baguette uses natural yeast and has a longer fermentation. Sourdough baguettes in France are knows as baguettes au levain.
Why did my baguette burst?
Your baguette may split or burst on the sides if they’re not shaped properly (seam isn’t sealed) or if they’re not scored enough.
Why are my baguettes dense?
It’s possible they’re underproofed, needed more steam in the oven, or added too much flour during shaping.
How do I get an open crumb on baguettes?
This 70% hydration recipe uses slightly less water than some baguette recipes so they’re easier to shape. This can result in a less open crumb, so you can gradually increase the hydration to get a more ciabatta-like interior.
You’ll also want to ensure the baguettes proof long enough and get plenty of steam during baking.
⭐️⭐️⭐️⭐️⭐️
Please leave a rating, comment or question below! Tag me on Instagram or Facebook @SourdoughBrandon or PIN this recipe on Pinterest to come back to it later!

Sourdough Baguettes
Equipment
- 1 Bread Steel, I use the Brød and Taylor bread steel linked which doesn't need preheating, but you can use a baking stone/steel, or Challenger Bread Pan
- 1 Baker's Couche, or sturdy tea towels
- 1 Transfer Peel, optional, or lightweight cutting board/slab of wood/sturdy cardboard
- 1 Baker's Peel, optional if using a baking stone/steel that needs preheating
- 1 Brød and Taylor Folding Proofer, optional but helpful
Ingredients
Levain
- 30 grams Sourdough Starter
- 30 grams Bread Flour
- 30 grams Water
Sourdough Baguettes
- 400 grams Bread Flour
- 270 grams Warm Water
- Levain, see above, or 90 grams of active sourdough starter
- 8 grams Sea Salt
Instructions
- Make the Levain:In a clean jar, mix the sourdough starter, bread flour, and water for the levain.Cover and set in a warm location (between 75-80ºF) for about 4-5 hours until doubled and bubbly.Alternatively, skip making a levain and use 90 grams of active sourdough starter below.30 grams Sourdough Starter, 30 grams Water, 30 grams Bread Flour
- Autolyse:About an hour before the levain is ready, mix together the bread flour and warm water in a mixing bowl.Make a well in the center of the flour and pour in the warm water. Use a dough whisk or your hands to mix together the flour and water just until it comes together.Cover and rest in a warm location for an hour.400 grams Bread Flour, 270 grams Warm Water
- Add Levain, Salt, and Mix:Add all of the levain into the bowl and dimple it into the dough. Then, stretch and fold the dough for a few minutes to incorporate.Cover and rest in a warm location for 30 minutes.Sprinkle the salt on top. Dimple into the dough with your fingertips. Stretch and fold the dough for about 5 until thoroughly mixed and the salt dissolves.Cover and rest in a warm location for 30 minutes.Levain, 8 grams Sea Salt
- Bulk Fermentation & Folds:At 78ºF (26ºC), bulk fermentation typically takes about 5 hours.During bulk fermentation, perform 4 or 5 sets of stretch and folds, spaced 30 minutes apart. Add more folds if the dough still seems very slack after the last set. Rest for the remainder of bulk fermentation.At the end of bulk fermentation, the dough should be smooth, feel full of air, have visible bubbles, and jiggle if shaken. The dough should rise about 75%.
- Cold Overnight Proof:Place the covered dough into a refrigerator to proof overnight and for up a day.
- Pre-shape & Shape:Lightly flour the top of the dough and the counter. Gently loosen the dough from the sides of the mixing bowl and turn the dough out onto the counter.Divide the dough into four equal-sized pieces by weight. Mine are typically around 185g each.To pre-shape, press each piece of dough into a square. Then, roll it up into a cylinder and rest seam-side down for 30 minutes.To shape, I recommend reading the detailed guide above with visuals.Turn the dough over and pat into a rectangle. Fold the top half of dough to the center, rotate 180º and repeat on the other side to create a seam. Seal with the palm of your hand and pinch the seam together.Roll the dough into a 14" tapered log with the ends thinner than the middle.
- Final Proof:Lightly flour a baker’s couche or towels. Lay the couche on an upside-down sheet pan if you'd like to proof in the oven or a warm location so you can move them easily.Fold one side of the couche under to create a bumper and place a shaped baguette seam-side up beside of it. Fold a 1-inch tall pleat beside of the baguette to separate and hold the baguette. Then, repeat with the remaining baguettes and couche.Cover with a tea towel and proof for 1 ½ to 2 hours or until the baguettes expand, feel puffy, and pass the finger poke test with a slight impression.
- Score & Bake:About 30 minutes before the end of proofing, place an empty cast-iron skillet on the bottom rack of your oven and preheat it to 450ºF (232ºC).Boil a cup of water on a stovetop or tea kettle and keep it nearby before baking.*Use a lightly floured baguette transfer peel to gently flip one sourdough baguette at a time from the couche to the transfer peel (seam-side down now).Then, slide the baguette off onto your bread steel and repeat with the remaining baguettes so you have four on the bread steel (see guide above for method using a baker's peel for a preheated bread stone).To score, use a curved bread lame to make four long cuts down the length of the baguette. They should overlap by about a third (see images in guide).Place the bread steel with the sourdough baguettes into the oven.Pour the cup of hot water set aside into your preheated cast-iron skillet to create lots of steam and immediately shut the door to trap the steam.Bake for about 25-30 minutes, or until the baguettes are deep golden brown. When done, the baguettes should feel light and sound hollow if tapped on the bottom.Remove from the oven and cool completely on a wire rack.
Notes
- *There are many methods of steaming your oven, including using lava rocks in a cast-iron skillet, tea towels in pans, and my method above. Use what you’re comfortable with, but be careful to not get water onto your oven door as it can crack or break. Always use heat-proof gloves to protect yourself.
- Try to keep the dough at a constant, warm temperature (between 75-80ºF) as much as possible throughout fermentation. I use the Brød and Taylor bread proofer to keep my dough at a constant 78ºF. If your dough and environment are cooler, bulk fermentation will take longer. Conversely, in warmer conditions, the dough will ferment faster.
- Read my guide above for a detailed walkthrough with photos and videos for shaping, scoring, and baking this bread.


If i use 40 grams of ww flour, should I add more water? the dough seems a bit stiff
Likely so!
My go to baguette recipe. Lovely texture with just the right amount of chewiness
That’s great to hear!
I”m a little confused.
First set of instruction say to pat into a rectangle then rest then form into a rectangle and roll into a log.
Second set says to to pat into a rectangle then rest then form into a rectangle and let rest. Then re-fold into a rectangle a second time? Then roll again. Is that right?
Baguettes get two shapes: a pre-shape into a rectangular log and then a final shape into the baguette form.
These loaves turned out spectacularly! I skipped the levain and used my mature and fed sourdough starter. I had to shorten the autolyse to 30 min because I got a late start at night and felt confident doing that based on Brandon’s article about the autolyse process. Added some slap and folds to the stretches and bulk fermented on our granite counter overnight – it’s January and cold here so I knew it wouldn’t get away from me; actually had to let it go a few more hours the next morning to get it where it needed to be. Then cold proofed for 24 hours. Baked on a preheated steel for 20 minutes with the recommended cast iron pan and boiling water on the floor of the oven. I tripled the recipe but divided the dough into six larger, slightly beefier loaves that were a cross between a batard and a baguette (about 375g each) – half with sesame seeds and half plain – to take to a dinner party. They were a huge hit. 10/10 would make again.
Beautiful bakes!